background image

Page 10

Basic Operation

1. Binding the Quattro-X to the Transmitter

a. With the transmitter turned OFF, install a charged Li-Po battery into the battery bay at the rear of 

the Quattro-X. Connect the battery using the T-connectors. The RED and GREEN LED indicator 

lights will rapidly flash alternately. During this initialisation period, do not move the Quattro-X. 

When the RED and GREEN LED indicators flash slowly, close the battery bay door.

b. Ensure that the throttle stick is in its lowest position and switches SWB and SWA are in their ‘0’ 

positions. Now turn on the transmitter. The transmitter emits a number of ‘beeps’ as it powers up.

IMPORTANT:


If  you are flying with friends with more than one Quattro-X, you must make sure that each 

Quattro-X is turned on and bound to its transmitter before the next Quattro-X is turned on. Do not 

attempt to bind more than one Quattro-X at the same time.

2. Calibration   

a. Before the first flight the Quattro-X must be calibrated. This is achieved by connecting a flight 

battery and binding the model to the transmitter as above. 

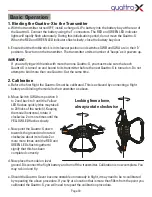
b. Move Switch SWA from position 0 

to 2 and back to 0 until the Yellow 

LED flashes quickly (this may take 8 

to 20 flicks of the switch). Keeping 

the model horizontal, rotate it 

clockwise 2 or more times until the 

YELLOW LED flashes slowly. 

c. Now point the Quattro-X down 

towards the ground and rotate it 

clockwise about its roll axis 2 or 

more more times until the RED and 

GREEN LEDs flash together to  

signify that this has been 

completed correctly. 

d. Now place the model on level 

ground. Disconnect the flight battery and turn off the transmitter. Calibration is now complete. You 

may re-bind and fly.  

e. Should the Quattro-X ever become unstable or unsteady in flight, it may need to be re-calibrated 

by repeating the above procedure. If you fly at a location that is more than 50km from the point you 

calibrated the Quattro-X, you will need to repeat the calibration procedure.

Looking from above, 

always rotate clockwise

Содержание Quattro-x

Страница 1: ...HIGH PERFORMANCE QUAD INSTRUCTION MANUAL...

Страница 2: ...However they are not invulnerable and most people will break parts during their flying career This is quite normal All parts are available as spares from your supplier Crash damage is not covered by...

Страница 3: ...bay in the rear of the model 5 Check that the electronics are operating correctly 6 Wait for a calm day with light winds for your first flights 7 If you are new to R C flying we recommend having an a...

Страница 4: ...ing Li Po Batteries Do not modify change any part of the battery or connector Do not remove its protective covering Removal or modification may damage the battery and will invalidate any warranty clai...

Страница 5: ...unctions This model is not a toy There are guidelines on flying multi rotor SUA Small Unmanned Aircraft and SUSA Small Unmanned Surveillance Aircraft SUSA includes camera equipped models such as the Q...

Страница 6: ...untighten clockwise c Fit each of the four propellers ensuring the direction of rotation on the propeller matches the direction of rotation symbol next to each motor Re fit each propeller nut and tig...

Страница 7: ...and operating any video recording device in the Quattro X Remember that commercial photography defined as anything that results in you receiving valuable consideration for your work requires registrat...

Страница 8: ...te higher than 1C and only ever charge a cool battery Always inspect the battery before charging and allow the charger to cool between charges c Always remove the Li Po battery from the model before c...

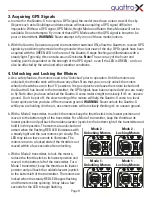
Страница 9: ...on the rear of the model flashes alternate RED then YELLOW while the main control board calibrates The RED LED slowly flashes when the motor function is locked and safe and the RED LED remains steady...

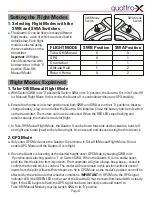
Страница 10: ...ht Low voltage indicator light Forward Backward Elevator Roll Left Right Aileron Throttle High Low Yaw Left Right Rudder Mode 1 Throttle Right Transmitter Control Layout 0 0 SWB Mode switch Auxiliary...

Страница 11: ...2 Calibration a Before the first flight the Quattro X must be calibrated This is achieved by connecting a flight battery and binding the model to the transmitter as above b Move Switch SWA from posit...

Страница 12: ...0 positions It is good practice to leave the motors locked until the Quattro X has bound to the transmitter the GPS signals have been acquired and you are ready to fly Note after you have unlocked th...

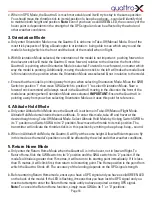
Страница 13: ...ng and remains steady the model is ready for flight c In Take Off Manual Flight Mode the Quattro X can be flown forwards and backwards bank left and right and rotate yaw to the left and right It can a...

Страница 14: ...on Mode was selected IMPORTANT Ensure the Quattro X is pointing away from you when selecting Orientation Mode as it uses this point for reference 4 Altitude Hold Mode a Only enter Altitude Hold Mode o...

Страница 15: ...tery As there may not be enough power to return the Quattro X to home it will simply attempt to land safely where it is As this is carried out as an emergency procedure the landing will not be as smoo...

Страница 16: ...de for 3 to 5 minutes for the Quattro X to find a GPS signal 1 Check that SWB and SWA switches are in their 0 positions before unlocking the motors 2 The flight battery needs charging 3 You have not u...

Отзывы: