6
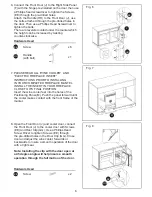
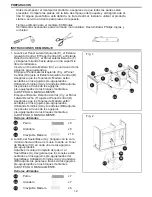
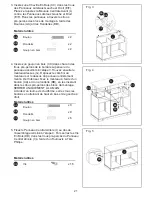
Fig. 7
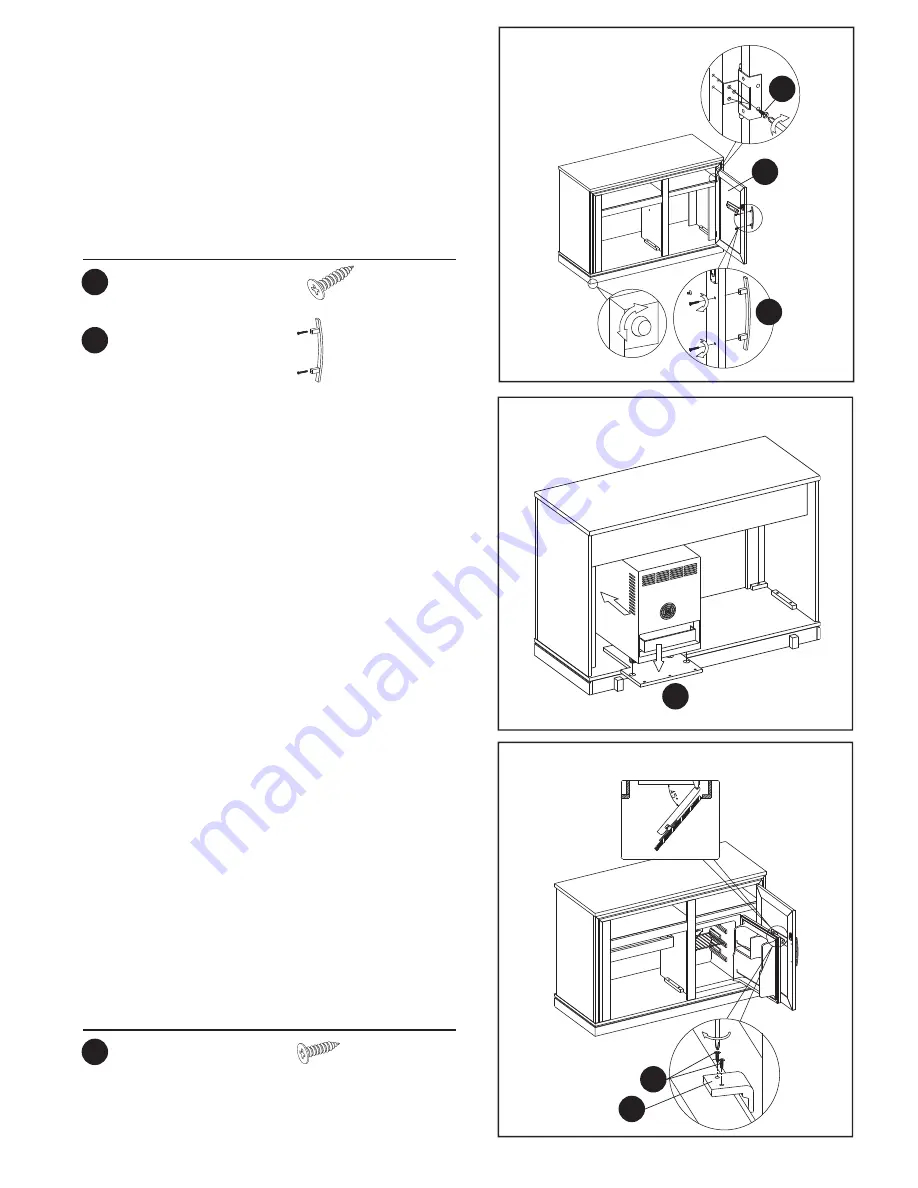
Fig. 8
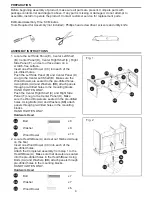
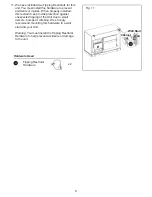
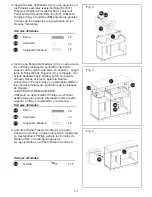
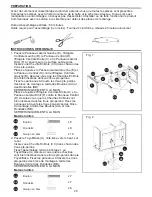
8. Open the Front Door (J) and cooler door, connect
the Front Door (J) to the cooler door with Screws
(EE) and Door Clip (GG), Use a Phillips Head
Screw Driver to tighten Screws (EE) through
the pre-drilled holes in the Door Clip (GG). Close
door and adjust the wine cooler forwards or
backwards to insure a smooth operation of the door
with a tight seal.
Note: Installing the clip with the door open at
a 45 degree angle will help insure a smooth
operation through the full motion of the door.
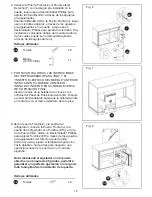
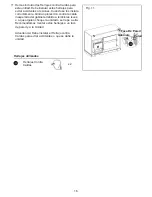
7. PLEASE READ ALL “WINE COOLER” AND
“ELECTRIC FIREPLACE INSERT”
INSTRUCTIONS PRIOR TO INSTALLING
IN YOUR COMPLETED FIREPLACE MANTEL.
INSTALL THE INSERT IN YOUR FIREPLACE
CLOSE TO ITS FINAL POSITION.
Insert the wine cooler feet into the holes of the
Positioning Panel (M). Push the panel forward until
the cooler makes contact with the front frame of the
mantel.
HH
EE
Handle
(with bolt)
Screw
x 1
x 2
M
EE
GG
Fig. 6
EE
J
HH
Hardware Used
Hardware Used
EE
Screw
x 6
6. Connect the Front Door (J) to the Right Side Panel
(F) with the hinge pre-installed on the door, then use
a Phillips head screwdriver to tighten the Screws
(EE) through the pre-drilled holes.
Attach the Handle (HH) to the Front Door (J), use
the bolts attached through the pre-drilled holes in
the door. Then use a Phillips Head Screwdriver to
tighten the bolts.
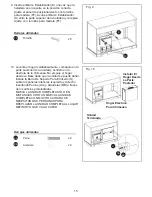
There are levelers located under the mantel which
the height can be increased by twisting
counter-clockwise.


