8
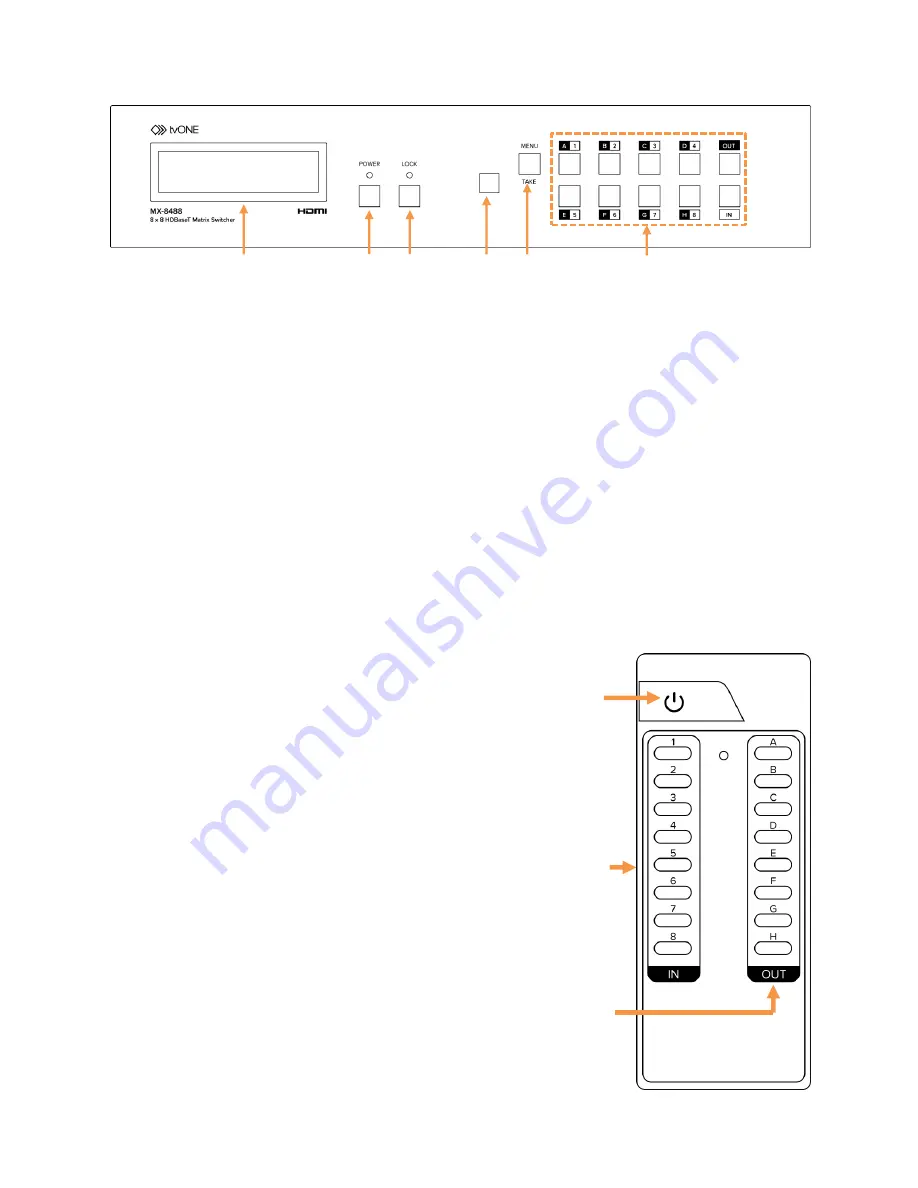
1
LCD: Displays the current I/O routing, EDID settings, Ethernet settings or functions as
a live status display while you make changes to the I/O settings. Press the MENU
button to step through each screen.
2
POWER: Press this button to turn the device on/off. The LED will illuminate green
when the power is on and red when it is in stand-by mode.
3
LOCK: Press this button to lock out all of the buttons on the front panel. Press it again
to unlock. The LED will illuminate green when the front panel is locked.
4
IR: IR Receiver window (accepts the remote control signal for this device only).
5
MENU/TAKE: Press this button to access the LCD menu system or to accept changes
made to input/output routing selections.
6
1-8/A-H and IN/OUT: These buttons are used to directly change the input/output
routing in the unit. Please see section 5.1 for more detail.
5.2
Remote Control Operation
1 2 3 4 5 6
Front Panel Controls
1
POWER: Press this button to power the unit on
or to place it into standby mode.
2
IN 1-8: Use these buttons to choose the input
you wish to route to an output.
3
OUT A-H: Use these buttons to choose the
output to send the selected input to.
Note: The remote can only be used to change
single input to single output routing. It is not
possible to make multiple output changes at one
time with the remote control.
1
2
3


