9
Cleaning the heat exchanger
Requires two people!
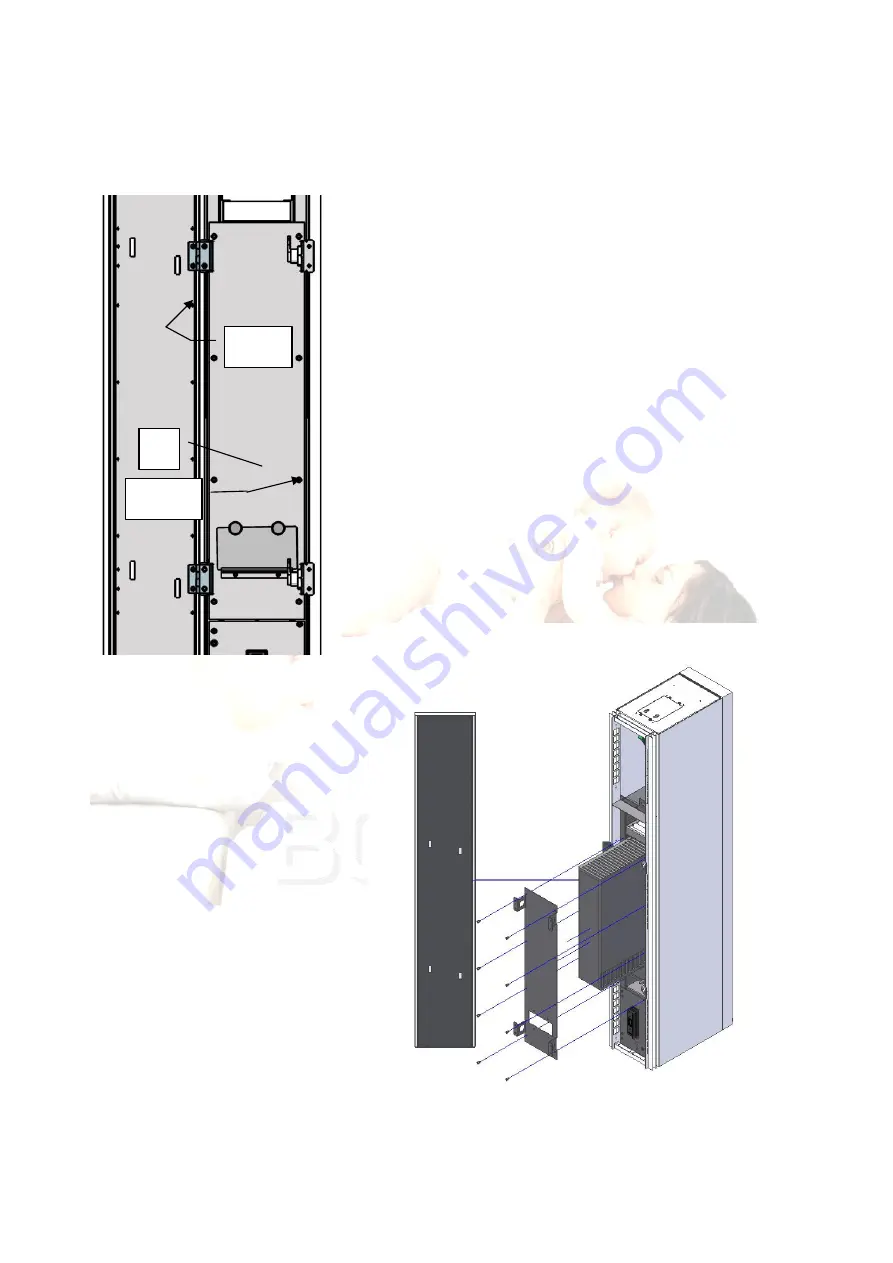
Start by removing the door by slackening the 4 screws (1)
securing the hinges. One person should support the door and
the other remove the screws. This method avoids damaging
the hinges.
To remove the heat exchanger, remove the cover (2). To do
so, remove the 8 screws (3) with a Philips screwdriver.
When the heat exchanger is out, clean it carefully with a
vacuum cleaner.
Reassemble the unit after cleaning. Ensure the heat exchanger
is correctly positioned. The visible ribs on the sides must face
downwards and to the right, and upwards and to the left
respectively.
1 (x4)
2
3 (x8)


