14
8. Inspect all moving and rotating parts.
Remove any debris that has become
entangled in the rear beaters or the PTO
drive line.
9. Make sure that all guards and shields are
installed and secured in position.
10. Check the oil level in the gearboxes. Top
up as required.
11. Insure that the PTO driveline is securely
attached on both ends and can telescope
easily. Check that the PTO driveline shield
rotates freely.
Loading
IMPORTANT :
When parking the spreader for
loading, put the tractor in
PARK
or
NEUTRAL
and apply the parking brake.
1. Fully Close Rear Hydraulic Gate
2. Load the Spreader
The manure consistency will determine
how full your spreader can be loaded. Solid
manure can usually be loaded level to slightly
heaped. Wet materials are heavier and may
limit loading.
NOTES: It is unlawful to allow any manure
spillage to occur on public roadways. Do not
heap load such that manure is allowed to fall off
spreader during transporting on roadways.
Always check the apron chain and slats to make
sure they are not frozen to the bottom of the
bed. Operating the spreader when the slats or
chain are frozen to the bed may cause damage.
Also make sure there are no lumps of manure
frozen to the floor.
It is recommended to make sure the apron
chain is operating properly before loading the
spreader.
Pre-operation Checklist
It is important for both personal safety and
maintaining the good mechanical condition
of the machine that this pre-operational
checklist be followed. Before operating
the machine and each time thereafter, the
following areas should be checked off:
1. Lubricate the machine completely. Refer
to “Service” in the Service & Maintenance
section of this manual.
2. Use only a tractor of adequate power
(see PTO / Horsepower Requirements on pg.
12) and weight to handle the spreader.
3. Ensure that the machine is properly
attached to the tractor using a drawbar pin
with provisions for a mechanical retainer.
Make sure that a retainer is installed.
4. Ensure that the safety chain on the hitch
is installed.
5. Check tires and ensure that they
are inflated to the specified pressure:
25 psi (175 kPa).
6. Check oil level in the tractor hydraulic
reservoir. Top up as required.
WARNING : Use extreme care when
working around a high pressure hydraulic
system. Make sure all connections are
tight and all components are in good
repair. Wear hand and eye protection when
searching for suspected leaks.
7. Inspect all hydraulic lines, hoses,
fittings and couplers for tightness.
Tighten if there are leaks. Use a clean
cloth to wipe any accumulated dirt from the
couplers before connecting to the tractor’s
hydraulic system. See “Hydraulic Safety” in
the Service & Maintenance section of this
manual.
Содержание Nitro 450
Страница 1: ...Tube Line Manure Spreader Nitro 450 Operator s Manual 31375 Rev 1 3 Nov 11 2014...
Страница 23: ...23 Part Lists...
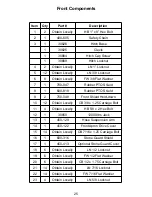
Страница 24: ...24 Front Components...
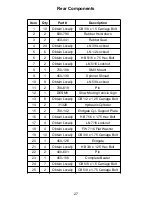
Страница 26: ...26 Rear Components...
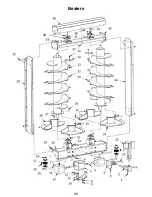
Страница 28: ...28 Beaters 34...
Страница 30: ...30 Apron Drive 20...
Страница 32: ...32 Apron Runners...
Страница 34: ...34 Side Floor Boards...
Страница 36: ...36 Single Axle...
Страница 38: ...38 Tandem Axle...
Страница 40: ...40 Drive Line 11 12...
Страница 42: ...42 Endgate Hydraulics...
Страница 44: ...44 Chain Drive Hydraulics...
Страница 46: ...46 Grease Line Schematic...
Страница 48: ...48 Intentionally Blank...
Страница 49: ...49 Light Kit TLVLK 450 Available Options...
Страница 50: ...50 Lights Right Left...
Страница 52: ...52 Light Kit Hydraulics...
Страница 54: ...54 Light Kit Electrical Breakdown...
Страница 56: ...56...
Страница 57: ...57...
Страница 58: ......


