TRUST SPACEC@M 150
13
UK
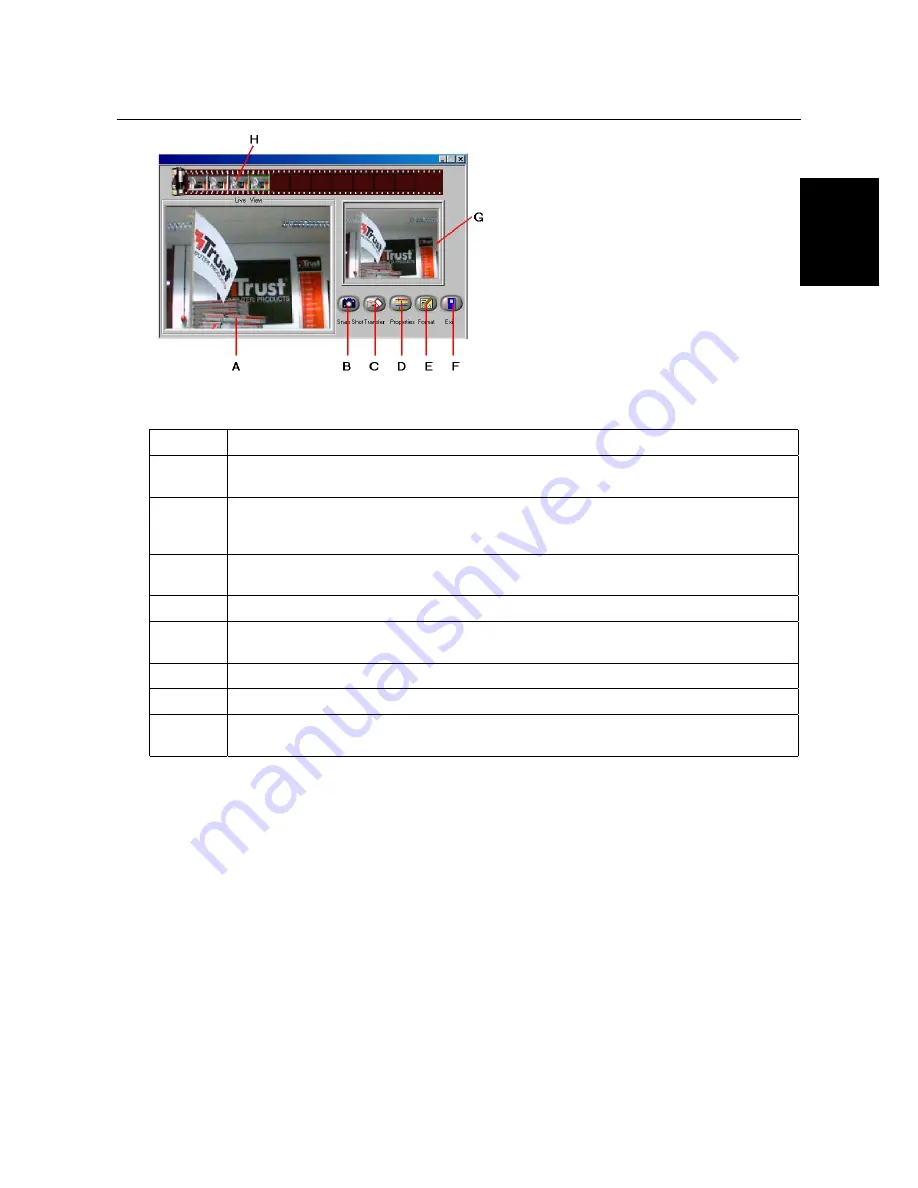
Figure 20: SpaceC@m 150 Software
Function
Description
A
The current camera image is shown in this screen. See chapter 6.3.1 for adjusting the
image.
B
‘Snapshot’ button; takes a snapshot of the image (A). The snapshot taken is shown on
screen (G) and added to the ‘thumbnails’ (H). You can also take a snapshot with the
button on the camera.
C
‘Transfer’ button; opens the snapshot shown on in screen (G) in the image-processing
program selected by you.
D
‘Properties’ button; program the camera settings here.
E
‘Format’ button; select the file format used for saving the snapshot here. You can select
BMP or JPEG. JPEG also enables you to set the compression.
F
‘Exit’ button; closes the program.
G
The snapshot taken is shown on this screen.
H
‘Thumbnails’ (miniature previews) of the snapshots taken are posted here. Click on the
‘thumbnails’ to view the snapshot on screen (G).
Table 3: SpaceC@M 150 software
6.3.1 Advanced image settings
Follow the instructions below for adjusting the camera image.
Note:
Only change the settings if necessary. Wrong settings may cause problems in other applications
(NetMeeting, for example).
1. Click on ‘Properties’ button D. Figure 21 will appear.


