


Recording settings includes: VAD setting and quality
setting.
Recording Settings
c)
Note:
VAD setting (only available the MIC is selected as the
recording source)
•
If VAD is turned ON, the player will not start recording
when you press “Start Recording”, until the external signal
level exceeds a threshold that is set by the user; If VAD
is turned OFF, the player will start recording when you
press “Start Recording”, even when there is no signal.
Quality setting: press [
] or [
] button to select the
desired quality, including low, medium, and high. The
higher the quality you select, the higher the quality the
final files will be. Press [ / ] button to return to the upper
level menu.
Connect this unit with external audio devices using the
supplied Line-in cable, which will avoid being interfered
by external noises. Press [Start Recording], then press
[ / ] button to start recording.
Line In recording
d)
Note:
In the recoding setting menu, select LINE IN as the
recording source.
•
The files will be saved as MP3 files in the Audio
directory in the order of AUDI001, V002.
•
If the recording time is less than 2 seconds, the player
will not save the file and an error message will be
shown in the display.
•
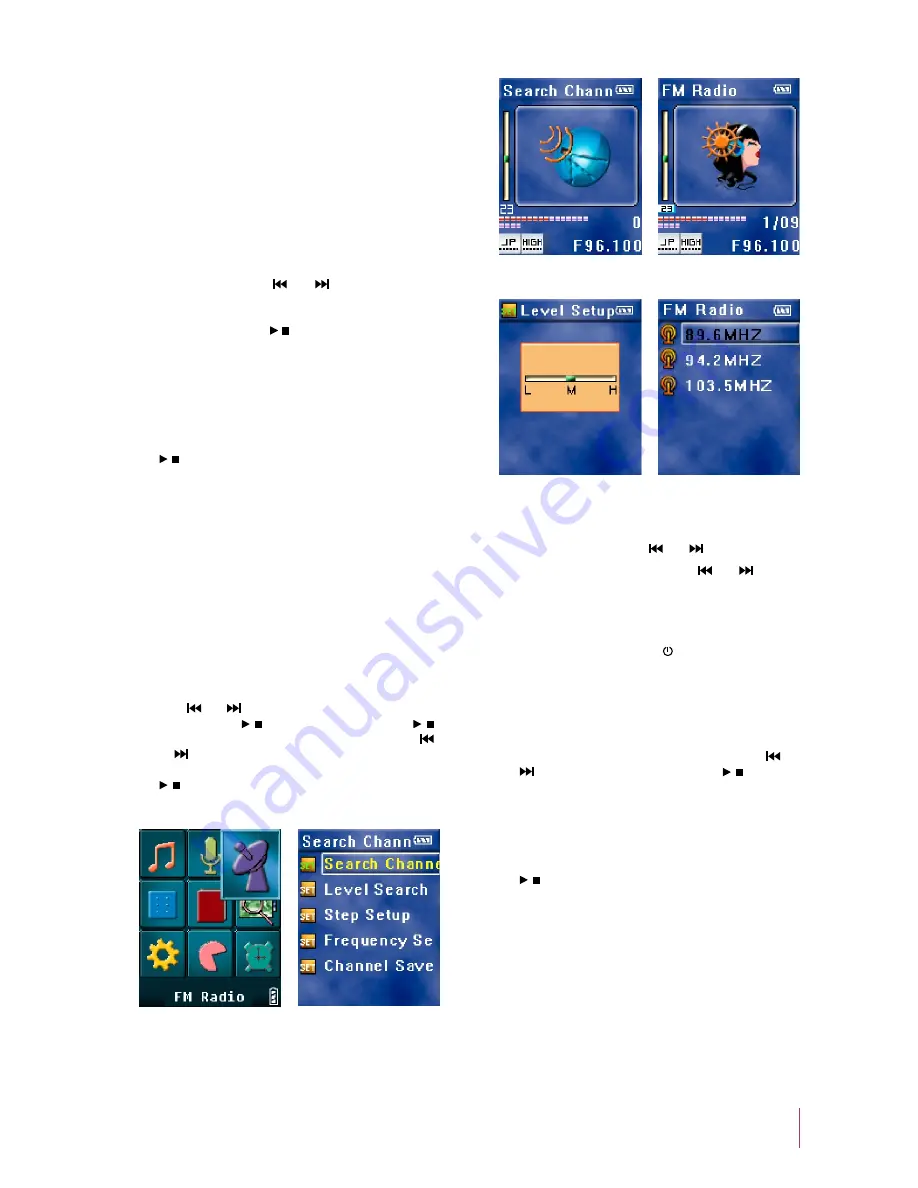
7. FM Radio
Press [
] or [
] button to select Figure 18. If no station
is stored, press [ / ] button (Figure 19), press [ / ]
button to enter searching mode (Figure 20). Press [
]
or [
] button to search a station, press [A-B] button,
the system will ask you whether to store the station. Press
[ / ] button to store the station. If there are stored
stations, the display will show Figure 21.
Store a Station
a)
Figure 19
Figure 18
Figure 23
Figure 22
Search a station
b)
Press [
] or [
] button.
Manual Search
:
Press and hold [
] or [
] button.
Automatic Search :
When in FM radio mode (Figure 21), press [A-B] button
to start recording. Press [ESC / ] button to stop recording.
FM Recording
c)
Note:
The files will be saved as MP3 files in the Voice directory
in the order of FMRC001, 002.
•
Figure 19 select [Search Level](Figure 22), press [
] or
[
] button to select search level. Press [ / ] button to
return to the upper level menu.
Search Level
d)
Figure 23 press [A-B] button to delete a station, the system
will ask you whether to delete the selected station, press
[ / ] button to confirm your operation.
Delete A Station
e)
Figure 21
Figure 20
8


