Tripp Lite SMX1000LCD Скачать руководство пользователя страница 3

2

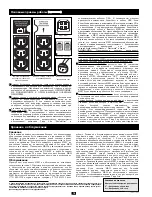
STEP 1: Place the UPS in either a horizontal or vertical (“tower”)

position. 

The UPS's housing is designed with sides that slope

slightly in order to tilt the LCD Display up for easy viewing in
either position—horizontal or vertical. As another aid to easy
viewing, the LCD Display can be rotated. To rotate the display:
carefully insert a small tool in the slots on the sides of the display
to pop it out of the UPS housing; rotate the display, and snap it back
into the UPS housing.

CAUTION: To safely balance the UPS when it is placed in a
vertical (“tower”) position, make sure the LCD Display is
located at the top of the front panel.

STEP 2: Using your computer's detachable power cord, plug the 

UPS into a wall outlet. 

Remove your computer's detachable 

power cord. Insert the female plug of the computer's cord 

into 

your UPS's AC input. Insert the male plug of your computer's
cord into an AC wall outlet that does not share a circuit with a 
heavy electrical load (such as an air conditioner or refrigerator).

After plugging the UPS into a wall outlet, push the ON/OFF button
for one second to turn the UPS on (see Basic Operation section).

Please Note! The UPS will not turn on automatically in the
presence of live utility power.

B

Important Safety Instructions

SAVE THESE  INSTRUCTIONS

This manual contains instructions and warnings that should be followed during the installation, operation and storage of all Tripp Lite UPS
Systems. Failure to heed these warnings will void your warranty.

STEP 3: Plug your equipment into the UPS.* 

Insert the female plug

of the detachable power cord that came with your UPS 

into the

computer's AC input. Insert the UPS cord's male plug into any of
your UPS's female output receptacles. Select outlets (see diagram)
will provide battery backup and surge protection; plug your
computer, monitor and other critical devices here. Select outlets
(see diagram) will provide surge protection only; plug your printer
and other non-essential devices here.

* Your UPS is designed to support electronic equipment only. You will overload the
UPS if the total VA ratings for all the equipment you connect to the Battery Backup
Protected/Surge Protected outlets exceeds the UPS's Output Capacity. To find your
equipment's VA ratings, look on their nameplates. If the equipment is listed in amps,
multiply the number of amps by 230 to determine VA. (Example: 1 amp × 230 = 230
VA). If you are unsure if you have overloaded the Battery Backup Protected/Surge
Protected outlets, run a self-test (see "MUTE/TEST" Button description).

CAUTION: The UPS must be plugged into a live AC outlet and
turned on for 24 hours after initial installation to fully charge the
UPS's internal battery. Your connected equipment will receive
utility-supplied AC power (if present) immediately after the UPS
is plugged in and turned on; however, your connected equipment
may not receive full battery backup in the event of a blackout or
severe brownout unless the UPS's internal battery is fully charged.

A

UPS Location Warnings

• The UPS is designed for indoor use only in a controlled

environment, away from excess moisture, heat/cold, conductive
contaminants, dust or direct sunlight.

• Leave adequate space around all sides of the UPS for proper

ventilation.

UPS Connection Warnings

• Connect your UPS directly to a properly grounded AC power

outlet. Do not plug the UPS into itself; this will damage the UPS.

• Do not modify the UPS’s plug, and do not use an adapter that

would eliminate the UPS’s ground connection.

• Do not use extension cords to connect the UPS to an AC outlet.

Your warranty will be voided if anything other than Tripp Lite
surge suppressors are used to connect your UPS to an outlet.

• If the UPS receives power from a motor-powered AC generator,

the generator must provide clean, filtered, computer-grade output.

Equipment Connection Warnings

• Do not use Tripp Lite UPS Systems for life support applications in

which a malfunction or failure of a Tripp Lite UPS System could
cause failure or significantly alter the performance of a life support
device.

• Do not connect surge suppressors or extension cords to the output

of your UPS. This might damage the UPS and will void the surge
suppressor and UPS warranties.

Battery Warnings

• Your UPS does not require routine maintenance. Do not open your

UPS for any reason. There are no user-serviceable parts inside.

• Batteries can present a risk of electrical shock and burn from high

short-circuit current. Observe proper precautions. Do not dispose
of the batteries in a fire. Do not open the UPS or batteries. Do not
short or bridge the battery terminals with any object. Unplug and
turn off the UPS before performing battery replacement. Use tools
with insulated handles. There are no user-serviceable parts inside
the UPS. Battery replacement should be performed only by
authorized service personnel using the same number and type of
batteries (sealed Lead-Acid). The batteries are recyclable. Refer to
your local codes for disposal requirements or in the USA only call
1-800-SAV-LEAD or 1-800-8-BATTERY (1-800-822-8837) or
visit www.rbrc.com for recycling information. Tripp Lite offers a
complete line of replacement batteries at www.tripplite.com.

• Do not attempt to add external batteries to the UPS.

Quick Installation

Содержание SMX1000LCD

Страница 1: ...Источники бесперебойного питания Tripplite SmartPro 1000VA LCD SMX1000LCD Инструкция пользователя ...

Страница 2: ...ns 1111 W 35th Street Chicago IL 60609 USA 773 869 1234 www tripplite com Copyright 2005 Tripp Lite All rights reserved Important Safety Instructions Quick Installation Basic Operation Front Panel Basic Operation Rear Panel Storage Service 3 4 4 2 2 Español Français Póññêèé 5 9 13 ...

Страница 3: ...on CAUTION The UPS must be plugged into a live AC outlet and turned on for 24 hours after initial installation to fully charge the UPS s internal battery Your connected equipment will receive utility supplied AC power if present immediately after the UPS is plugged in and turned on however your connected equipment may not receive full battery backup in the event of a blackout or severe brownout un...

Страница 4: ...hich stray due to poor quality utility service outside the range of standard computer tolerance rest assured that the UPS is designed through the use of automatic voltage regulation to continuously supply connected equipment with stable computer grade output voltage In the event of a blackout power loss severe brownout low power or overvoltage high power the UPS will rely on its internal battery t...

Страница 5: ... remove the two screws on the UPS back panel to access the internal battery Tripp Lite offers a complete line of replacement batteries at www tripplite com Tel DSL Jacks USB Port 6 7 AC Input Outlet 8 Surge Only Protected Outlets 4 Battery Backup Surge Protected Outlets 5 4 5 6 7 8 Storage Service Storage To avoid battery drain all connected equipment should be turned off and disconnected from the...

Страница 6: ...th Street Chicago IL 60609 USA 773 869 1234 www tripplite com 2005 Tripp Lite Todos los derechos reservados Instrucciones de seguridad importantes Instalación rápida Operación básica Panel frontal Operación básica Panel posterior Almacenamiento y Servicio 7 8 8 6 6 English Français Póññêèé 1 9 13 ...

Страница 7: ... por 24 horas después de la instalación inicial para cargar completamente la batería interna Su equipo conectado recibirá energía de CA suministrada de la red si está disponible inmediatamente después que el UPS esté conectado y encendido sin embargo su equipo conectado no podrá recibir completo respaldo de batería en el caso de una falla del servicio eléctrico o una severa baja de voltaje a menos...

Страница 8: ...ngo de tolerancia estándar de computadora puede estar seguro que el UPS está diseñado mediante el empleo de regulación automática de voltaje para suministrar continuamente al equipo conectado un voltaje de salida estable de grado computadora En el caso de una falla del servicio eléctrico pérdida de energía una severa baja de voltaje baja de potencia o un sobrevoltaje subida de potencia el UPS empl...

Страница 9: ...siguiente procedimiento Apagar el UPS desconectar el cordón de alimentación y retirar los dos tornillos en el panel posterior del UPS para acceder a la batería interna Tripp Lite ofrece una línea completa de baterías de reemplazo en www tripplite com Puerto USB 6 7 Toma de entrada de CA 8 Salidas protegidas sólo contra sobretensiones 4 Respaldo de batería Salidas protegidas contra sobretensiones 5...

Страница 10: ...11 W 35th Street Chicago IL 60609 USA 773 869 1234 www tripplite com Copyright 2005 Tripp Lite Tous droits réservés Importantes consignes de sécurité Installation rapide Fonctionnement de base panneau avant Fonctionnement de base panneau arrière Entreposage et service 11 12 12 10 10 Español English Póññêèé 5 1 13 ...

Страница 11: ... la description du bouton MUTE TEST ATTENTION L onduleur UPS doit être branché dans une prise de courant active et mis en marche pendant 24 heures après l installation initiale pour charger complètement sa batterie interne Votre équipement connecté recevra le courant de secteur s il est présent immédiatement après que l onduleur UPS a été branché et mis en marche cependant votre équipement connect...

Страница 12: ...assent à cause de la piètre qualité du secteur le registre de la tolérance de l équipement standard soyez assuré que l onduleur UPS est conçu grâce à sa régulation automatique de tension pour fournir en permanence à l équipement connecté une tension de sortie stable classée pour ordinateur Dans le cas d une panne perte de courant de baisse sévère de tension courant faible ou de surtension courant ...

Страница 13: ...ité et doit observer la procédure suivante Fermer l onduleur UPS débrancher le cordon d alimentation et dévisser les deux vis au dos du panneau arrière de l onduleur UPS pour accéder à la batterie interne Tripp Lite offre une gamme complète de batteries de remplacement à www tripplite com Prises tél et DSL Port USB 6 7 Prise d entrée CA 8 Prises protégées des surtensions seulement 4 Prises protégé...

Страница 14: ...L 60609 USA 773 869 1234 www tripplite com Àâòîðñêîå ïðàâî 2005 Tripp Lite Âñå ïðàâà îõðàíÿþòñÿ Âàæíûå èíñòðóêöèè ïî òåõíèêå áåçîïàñíîñòè Áûñòðàÿ óñòàíîâêà Îñíîâíûå ïðèåìû ðàáîòû ï ïå åð ðå åä äí íÿ ÿÿ ÿ ï ïà àí íå åë ëü ü Îñíîâíûå ïðàâèëà ðàáîòû ç çà àä äí íÿ ÿÿ ÿ ï ïà àí íå åë ëü ü Õðàíåíèå è îáñëóæèâàíèå 15 16 16 14 14 Español Français English 5 9 1 ...

Страница 15: ...ííîãî òîêà è âêëþ åí íà 24 àñà äëÿ ïîëíîé çàðÿäêè âíóòðåííèõ áàòàðåé Ïîäêëþ åííîå îáîðóäîâàíèå ïîëó èòü ýëåêòðîïèòàíèå ïåðåìåííîãî òîêà îò ñåòè åñëè åñòü íàïðÿæåíèå â ñåòè ñðàçó æå ïîñëå òîãî êàê ÈÁÏ áóäåò ïîäêëþ åí ê ðîçåòêå è âêëþ åí îäíàêî ïîäêëþ åííîå îáîðóäîâàíèå ìîæåò è íå ïîëó èòü ïîëíîé áàòàðåéíîé ïîääåðæêè â ñëó àå îòêëþ åíèÿ ýëåêòðè åñòâà èëè ñèëüíîãî ïîíèæåíèÿ íàïðÿæåíèÿ åñëè âíóòðåííèå...

Страница 16: ...äüòå óâåðåíû òî ÈÁÏ ðàññ èòàí áëàãîäàðÿ àâòîìàòè åñêîé ðåãóëèðîâêå íàïðÿæåíèÿ íà ïîñòîÿííîå ñíàáæåíèå ïðèñîåäèíåííîãî îáîðóäîâàíèÿ ñòàáèëèçèðîâàííûì íàïðÿæåíèåì êîìïüþòåðíîãî êà åñòâà Â ñëó àå îòêëþ åíèÿ ýëåêòðè åñòâà ðåçêîãî ñíèæåíèÿ íàïðÿæåíèÿ èëè ïåðåãðóçêè ÈÁÏ ïîëàãàåòñÿ ïðè ïîäà å âûõîäíîãî íàïðÿæåíèÿ êîìïüþòåðíîãî êà åñòâà íà ñâîè âíóòðåííèå áàòàðåè Èçìåðèòåëü âõîäíîãî íàïðÿæåíèÿ ìîæíî òàêæå...

Страница 17: ... äåéñòâóþùåé ðîçåòêå ïåðåìåííîãî òîêà âêëþ èòå åãî ïóòåì íàæàòèÿ è óäåðæàíèÿ â òå åíèå îäíîé ñåêóíäû êíîïêè ON OFF è äàéòå áàòàðåÿì çàðÿæàòüñÿ â òå åíèå 24 àñîâ Åñëè îñòàâèòü áàòàðåè ÈÁÏ íåçàðÿæåííûìè íà ïðîäîëæèòåëüíîå âðåìÿ îíè ïîñòðàäàþò îò íåâîñïîëíèìîé ïîòåðè åìêîñòè Îáñëóæèâàíèå Ïðåæäå åì îòïðàâëÿòü ÈÁÏ íà îáñëóæèâàíèå âûïîëíèòå ñëåäóþùèå äåéñòâèÿ 1 Ïðîñìîòðèòåòå óêàçàíèÿ ïî èíñòàëëÿöèè è ýê...

Страница 18: ...Клавиатуры и комплекты Веб камеры Двойники тройники переходники в розетку Аккумуляторы свинцово кислотные AGM VLRA SLA Микрофоны Обжимки Наушники Геймпады джойстики рули Патч корды патч панели Кабели питания Сканеры ...

Отзывы: