24
4.2 Set up 2 DVR under the same router for DDNS
(1) First of all, connect these 2 DVR to the same router and we can name them as
DVR1 & DVR2.
(2) Change the system setting for DVR1 and DVR2 in DVR main menu:
(A) Local IP: a local IP will be shown in DHCP, ex:192.168.1.XXX (this is
allocated by router and number will be different)
(B) Port: set DVR1 and DVR2 in different port, such as set DVR1 as 8841, set
DVR2 as 8842.
(C) Mac address: set DVR1 and DVR2 in different Mac address, such as set
DVR1 as 12:34:56:78:9A:BC (default), set DVR2 as 12:34:56:78:9A:BD
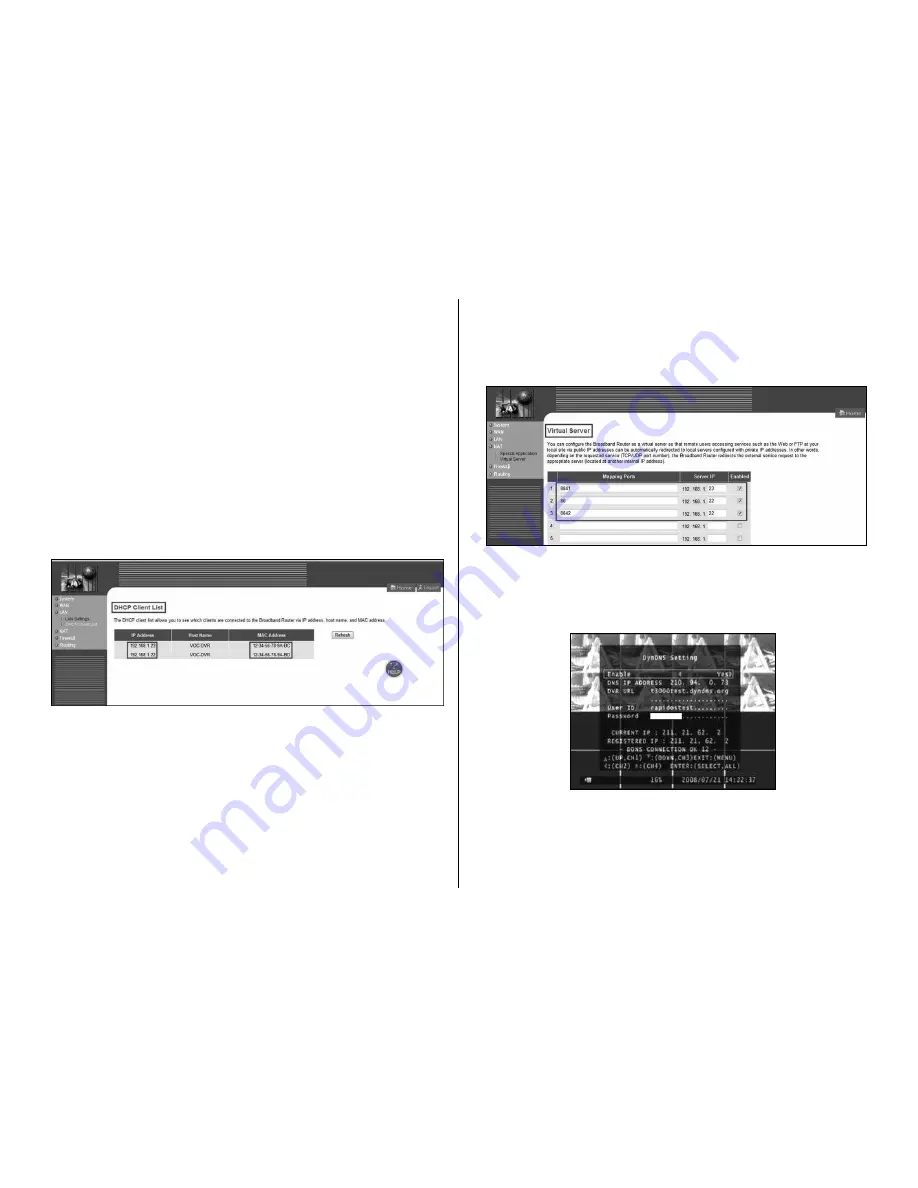
(D) After set up, you may check whether you can see from the DHCP Client List
or not. (the layout of the DHCP Client List may be varied to different router,
but the function should be more or less the same.)
The picture shown as above, 2 DVR IP will be in the list. If the DVR IP
address or the IP account are not the same with your setting, please go back
to step (2).
(E) Then, enter the selection of NAT in router to set up the port of DVR1 &
DVR2 to a designated IP of DVR in virtual server. The designated IP of the
port 80 can choose to key in DVR1 or DVR2. (We recommend using 80 port
first. If the 80 port was occupied, change the port setting.)
(F) Afterwards, the set up under router is completed.
(3) Go to the set up page of DynDNS, please refer to the DDNS Setup chart step(1).
(A) Make the same setting process for DVR1 and DVR2.
(4) Go to the DVR main menu: SYSTEM / NETWORK / DDNS setting
Enable: Set to be “Yes”
DNS IP ADDRESS: No need to set
DVR URL: Key in your “Host Name” under DynDNS
USER ID: Key in your “ID” under DynDNS.
Password: Key in your “Password” under DynDNS.


