


Page 6 of 14
Part Number 8519184-0000 Rev: B
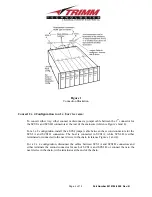
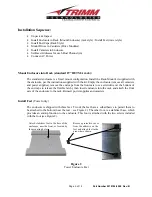
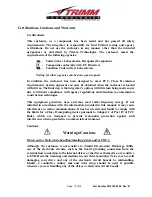
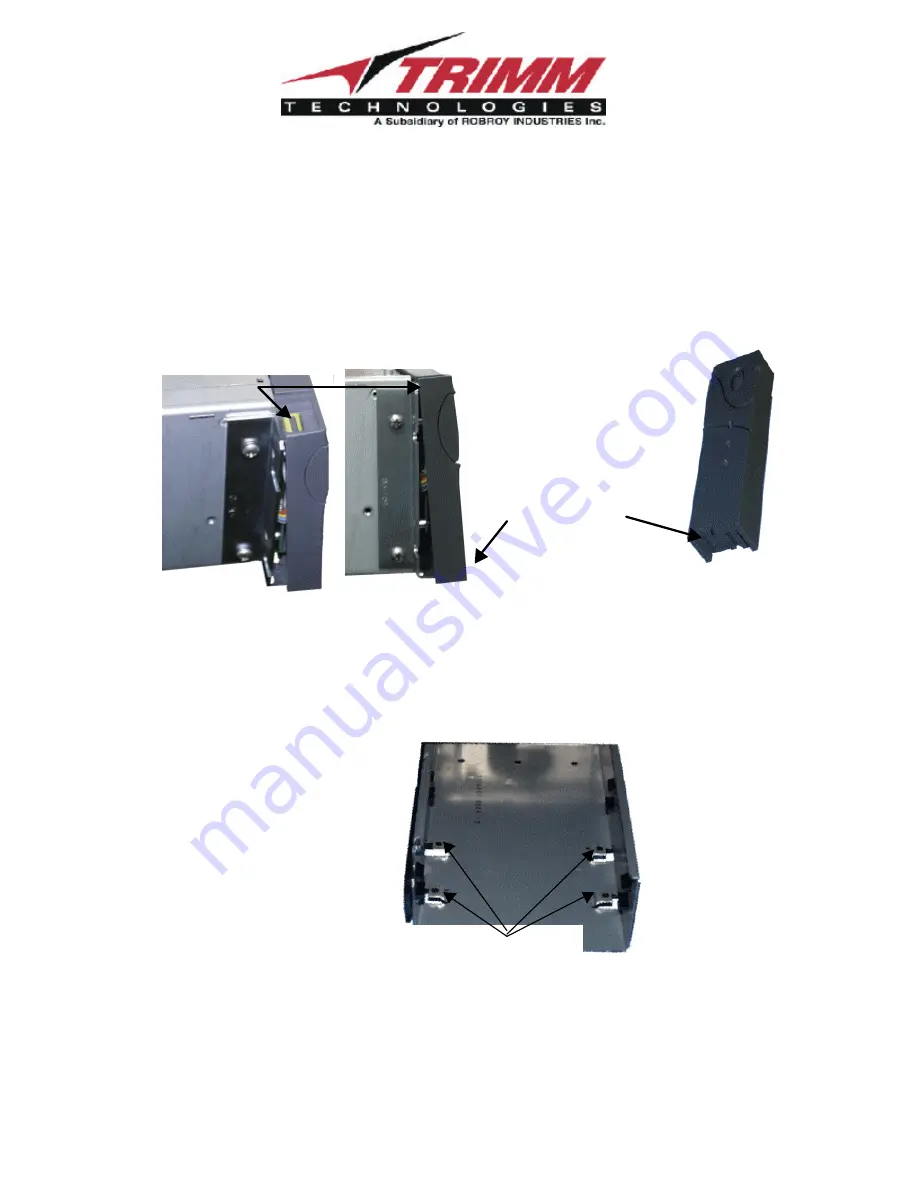
Install/Remove End Caps
(Rack-Mount Enclosure only)
The end caps are dress items, which mount on the rail flanges at the ends of the enclosure. The
caps snap in place with a notch at the bottom of the caps. To snap the caps in place, insert the top
notch in place first and then push the bottom in until the flexible flange at the bottom is captured
in the mating indent.
The notch at the bottom, provides access for a screwdriver (or similar instrument) to be inserted
to lift up on the flexible flange to disengage it from the indent and permit the bottom of the cap to
be pulled forward to remove the cap(s).
Figure 3
End Cap Install/Remove Illustration
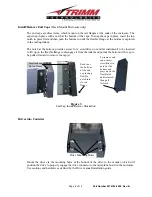
Drives into Canisters
Mount the drive via the mounting holes at the bottom of the drive to the canister, which will
position the drive to properly engage the drive connector to the mid-plane board in the enclosure.
Use cautions and hardware as defined by the Drive manual/installation guide.
Drive Mounting Holes
Insert end cap notch in
slot on flange
Push in at
the bottom
of the end
cap to snap
flexible
notch into
slot on
flange
To remove end
caps, insert
screwdriver in
notch at the
bottom and
press up on the
flexible tab
until released,
then pull
forward
Содержание UR8J2-4 Series
Страница 2: ...Part Number 8519184 0000 Rev B...


