background image

2.11

TRICOR Systems Inc.

2.6.3 USB Connection (Cont'd)

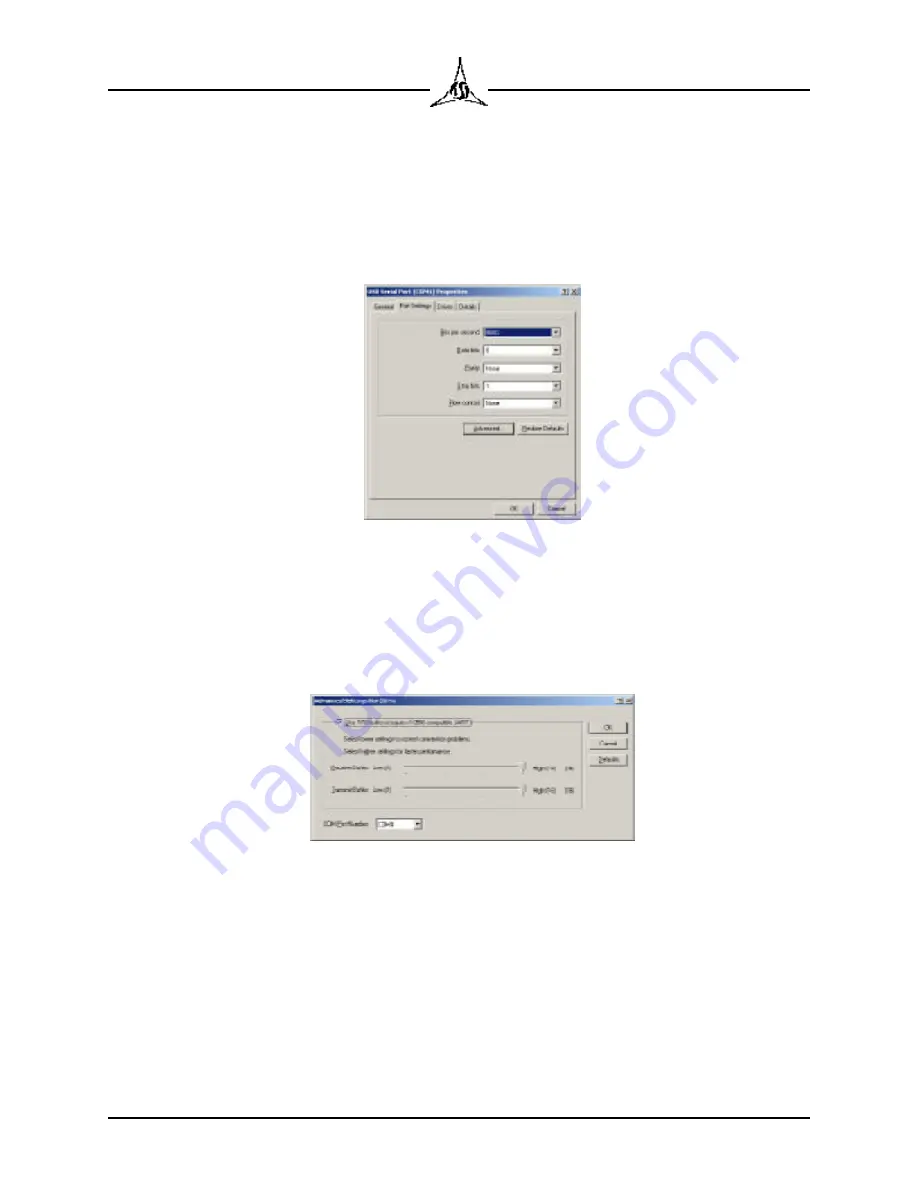
The currently selected COM channel is appended after the port name.  This
channel selection should not be less than COM3.  If it is, double click to edit the
port properties.  Choose the Port Settings tab and press the Advanced button.

Figure 2.8  USB Port Settings

Change the port channel setting to some other value greater than COM4.  Use
the Com Port Number drop down list box to choose the channel.  Never select a
channel that is the same as an RS232 com port on the PC.  Press the OK
buttons to back out with the new settings.

Figure 2.9  Advanced Port Settings

Turn off the Model 225 and reboot the Windows operating system.  Wait for
Windows to again restart.  Turn on the Model 225.  Verify that the Configuration
application can communicate with the Model 225.  The channel should match
that set in the driver configuration dialog.  If problems persist, please call
TRICOR for assistance.

Содержание 225

Страница 1: ......

Страница 2: ... 8 2 6 3 USB Connection 2 9 3 MODEL 225 OPERATIONAL PROCEDURES 3 1 3 1 Turning On The Model 225 3 1 3 2 Display Contrast 3 2 3 3 Initialization And Testing 3 2 3 4 Running A Chocolate Sample 3 4 3 5 Menu Keyboard Operation 3 7 3 5 1 Passwords 3 8 3 5 2 User ID 3 8 3 5 3 Print Result Data 3 9 3 5 4 Clear Test Memory 3 11 3 5 5 Internal Printer 3 12 3 5 6 External Printer 3 12 3 5 7 Temperature Unit...

Страница 3: ...od 4 9 4 3 2 Temperature Units 4 9 4 3 3 Internal Printer 4 9 4 3 4 External Printer Option 4 10 4 3 5 Clear Results 4 10 4 4 Temperature Control 4 11 4 5 System Status 4 12 4 6 Status Bar 4 12 5 CHOCOLATE TEMPER CURVE INTERPRETATION 5 1 5 1 Temper Curve 5 1 5 2 Qualitative Method 5 2 5 3 Analytical Method 5 2 5 3 1 CTU and Slope Determination 5 2 5 3 2 CTU Criteria 5 5 5 3 3 Slope Criteria 5 5 6 ...

Страница 4: ...Inc The information in this document is subject to change without notice TRICOR Systems Inc makes no representations or warranties with respect to the contents of this manual and specifically disclaims any implied warranties of fitness for a particular purpose TRICOR Systems Inc assumes no responsibility for errors or omissions in this document TRICOR Systems Inc 1650 Todd Farm Drive Elgin Illinoi...

Страница 5: ...2 5542 If TRICOR is made aware or discovers any discrepancies or problems you will be notified and corrective action will be taken as soon as possible To serve you better we request that primary and alternate contact names be provided on the enclosed product contact formandreturnedtoTRICORintheself addressedenvelope This personalized approach will eliminate any delay in providing you with potentia...

Страница 6: ...________________ _______________ _______________________ Alternate 1 ____________________ _______________ _______________________ 2 ____________________ _______________ _______________________ 3 ____________________ _______________ _______________________ The person s to contact with regard to New Product Releases Name Telephone No Email Primary ____________________ _______________ _______________...

Страница 7: ...mperature sensing probe depth These field proven features ensure accuracy and repeatability in measuring chocolate temper The 225 is housed in a small laboratory enclosure All controls indicators and the internal printer are located on the front panel The chocolate sample well and cover door are found on the top of the unit On the back of the model 225 is the power entry module with the on off swi...

Страница 8: ...hould be performed only by a qualified service technician 1 4 Calibration TRICOR Systems recommends a yearly calibration Two separate calibrations are performed on Temper Meters The first is an electronic calibration verification of the electronics This verification can be performed by your internal personnel provided that they have been given the proper training and the verification tools have be...

Страница 9: ...Systems Inc 1 4 Calibration Cont d If you would like to schedule your Model 225 to be calibrated at TRICOR Systems please call TRICOR s Contracts Department at 847 742 5542 for a Return Material Authorization RMA ...

Страница 10: ...moved for cleaning by removing the 4 screws which hold it to the base cover Figure 2 1 Bottom View Showing Fan Intake The repeatability and precision of the chocolate temper is affected by the length of time it takes to get the chocolate sample from the source to the Model 225 temperature well and to get the sample door closed It is recommended that the unit be placed in close proximity to the cho...

Страница 11: ......

Страница 12: ...ose paper end coming over the top of the roll from the back side Snap the door closed being sure to align the paper so that it is centered below the tear off metal teeth If the power is turned on the Feed button can be pressed to advance the paper The internal printer can be tested by holding the Feed button down while the Model 225 is powered up The printer will print several inches of text and g...

Страница 13: ......

Страница 14: ...l instructions provided by Okidata regarding setup of this printer The shipping restraints holding the print head must be removed Connect AC power to the printer NOTE The Okidata 184 must be ordered with the correct line voltage input for your region of the world The printer does not contain a universal power supply nor a line voltageselector TRICORisnotresponsiblefordamages caused by operating th...

Страница 15: ...originally purchased with the unit A list of features which can be configured is shown below Set Real Time Clock Calendar Option Set Power Line Frequency Adjust Sample Run Time Option Set User Text Extended Temperature Plotting Option Change CTU Offset Set Password Select CTU or Slope Temperature Select Temperature Units Enable Disable Internal Printer Auto Print Enable Disable External Printer Au...

Страница 16: ...e application software can be run without the Model 225 attached but the operations are limited until there is communications established between the PC and the unit 5 If the USB connection is to be used on the Model 225 leave the installation CD in the drive and skip down to section 2 6 3 The communications between the PC and the Model 225 is handled over either an RS232 serial port or a Universa...

Страница 17: ...te between the PC and the Model 225 is provided It consists of a 9 pin adaptor which attaches to the serial port of most recent PCs This adaptor accepts one end of the flat cable with RJ 11 connectors The other end of the cable is plugged into the Model 225 The black phone jack on the back of the unit is intended for the serial communications Figure 2 6 RS232 Serial Cable ...

Страница 18: ...he USB specification and TRICOR Systems will not support equipment operated using a USB cable longer than 6 feet IMPORTANT Do not connect the Model 225 with the USB cable to the PC until instructed to do so below If you are not ready with the proper software you may create difficulties when connecting in the future USB is not supported directly by Windows 95 and may have incompatibilities with ear...

Страница 19: ... the operating system Run the Configuration application It will search through all the available resources on the PC in an attempt to find a connection to the Model 225 The status bar of the application shows in the lower left corner the communication channel being used or currently searched If there is trouble installing the USB drivers the most likely cause are legacy RS232 serial ports on the P...

Страница 20: ... greater than COM4 Use the Com Port Number drop down list box to choose the channel Never select a channel that is the same as an RS232 com port on the PC Press the OK buttons to back out with the new settings Figure 2 9 Advanced Port Settings Turn off the Model 225 and reboot the Windows operating system Wait for Windows to again restart Turn on the Model 225 Verify that the Configuration applica...

Страница 21: ...isconnecting the USB cable causes the Windows operating system to terminate the USB driver software in effect pulling the driver out from under the Configuration or TMDAS application Always close the applications communicating with the 225 before terminating the link to avoid program crashes ...

Страница 22: ...The red error LED may be illuminated on the internal printer If it is check the paper supply and replace the roll if out of paper The red indicator may also be on if the paper roll is improperly positioned Check the roll and try advancing the paper using the printer Feed button The unit power indicator on the bottom right of the front panel will flash at a fast rate Figure 3 1 Front Panel of Model...

Страница 23: ... would then be impossible to navigate through the menu to readjust the contrast To provide a method to overcome this complication there is a power up procedure to regain control If the display comes up without any characters visible turn the Model 225 off and allow 10 seconds to power it down Press and hold the Scroll Up and Scroll Down buttons Turn on the Model 225 When you can again see characte...

Страница 24: ... retains the results even while power is off Searching Stored Results The results are searched starting from the beginning of memory looking for the last valid result Corrupted or non used result memory is ignored A progress bar is shown across the bottom row of the display indicating continuing scanning During this scan time the heater and cooler control circuits are working to obtain the desired...

Страница 25: ...knob completely to the right and open the sample well door Figure 3 2 Sample Well and Ejector Fill the sample cup from the enrober curtain or depositor to just below the top of the cup lip Remove any excess from sides of cup Avoid touching the walls of the sample cup Handle by the cup lip Push the sample cup firmly down into the cooler well The temperature probe in the center of the well will pier...

Страница 26: ... purchased is a variable run time Times from 3 minutes to 10 minutes may be selected in 30 seconds increments This feature permits complex or non chocolate samples to be processed When the testing is complete the LCD will show the message below This message will alternate with text that displays the measurement results Remove Sample There are two alternate methods of displaying the test results Th...

Страница 27: ...hocolate sample as soon as the test is complete If the sample remains for a very long time it gets hard and sticks to the temperature probe It is much easier to remove while still warm Slide the ejector knob completely to the right This will catch the sample cup under the lip Pull the door up The door will lift the sample cup out of the well If the chocolate sample should stick in the well twist t...

Страница 28: ...r the test is complete and the sample is removed 3 5 Menu Keyboard Operation The Model 225 has a menu of features which the user can choose from using the display and 4 buttons on the front panel The features include how and when the unit prints data display and printing of previous test data clock settings temperature units and system status From the ready for testing screen the menu is entered b...

Страница 29: ...its 1 2 3 and 4 These are the same digits as the buttons on the front panel of the 225 If prompted enter the 8 digit password on the keypad You must enter the characters quickly and accurately to avoid the automatic timeout cancellation If you make a mistake just stop and let the system return to the previous mode The password can only be programmed from the Configuration application The password ...

Страница 30: ...dy to test screen press the Cancel button 3 5 3 Print Result Data The Model 225 saves previous test results so that they can be recalled and printed These results can be sent to the internal printer or the external printer if this optional feature is available The TMDAS software optional also substitutes for the external printer The standard Model 225 retains only the last 5 test samples The unit ...

Страница 31: ... test was performed and the run number CTU 8 9 SLOPE 33 09 24 04 08 02 36 If you decide not to print any results press the Cancel button to return to the Top Menu Selection To print or transfer the current test result press the Select button Printer Output Choice External Printer If you have purchased the external printer or TMDAS options a menu screen will be displayed allowing the choice of wher...

Страница 32: ...to protect the data when returning the unit for repair or when moving the Model 225 to another production line the memory holding previous test samples can be wiped clean To clear the previous test results press the Select button from the ready to test screen In the menu mode use the scroll buttons to choose the Clear Test Memory group Top Menu Selection 2 Clear Test Memory Press the Select button...

Страница 33: ...Internal Printer Menu Auto Print ON To accept the newly entered value press the Select button If you decide not to change the value press the Cancel button to return without making the change In both cases the Top Menu Selection display will show again To return to the ready to test screen press the Cancel button 3 5 6 External Printer The external print is an option that must be purchased when or...

Страница 34: ...ide not to change the value press the Cancel button to return without making the change In both cases the Top Menu Selection display will show again To return to the ready to test screen press the Cancel button 3 5 7 Temperature Units The Model 225 can display temperatures in either degrees Celsius or Fahrenheit The user is free to make the choice To change the temperature units press the Select b...

Страница 35: ...ng the Model 225 If you do not have this option selecting this menu group will cause a warning message indicating that the feature is not available This menu group allows the time and date for the Model 225 to be set NOTE The Model 225 does not automatically correct for daylight savings time You must manually reset the time The clock is automatically corrected for leap years To change the time and...

Страница 36: ...e will have been changed if you see the Settings Stored message In both cases the Top Menu Selection display will show again To return to the ready to test screen press the Cancel button 3 5 9 Run Time The run time is an option that must be purchased when ordering the Model 225 If you do not have this option selecting this menu group will cause a warning message indicating that the feature is not ...

Страница 37: ... indicating that the feature is not available This menu group allows the baseline of the printed graph to be adjusted This option is necessary with some products where the inflection point may occur above or below the range of the normal printout To change the baseline temperature press the Select button from the ready to test screen Use the scroll buttons to choose the Plot Baseline Temp group To...

Страница 38: ...ayed status The first item displayed is the total number of chocolate samples which have been tested History Status Menu 58 Samples The next item is the total number of hours that the Model 225 has been powered History Status Menu 71 0 Hours The current cooler temperature is displayed History Status Menu COOLER 48 6 F The current heater temperature is displayed History Status Menu HEATER 77 4 F Ch...

Страница 39: ... Menu Ch2 2 49 Channel 3 is the heater voltage History Status Menu Ch3 1 30 Channel 4 is the cooler current History Status Menu Ch4 89 Channel 5 is the cooler stability servo screen History Status Menu Ch5 2 42 Channel 6 is the heater stability servo screen History Status Menu Ch6 2 65 To return to the Top Menu Selection press the Cancel button To return to the ready to test screen press the Cance...

Страница 40: ...trast can be obtained for both text lines LCD Contrast Menu BDFHJLNPRTVXZ ˆ bdfhjln To accept the newly adjusted value press the Select button If you decide not to change the value press the Cancel button to return without making the change In both cases the Top Menu Selection display will show again To return to the ready to test screen press the Cancel button 3 5 13 CTU Offset Adjust The CTU off...

Страница 41: ...ooler Set Point The Cooler Set Point Temperature is an option that must be purchased when ordering the Model 225 If you do not have this option selecting this menu group will cause a warning message indicating that the feature is not available This menu group allows the cooler temperature to be adjusted Top Menu Selection 12 Cooler Set Point Press the Select button to select this menu group Use th...

Страница 42: ...the heater temperature to be adjusted Top Menu Selection 13 Heater Set Point Press the Select button to select this menu group Use the scroll buttons to change the temperature The temperature can be changed in 0 1 degree steps Heater Set Point Menu 78 0 To accept the newly entered value press the Select button If you decide not to change the value press the Cancel button to return without making t...

Страница 43: ...ncy Menu 60 Hz To accept the newly entered value press the Select button If you decide not to change the value press the Cancel button to return without making the change In both cases the Top Menu Selection display will show again To return to the ready to test screen press the Cancel button 3 5 17 Self Test This menu choice runs the system test that is performed when the Model 225 is first turne...

Страница 44: ...rn to the Top Menu Selection To return to the ready to test screen press the Cancel button Any failures detected during the self test will halt the testing and display a warning message with a numeric code The warning codes can be found in the appendix System Warning 10 Push Cancel To Continue ...

Страница 45: ...and the connection to the PC is discussed in section 2 6 Install the software and connect the Model 225 to the PC using your preferred method USB or RS232 Turn on the Model 225 and allow it to come to the WAIT or Ready To Test mode Start the Configuration application Note the communications channel number in the status bar at the bottom left of the dialog It should increment from 1 to 8 checking e...

Страница 46: ...p 4 1 Clock Calendar Set optional Figure 4 1 Configuration Application Clock Tab The real time clock is a feature of the Model 225 which is optionally ordered at time of purchase This hardware keeps track of the time and date so that the information is available to add to the printed data Traceability of test conditions is improved with automatic date stamps The date and time should be set to loca...

Страница 47: ...se which method is appropriate Note that when the Use PC Clock option is selected the Set Time field is incrementing as the PC s clock changes Press the Set Time button to set the clock in the Model 225 The new time is transferred and the application checks for the correct settings Note that the PC and the Model 225 only measure time to the nearest second It is quite possible to have both set the ...

Страница 48: ... is printed in the test results The ID is a value of 1 199 The value is not permanently stored in the Model 225 and can only be entered from the 225 menu This ID can not be set from the Configuration application The Multiple Run Storage checkbox indicates the ability to store many previous runs in the unit The standard is to store only the last 5 The multiple store uses a large memory to store to ...

Страница 49: ...he menu mode requires entry of an 8 digit password made up of the numbers 1 to 4 the numbers on the 255 buttons A correct and speedy entry of this 8 digit value is required when the Select button on the 225 is pressed Entering the incorrect value or delaying too long will result in the unit returning to the Ready To Test mode Once in the menu mode the operator can return to the Ready To Test mode ...

Страница 50: ... next to the Run Time field A dialog will open with a drop down list of available choices Select the time that is appropriate for your process Do not make this time so short that you may miss the second inflection point Press the Ok button to accept the change 4 2 4 User Text The Model 225 can store a 12 character line of text that gets printed at the top of both the internal and external print ou...

Страница 51: ... baseline temperature of the external printout press the small button next to the Plot Baseline Temperature field and enter your new temperature in the dialog that appears The range is limited and indicated on the dialog Press the Ok button to accept the changes and transfer the new value to the Model 225 4 2 6 CTU Offset The CTU offset is a constant added to the CTU calculation TRICOR uses this v...

Страница 52: ... of the Model 225 data This includes the following features CTU or Slope Temperature Temperature unit Internal Printer Setup External Printer Setup option The Features group has two check boxes which indicate the availability of optional features These are indicators only they can not be clicked on to change the state of the feature ...

Страница 53: ... temperature units press the radio button in the Units group Both the Model 225 and the Configuration application use this setting when displaying any temperature 4 3 3 Internal Printer By default the internal printer is set to print the results of every chocolate sample tested It is possible to turn the auto printing off In this case the test will be performed and the final result saved in memory...

Страница 54: ... LCD There will not be any paper printout on the external printer You may go back later and print a result which is saved in memory In this case the auto printing flag is ignored To change the state of the external auto print flag click on the Enable Auto Print check box in the External Printer group 4 3 5 Clear Results The Model 225 saves previous test results so that they can be recalled and pri...

Страница 55: ...o toggle control screen on and off Normally the control loop toggle buttons should not be pressed The main software of the 225 may not restart the control if a test is started If you use these buttons to toggle control off TRICOR recommends that you turn off the Model 225 before making any chocolate test The Features group has two check boxes which indicate the availability of optional features Th...

Страница 56: ...ed TRICOR expects this information to be valuable when troubleshooting customer problems You may be asked to check these numbers 4 5 System Status Figure 4 5 Configuration Application System Tab The Status tab displays information about the Model 225 unit that is connected The Internal Power group displays the internal voltages and currents that are monitored The main power supply is 28 volts and ...

Страница 57: ... cooling of the chocolate sample while precisely measuring the temperature of the chocolate sample over a specified period of time If the chocolate did not generate heat during the crystallization process latent heat of crystallization the curve would fall at an exponential rate refer to Figure 5 1 approaching the cooling temperature However chocolate does generate heat during the crystallization ...

Страница 58: ... therefore not be suitable for the particular chocolate formulation being tested If this is the case users must define the required shape of the temper curve for their specific chocolate formulation The qualitative method at best provides a crude estimate of chocolate temper 5 3 Analytical Method The analytical method of interpreting the temper curve involves determining the Chocolate Temper Unit ...

Страница 59: ...e 5 2 Typical Chocolate Temper Curves Figure 5 3 illustrates a temper curve and the key parameters analyzed by the 225 The temper curve is analyzed to determine Tangent1 Time Temperature Slope First Inflection Point Tangent2 Time Temperature Slope Second Inflection Point ...

Страница 60: ...of the sample is not a factor in the test results This is not to say that temperature does not affect temper This is to say for a given temper present in the test sample the starting temperature is not a factor in the CTU and slope test results This is important since the temperature will vary slightly as part of the tempering process in order to maintain the desired temper Figure 5 3 Temper Curve...

Страница 61: ...ring processes For these types of activities a graphical plot temper curve allows visualization of the effects of formulation and process changes 5 3 2 CTU Criteria The CTU is a relative number providing a figure of merit for chocolate temper The smaller the number the less the temper i e 0 or negative is typically very under tempered and the larger the number the greater the temper i e 12 or grea...

Страница 62: ...ility Clean the intake air filter regularly Clean the sample well Use only the cleaning tool provided Vacuum or blow chocolate particles from the sample well Keep chocolate from entering the ventilation holes and connectors on the back of the unit Use the Model 225 in the best environment possible Avoid excessively hot and humid conditions Should you have any trouble with the Model 225 check the p...

Страница 63: ...ntinue The unit will be reset when the Cancel button is pressed All other warnings allow the user to continue A typical message is System Warning 23 Push Cancel To Continue This message indicates that the Model 225 is out of calibration A list of all the failure codes follows 01 The stored clock data is corrupted 02 The clock battery has failed time is invalid 03 The clock hardware has failed 04 T...

Страница 64: ...tion is due With the exception of the warning message the calibration due message causes no changes in the behavior of the Model 225 The out of calibration warning causes a banner to be added to the printed output from the Model 225 Warning 04 EEPROM data is corrupt can be caused by turning off the Model 225 while in the menu mode after making changes Always return to the ready to test mode before...

Страница 65: ...er 2 The next record is empty last record 3 No previous data record header 4 The next data record is corrupted 5 The previous data record is corrupted 6 The previous data record is empty first record 7 The current data record is corrupted 8 The data record has mismatched linkage 9 The data has no inflection 10 The data record has a bad checksum 11 No record was found The second number in the Bad R...

Страница 66: ...erature can be checked The temperature should not vary by more than 0 2 C once the stable temperature point is reached Be certain you have not exceeded the ambient temperature limits of the unit If problems persist call TRICOR Systems technical support department 6 6 Non Repeatable Results If inconsistent results are observed first check you procedure Are the users introducing variability because ...

Отзывы: