TRI TOOL INC.
92-0092 Rev. 210701
20
Secure the Clamshell to the Pipe
Clean the mating surfaces and the ID of the Clamshell halves.
Wipe clean the mounting surface of the pipe.
Check to ensure that the Tool Blocks will clear the pipe when the Clamshell is mounted.
Close the two halves of the Clamshell around the pipe, keeping the mating surfaces clean.
Check that the Alignment Pins have seated the two halves properly.
Bolt the two halves of the Clamshell together using the Locking Screws in the Housing and in
the Headstock.
Tightening torque should be 35 to 40 ft-lbs. (47 to 54 N-m).
If using Fixed Clamping Pads, clamp the Clamshell to the pipe as follows: if not, go to “If using
fixed Clamping Pads, P/N…” (See the following).
Tighten the Adjustable Pads lightly so that all four of the Clamping Pads contact the pipe.
Gently rock the Clamshell as you tighten the Adjustable Clamping Pads to seat the Clamshell
square on the pipe.
Check that all four Clamping Pads fully contact the pipe.
If not, repeat the last three steps.
Tighten the Clamping Pads.
Tightening torque should be 40 to 50 ft-lbs. (54 to 68 N-m).
Go to “General machining sequence.”
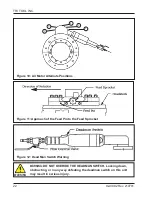
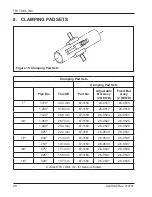
Figure 9: Fixed Pad Installation
Содержание 601SBM
Страница 1: ...Operation Manual 92 0092 Rev 210701 Model 601SBM Low Profile Clamshell ...
Страница 42: ...TRI TOOL INC 92 0092 Rev 210701 40 13 ILLUSTRATED PARTS BREAKDOWN MODEL 601SBM CLAMSHELL SUB ASSEMBLY ...
Страница 44: ...TRI TOOL INC 92 0092 Rev 210701 42 HOUSING ASSY DRIVE P N 19 0285 5 1 2 4 7 9 8 6 3 ...
Страница 46: ...TRI TOOL INC 92 0092 Rev 210701 44 MOTOR ASSY AIR P N 57 0083 5 4 2 3 8 1 6 7 ...
Страница 48: ...TRI TOOL INC 92 0092 Rev 210701 46 TOOL BLOCK STANDARD P N 08 0036 2 7 6 10 11 12 13 8 3 4 5 9 9 1 ...
Страница 50: ...TRI TOOL INC 92 0092 Rev 210701 48 TOOL BLOCK LOW PROFILE P N 08 0096 1 7 9 8 5 3 2 11 6 4 3 10 ...
Страница 54: ...THIS PAGE INTENTIONALLY LEFT BLANK ...
Страница 55: ......


