


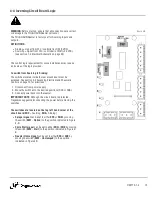


B. To Connect Air Supply
NOTE:
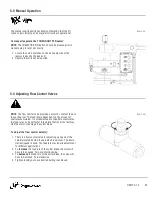
Push the HOME POSITION button before connecting air line.
1. Use only dry, filtered, lubricated air.
IMPORTANT:
Requirements:
80-100 psi at 16 CFM (5.5-7.0 bar at 450 LPM) at the reamer
during operation.
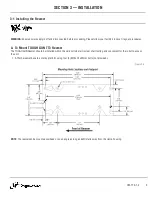
2. Use an air supply line with an inside diameter of 3/8". Connect to
a 1/4" NPT elbow located on the side of the reamer.
Figure 3-B
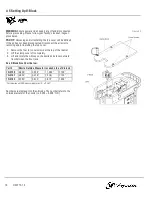
3-2 Installing the Wire Cutter
WARNING:
Ensure air and power supply is off and disconnected
before proceeding. Please follow your facility's lockout / tagout
procedures.
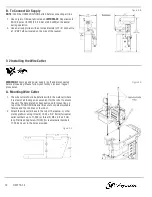
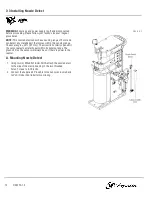
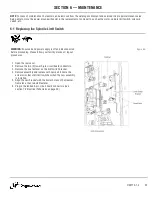
A. Mounting Wire Cutter
1. The wire cutter should be installed within the weld cell where
it is clear of all tooling and convenient for the robot to access
the unit. The base plate has been designed for mounting on
top of the TOUGH GUN Reamer. Be sure to consider movable
fixtures and the confines of the robot.
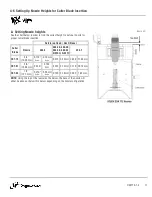
2. Attach the wire cutter base to the top of the reamer, or other
sturdy platform using three (3) 10-24 x 3/4” bolts (for reamer
serial numbers up to 11,299) or three (3) M5 x 0.8 x 25 mm
long Flat Head Cap Screw (FHCS) (for reamer serial numbers
11,300 and up) in the holes provided.
Figure 3-C
Figure 3-D
10
OM-TT3-1.4
Содержание TOUGH GUN TT3 Reamer
Страница 34: ...7 2 Electrical Schematic A TOUGH GUN TT3 Reamer 30 OM TT3 1 4...
Страница 41: ...NOTES 37 OM TT3 1 4...


