background image

Slash 

• 

11

The Traxxas TQ Radio System

Installing Transmitter Batteries

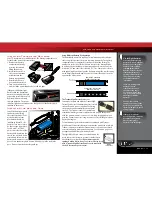
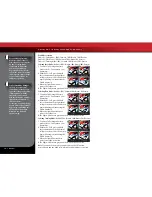
Your TQ transmitter uses 8 AA batteries. The battery compartment is 
located in the base of the transmitter.
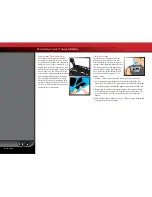
1. Remove the battery 

compartment door by 
pressing the tab and 
lifting the door up.

2. Install the batteries in 

the correct orientation 
as indicated in the 
battery compartment.

3. Reinstall the battery 

door and snap it closed.

4. Turn on the transmitter 

and check the power indicator for a solid red light.

If the power indicator light 
flashes, then the transmitter 
batteries are weak, discharged 
or possibly installed incorrectly. 
Replace with new or freshly 
charged batteries. The power 
indicator light does not indicate the charge level of the battery pack 
installed in the model.

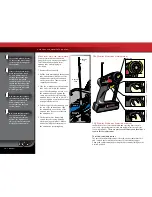
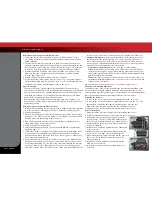
Installing the Battery Pack

Install the battery pack with 
the battery wires facing 
the rear of the model. Your 
model includes a foam 
block which should be 
installed in front of 6-cell 
batteries for a more secure 
fit. Remove the foam block 
for use with 7-cell “flat” 
packs. Insert the tabs of the 
battery hold-down into the 
slots in the rear hold-down 
retainer and then place the 
battery hold-down over the 
post. Secure the battery hold-down with body clip in the hole in the 
post.  Do not connect the battery pack yet.

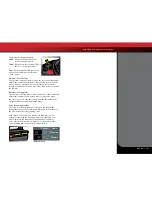
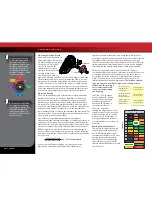
Using Different Battery Configuration

The battery hold-downs are capable of accommodating either side-by-
side racing style packs or the more common stick packs. The battery 
compartments are configured for stick packs from the factory. The 
number on each side of the hold down indicates the battery height 
in millimeters that hold-down can accommodate. Note that one side 
is labeled “25” and other side is labeled “23”. The 25mm side is for use 
with typical stick type battery packs. If you are using side-by-side racing 
packs, simply flip the hold-down over to the 23mm side and use it on the 
opposite side of the chassis. 

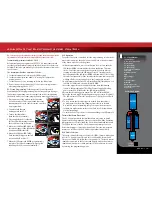
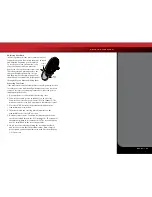
The Traxxas High Current Connector

Your model is equipped with the Traxxas High-

Current Connector. Standard connectors restrict 
current flow and are not capable of delivering 
the power needed to maximize the output of 
the XL-5. The Traxxas connector’s gold-plated 
terminals with a large contact surfaces ensure positive current flow 
with the least amount of resistance. Secure, long-lasting, and easy to 
grip, the Traxxas connector is engineered to extract all the power your 
battery has to give.

To run this model, your batteries must be equipped with Traxxas 

High-Current Connectors. Batteries can either be purchased new with 
Traxxas connectors installed or Traxxas connectors can be purchased 
to install on battery packs you already own. See sidebar on page 9 for 
packages available from your hobby dealer.

The typical Molex style connector is inadequate for 
use in your model. It creates resistance that becomes 
a bottleneck to current flow. 

If your battery pack is 

equipped with a Molex connector, it must be replaced 
with a Traxxas High-Current Connector to mate with 
the XL-5 electronic speed control.

CH.2

CH.1

Use the Right Batteries

Your transmitter uses AA 
batteries. Use new alkaline 
batteries, or rechargeable 
batteries such as NiCad 
or NiMH (Nickel Metal 
Hydride) batteries in your 
transmitter. Make sure 
rechargeable batteries are 
fully charged according 
to the manufacturer’s 
instructions.

If you use rechargeable 
batteries in your 
transmitter, be aware
that when they begin 
to lose their charge, they 
lose power more quickly 
than regular alkaline 
batteries. 

Caution: Discontinue 
running your model at the 
first sign of weak batteries 
(flashing red light) to avoid 
losing control.

If the power indicator 
doesn’t light red, check the 
polarity of the batteries. 
Check rechargeable 
batteries for a full charge.

Molex 

connector

25mm side: Standard 

NiMH stick pack setup

23mm side: Side-by-side 

NiMH pack setup

Foam Block

Содержание Slash 5805

Страница 1: ...owners manual MODEL 5805...

Страница 2: ...ovide just the right amount of bite and thick blinding clouds of dirt roost We know you re excited about getting your new model on the road but it s very important that you take some time to read thro...

Страница 3: ...Traxxas com You may also e mail customer support with your question at support Traxxas com Join thousands of registered members in our online community at Traxxas com Traxxas offers a full service on...

Страница 4: ...ter on First Switch on your transmitter first before switching on the speed control to prevent runaways and erratic performance Don t Get Burned The transistor tabs and the heat sinks can get extremel...

Страница 5: ...gh Current Connector NiMH battery charger peakdetectingtyperecommended seesidebar 2 0mm L wrench 1 5mm L wrench Turnbuckle wrench U joint wrench 4 way wrench Aftermarket servo adapters Pre load spacer...

Страница 6: ...own Receiver Box Antenna Mount Suspension Arm Front Front Bumper Steering Servo Shock Oil Damper Turnbuckle Toe Link Turnbuckle Front Camber Link Turnbuckle Rear Camber Link Rear Shock Tower Traxxas H...

Страница 7: ...s 3 Install the antenna See page 12 9 Detail your model See page 8 Install the antenna mast in the model Apply other decals if desired 4 Install batteries in the transmitter See page 11 10 Drive your...

Страница 8: ...ms The tires must be glued to the rims to prevent the rims from spinning inside the tires The instructions here are provided to show you how to glue replacement tires to the rims in the future Use CA...

Страница 9: ...witch Power Indicator Antenna Not Used Receiver Motor Titan 12T Traxxas High Current Connector Male to Battery Traxxas High Current Connector Male to Battery XL 5 Electronic Speed Control Channel 2 St...

Страница 10: ...control also has circuitry that prevents loss of steering and throttle control as the batteries lose their charge Frequency band The radio frequency used by the transmitter to send signals to your mod...

Страница 11: ...the hold down over to the 23mm side and use it on the opposite side of the chassis The Traxxas High Current Connector Your model is equipped with the Traxxas High Current Connector Standard connector...

Страница 12: ...t on the post just until the antenna tube is securely in place Do not over tighten or crush the antenna wire against the chassis 4 Fold the top of the antenna wire over the top of the antenna tube Sli...

Страница 13: ...teering trim located on the face of the transmitter adjusts the neutral center point of the steering servo when the servo is at rest Adjust this control to make the model drive straight with no steeri...

Страница 14: ...rear tires are off the ground If you are holding the model grip it firmly Make sure your hands are clear of the moving parts of the model 3 Plug the battery pack in the model into the speed control 4...

Страница 15: ...servo jump but the LED may not stay on Simply press the button again until the LED shines GREEN and then release Note If the throttle is not at neutral or if the throttle trim has been altered the LED...

Страница 16: ...ins blinking red indicating the Profile numbers 3 When the light blinks red twice release the set button 4 The light will then turn green and the model is ready to drive SelectingTrainingMode Profile...

Страница 17: ...en repetitively from a stop to top speed and with repetitive hard acceleration Tips for Increasing Run Time Use batteries with the highest mAh rating you can purchase Use a high quality peak detecting...

Страница 18: ...r the receiver box during wet running This can cause long term problems with the sensitive electronics in the receiver Removing the receiver box cover during storage allows the air inside to dry This...

Страница 19: ...smoothly and are more consistent while thicker oils provide more damping Use only 100 pure silicone shock oil to prolong seal life The model s ride height can be adjusted by adding or removing the cl...

Страница 20: ...t the model is close to factory stock weight and operates freely with no excessive friction dragging or binding and the battery is fully charged and in good condition The model is equipped with a Tita...

Страница 21: ...lation in the model 1 Disconnect the servo horn from the steering servo 2 Connect the steering servo to channel 1 on the receiver Connect the electronic speed control ESC to channel 2 The white wire o...

Страница 22: ...er Traxxas part 3744 the bellcrank bushings Traxxas part 2545 and the tie rod ends Traxxas part 2742 Replace these components as needed to restore factory tolerances Motor Every 10 15 runs remove clea...

Страница 23: ...e speed control is plugged into the throttle channel of the receiver Check operation of the throttle channel with a servo Bad battery or motor Check the operation with known good battery and motor XL...

Страница 24: ...080514 KC1130 1100 Klein Road Plano Texas 75074 1 888 TRAXXAS owners manual MODEL 5805...

Отзывы: