SLASH 4X4 ULTIMATE • 29
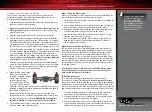
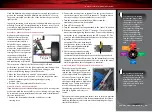
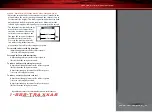
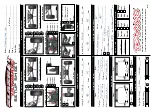
5. Slide the bumper assembly off of the chassis.
6. Remove the tie bar from the chassis.
7. Remove the two 3x15mm button-head screws from the differential
cover. Do not remove the two screws that secure the shock tower.
8. Remove the differential cover and slide the differential out of the
front of the case.
9. To reinstall the differential, reverse the steps.
Refilling the differentials:
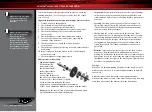
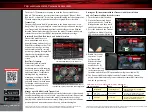
1. Remove the four 2.5x8mm screws from the differential case and
carefully pull the differential case halves apart. Work over a towel
to collect any fluid that drips from the differential.
2. Drain the fluid from the differential. You may wish to remove the
spider gears from the differential to make this easier.
3. Place the spider gears back into the differential case, if you
removed them. Fill the diff case with fluid until it the spider gears
are submerged half way.
4. Rejoin the differential case halves, using care to align the screw
holes. Be sure the rubber gasket is in place, or the differential
may leak.
5. Install the 2.5x8mm screws and tighten securely.
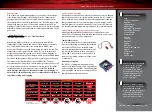
Center differential
The optional included center differential allows the power from
the motor to be transferred to the front and rear differentials
independently from one another. When the rear wheels are under
more load than the front wheels, more power will be transmitted to
the front wheels. This is very beneficial on rough terrain and makes
hard acceleration from low speeds easier to control by keeping
the nose down. The center differential is assembled with 100K
differential lube from the factory. This viscosity will be a good base
point for most conditions.
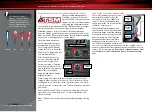
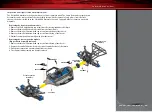
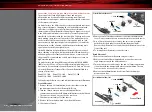
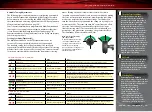
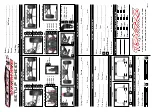
1. Locate and remove the two 4x12mm button head machine
screws from the top rear of the chassis and the two 4x14mm
button head machine screws from the bottom of the rear
suspension bulkhead (See page 25 for reference).
2. Remove the modular rear end from the chassis by sliding it
backward away from the chassis. This is to access the spur gear/
slipper unit. Remove the spur gear/slipper unit from the rear of
the chassis.
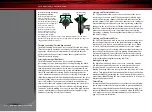
3. Insert the included center differential unit into the rear of the
chassis (where the spur gear/slipper unit was removed). Stand
the chassis up on the front bumper to hold the spur gear steady
and line it up with the pinion gear. The splined shaft adapter
must key into the aluminum center drive shaft.
4. Attach the rear end unit to the chassis keying in the rear output
shaft of the center differential with the opening in the rear
differential. Secure the assembly with the same four button-
head screws.
Tip
: Rotate the rear wheels slowly while attaching the rear end
to the chassis to properly set the rear output shaft of the center
differential into the rear differential. You should feel the rear end
set into place. The rear skid plate should lock into the bottom of
the chassis.
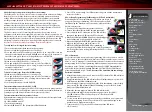
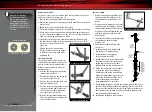
TUNING AND MAINTAINING THE SHOCKS
Slash 4X4 Ultimate features high-performance GTR shocks that
utilize friction-reducing titanium nitride shafts and hard-anodized
bodies with PTFE-coated bores to provide the ultimate in precise
damping control. The shocks are filled with 30W silicone fluid. You
may wish to install lower-viscosity (“thinner”) or higher-viscosity
(“thicker”) fluid to alter damping performance to suit your track,
terrain, or driving style. Damping can also be altered by changing
the pistons inside the shocks. The front piston is a 2-hole with
1.5mm diameter holes. The rear piston is a 2-hole with 1.6
diameter holes.
Shock Oil
The 4 oil-filled aluminum shocks (dampers) effectively control the
suspension movement by preventing the wheels and tires from
continuing to “bounce” after rebounding from a bump. Changing
the oil in the shocks can vary the suspension damping effect.
Changing the oil to a higher viscosity oil will increase damping.
Lowering the viscosity of the oil will cause the suspension damping
to be reduced. Damping should be increased (with higher viscosity
oil) if the model is bottoming easily over jumps. Damping should be
decreased (with thinner viscosity oil) if the model is hopping over
small bumps and feels unstable. The viscosity of shock oil is affected
by extremes in operating temperature; an oil of certain viscosity will
become less viscous at higher temperatures and more viscous at
lower temperatures. Operating in regions with cold temperatures
may require lower viscosity oil. From the factory, the shocks are filled
with SAE-30W silicone oil. Only use 100% silicone oil in the shock.
ADVANCED TUNING ADJUSTMENTS

