SLASH 4X4 ULTIMATE • 23
Suspension and slipper clutch assembly removal
The Slash 4X4 Ultimate was designed with ease of disassembly in mind. The entire front and rear suspension
assemblies can be removed from the chassis fully intact with the removal of only a few screws. Refer to the
exploded views included in the Slash 4X4 Ultimate Service Support Guide for complete assembly diagrams.
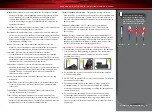
Removing the front suspension module
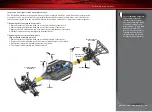
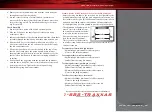
1. Remove the two 4x12 button-head cap screws from the front of the chassis.
2. Remove the two 4x10 button-head cap screws from the top of the chassis.
3. Remove the 3x15 button-head cap screw from the steering link under the chassis.
4. Pull the front suspension assembly away from the chassis.
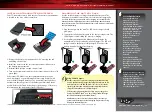
Removing the rear suspension module
(Slipper clutch assembly removal)
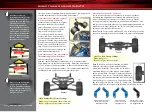
1. Remove the two 4x12 button-head cap screws from the top of the chassis.
2. Remove the two 4x12 button-head cap screws from the bottom of the chassis.
3. Pull the rear suspension assembly away from the chassis.
4. The slipper clutch assembly can now be removed.
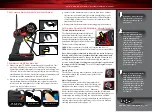
maintaining your model
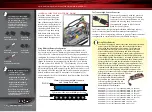
The rear bulkhead (skid plate
under spur gear) has two
small holes in the bottom.
These are for drainage of this
area when running in very
wet conditions. To keep extra
dust/dirt out of the spur
gear, 3mm set screws can be
installed into these holes to
limit dirt entry. Use Traxxas
Part #2743 (sold separately).
4x10BCS
4x12BCS
4x12BCS
4x12BCS
3x15BCS
Rear Suspension
Assembly
Front Suspension
Assembly
Slipper Clutch
Assembly

