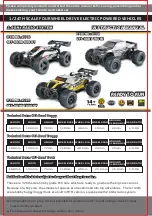
background image

18 

 GRAVE DIGGER

Precautions
• Without proper care, some parts of your model can be seriously 

damaged due to contact with water. Know that additional 
maintenance procedures will be required after running in wet 
conditions in order to maintain the performance of your model. 
Do not run your model in wet conditions if you are not willing 
to accept the additional care and maintenance responsibilities.

• Not all batteries can be used in wet environments. Consult your 

battery manufacturer to see if their batteries can be used in wet 
conditions. 

• The Traxxas TQi transmitter is not water resistant. Do not subject 

it to wet conditions such as rain.

• Do not operate your model during a rain storm or other inclement 

weather where lightning may be present.

• Do NOT allow your model to come in contact with salt water 

(ocean water), brackish water (between fresh water and ocean 
water), or other contaminated water. Salt water is highly 
conductive and highly corrosive. Use caution if you plan to run 
your model on or near a beach.

• Even casual water contact can reduce the life of your motor. 

Special care must be taken to modify your gearing and/or your 
driving style in wet conditions to extend the life of the motor 
(details follow). 

Before Running Your Vehicle in Wet Conditions

1. Consult the section “After Running Your Vehicle in Wet 

Conditions” before proceeding.  Make sure you understand the 
additional maintenance required with wet running.

2. The wheels have small holes molded in to allow air to enter and 

exit the tire during normal running. Water will enter these holes 
and get trapped inside the tires if holes are not cut in the tires. 
Cut two small holes (3mm or 1/8” diameter) in each tire.  Each 
hole should be near the tire centerline, 180 degrees apart. 

3. Conirm that the RX box O-ring and cover are installed correctly 

and secure. Make sure the screws are tight and the blue O-ring is 
not visible protruding from the edge of the cover.

4. Conirm that your batteries can be used in wet conditions.
5. Use lower gearing (smaller pinion gears, as low as 12T or spur 

gear as large as 90T) when running in mud, deep puddles, snow, 
or other similar situations that will restrict the tires and put much 
higher loads on the motor. 

Motor Precautions

• Titan motor life can be greatly reduced in mud and water. If 

the motor gets excessively wet or submerged, use very light 
throttle (run the motor slowly) until the excess water can run 
out. Applying full throttle to a motor full of water can cause rapid 
motor failure. Your driving habits will determine motor life with a 
wet motor. Do not submerge the motor under water.

• Do not gear the motor by temperature when running in wet 

conditions.  The motor will be cooled by water contact and will 
not give an accurate indication of appropriate gearing.

After Running Your Vehicle in Wet Conditions

1. Drain the tires by spinning the tires at high speed to “sling” the 

water out. One way to do this is to make several high-speed 
passes on a lat, dry surface, if possible.

2. Remove the batteries.
3. Rinse excess dirt and mud off the truck with low-pressure water, 

such as from a garden hose.  Do NOT use pressure washer 
or other high-pressure water. Avoid directing water into the 
bearings, transmission, etc.

4. Blow off the truck with compressed air (optional, but 

recommended). Wear safety glasses when using compressed air. 

5. Remove the wheels from the truck.
6. Spray all the bearings, drivetrain, and fasteners with WD-40

®

 or 

similar water displacing light oil.

7. Let the truck stand or you may blow off with compressed air. 

Placing the truck in a warm sunny spot will aid drying. Trapped 
water and oil will continue to drip from the truck for a few hours. 
Place it on a towel or piece of cardboard to protect the surface 
underneath. 

8. As a precautionary step, remove the sealed receiver box 

cover. While unlikely, humidity or tiny amounts of moisture or 
condensation may enter the receiver box during wet running.  
This can cause long-term problems with the sensitive electronics 
in the receiver.  Removing the receiver box cover during storage 
allows the air inside to dry. This step can improve the long-
term reliability of the receiver. It is not necessary to remove the 
receiver or unplug any of the wires.

9. 

Additional Maintenance

: Increase your frequency of 

disassembly, inspection and lubrication of the following items:  
This is necessary after extended wet use or if the vehicle will 
not be used for an extended period of time (such as a week or 

DRIVING YOUR MODEL

Содержание Grave digger 3603x

Страница 1: ...л чит т нич ю н льт цию гл т чн Б з вы дны www sotmarket ru д бн я инф м ция т в тзывы бз ы и ы Инструкция для Grave Digger 1 10 30th Anniv Traxxas Перейти в карточку товара 8 800 775 98 98 ...

Страница 2: ...owner s manual MODEL 3603X ...

Страница 3: ... support possible Traxxas models are about experiencing total performance and satisfaction not just with your model but also with the company that stands behind it We know you re excited about getting your new model on the road but it s very important that you take some time to read through the Owners Manual This manual contains all the necessary set up and operating procedures that allow you to u...

Страница 4: ...POINTS TO REMEMBER Your model is not intended for use on public roads or congested areas where its operation can conlict with or disrupt pedestrian or vehicular trafic Never under any circumstances operate the model in crowds of people Your model is very fast and could cause injury if allowed to collide with anyone Because your model is controlled by radio it is subject to radio interference from ...

Страница 5: ...y Diodes External schottky diodes are not compatible with reversing speed controls Using a schottky diode with the XL 5 will damage the ESC and void the 30 day warranty BATTERIES AND BATTERY CHARGING The XL 5 speed control uses rechargeable batteries that must be handled with care for safety and long battery life Make sure to read and follow all instructions and precautions that were provided with...

Страница 6: ...e the Right Batteries on page 11 Optional Pinion Gear see page 21 Aftermarket servo adapters Various pre load spacers and shock pistons on parts tree see page 20 Battery pad to reduce battery vibration if necessary NiMH battery charger Body clips and body washers 4 way wrench 7 cell NiMH battery pack with Traxxas High Current Connector REQUIRED EQUIPMENT sold separately Battery and charger style a...

Страница 7: ... Battery Battery Hold Down Receiver Box Front Body Mount Antenna Mount Camber Link Suspension Arm Front Bulkhead Front Bumper Front Shock Tower Steering Servo Shock Oil Damper Turnbuckle Tie Rod Suspension Arm Rear Caster Block Steering Block ANATOMY OF THE MODEL Traxxas High Current Connector LED Light Connector ...

Страница 8: ...d that there is no interference from outside sources 3 Install batteries in the transmitter See page 11 8 Drive your model See page 17 The transmitter requires 8 AA alkaline or rechargeable batteries Driving tips and adjustments for your model 4 Install battery pack in the model See page 12 9 Maintaining your model See page 22 Your model requires a fully charged 7 2 volt battery pack Follow these ...

Страница 9: ...uence to provide rotation Opposite of a brushed motor the brushless motor has its windings coils on the perimeter of the motor can and the magnets are mounted to the spinning rotor shaft ESC Electronic Speed Control An electronic speed control is the electronic motor control inside the model The XL 5 uses MOSFET power transistors to provide precise digital proportional throttle control Electronic ...

Страница 10: ...eering Voltage Voltage is a measure of the electrical potential difference between two points such as between the positive battery terminal and ground Using the analogy of the garden hose while current is the quantity of water low in the hose voltage corresponds to the pressure that is forcing the water through the hose IMPORTANT RADIO SYSTEM PRECAUTIONS For maximum range always point the front of...

Страница 11: ...ink Button LED Sensor Expansion Port Accessory sensor port for use with TQi Docking Base see Traxxas com and included materials for more information WIRING DIAGRAM C C C C C R V BA TT C C C C C R V BA TT S S Voltage Temp Senor Port RPM Sensor Port B B To Lights Channel 4 Channel 3 Channel 1 Not used Accessory sensor port for use with TQi Docking Base see Traxxas com and included materials for more...

Страница 12: ...dicating the battery is charging 3 The battery should charge for approximately 8 hours The LED will turn green when the battery is fully charged Disconnect the battery from the charger after charging 2 3 1 Using Other Chargers Another convenient option for charging the included battery is an AC peak detecting charger that plugs directly into an AC wall outlet such as the TRX EZ Peak Part 2930 It c...

Страница 13: ...elp to prevent your model from receiving stray signals from another transmitter or other source and running out of control Your model has electronic fail safes to prevent this type of malfunction but the first best defense against a runaway model is to always turn the transmitter on first and off last Always use new or freshly charged batteries for the radio system Weak batteries will limit the ra...

Страница 14: ...your hands are clear of the moving parts of the model 3 Plug the battery pack in the model into the speed control 4 The on off switch is integrated into the speed control With the transmitter on press and release the EZ Set button 25 seconds The LED will shine RED see note below This turns the model on To turn the XL 5 off press and hold the EZ Set button until the LED turns off 5 seconds Note If ...

Страница 15: ...e Confirm that the steering and throttle operate properly before driving your model Steering Sensitivity Exponential The Multi Function knob on the TQi transmitter has been programmed to control Steering Sensitivity also known as exponential The standard setting for Steering Sensitivity is normal zero exponential with the dial full left in its range of travel This setting provides linear servo res...

Страница 16: ...gramming steps before you begin If you get lost during programming or receive unexpected results simply unplug the battery wait a few seconds plug the battery pack in and start over 1 Disconnect one of the motor wires between the XL 5 and the motor This is a precaution to prevent runaway when the speed control is turned on before it is programmed 2 Turn on the transmitter with the throttle at neut...

Страница 17: ... pressed down and the blink cycle will repeat until the button is released and a Mode is selected LED Codes and Protection Modes Solid Green XL 5 power on light Low Voltage Detection is ACTIVATED LiPo setting Solid Red XL 5 power on light Low Voltage Detection is DISABLED NiMH setting Never use LiPo batteries while Low Voltage Detection is disabled Fast Blinking Red The XL 5 is equipped with therm...

Страница 18: ... speeds This will help insure that the motor provides the best performance and longest life About Run Time A large factor affecting run time is the type and condition of your batteries The milliamp hour mAh rating of the batteries determines how large their fuel tank is A 3000 mAh battery pack will theoretically run twice as long as a 1500 mAh sport pack Because of the wide variation in the types ...

Страница 19: ...uations that will restrict the tires and put much higher loads on the motor Motor Precautions Titan motor life can be greatly reduced in mud and water If the motor gets excessively wet or submerged use very light throttle run the motor slowly until the excess water can run out Applying full throttle to a motor full of water can cause rapid motor failure Your driving habits will determine motor lif...

Страница 20: ...ving the Receiver 1 Remove the wire clamp by removing the two 2 5x8mm cap screws 2 Remove the cover by removing the two 3x10mm cap screws 3 To remove the receiver from the box simply lift it out and set to the side The antenna wire is still inside the clamp area and cannot be removed yet 4 Unplug the servo cables from the receiver and remove the receiver Receiver Installation 1 Install the electro...

Страница 21: ...hole piston with a lightweight oil will at one point give you the same dampening as a three hole piston with heavier oil We recommend using the two hole pistons with a range of oil viscosities from 10W to 50W available from your hobby shop The thinner viscosity oils 30W or less low more smoothly and are more consistent while thicker oils provide more dampening Use only 100 pure silicone shock oil ...

Страница 22: ...Loosen the motor screws and slide the motor and pinion gear into the spur gear Retighten the motor screws and then remove the strip of paper You should be able to run a fresh strip of paper through the gears without binding them Centering Your Servo If the trim controls on your transmitter seem off you may need to re center your servo Additionally whenever your servo has been removed for service o...

Страница 23: ... saver Traxxas part 3744 the bellcrank bushings Traxxas part 2545 and the tie rod ends Traxxas part 2742 Replace these components as needed to restore factory tolerances Motor Every 10 15 runs remove clean and lubricate the motor Use a product such as electric motor cleaning spray to lush dirt out of the motor After cleaning lubricate the bushings at each end of the motor with a drop of light weig...

Страница 24: ...epresent what you wish to be the servo s maximum travel the Steering Percentage or Braking Percentage functions will not override the End Point settings Steering and Throttle Sub Trim The Sub Trim function is used to precisely set the neutral point of the steering or throttle servo in the event that simply setting the trim knob to zero does not completely center the servo When selected Sub Trim al...

Страница 25: ...green four times repeatedly 4 Press SET once The status LED will blink green once repeatedly 5 Press MENU once The status LED will blink green twice repeatedly 6 Press SET The memory is now selected to be deleted Press SET to delete the model Press and hold MENU to return to driving mode Failsafe Your Traxxas radio system is equipped with a built in failsafe function that returns the throttle to i...

Страница 26: ...t and press set to save To reset max throw Let go of controls and press SET The menu tree below shows how to navigate through the TQi transmitter s various settings and functions Press and hold MENU to enter the menu tree and use the following commands to navigate through the menu and select options MENU When you enter a menu you always start at the top Press MENU to move down the menu tree When y...

Страница 27: ... LED blinks Press SET red LED blinks x3 Press MENU twice red LED blinks x3 Turn steering wheel to desired max left and right travel x8 Press SET to save each position Turn steering wheel to test settings IF END POINTS ARE OK Press hold MENU returns to driving mode IF END POINTS NEED TO BE CHANGED Press SET and repeat steps 6 8 To reset the END POINTS of STEERING servo to defaults Press hold MENU g...

Страница 28: ...g options Control Drive Effects settings such as steering and throttle sensitivity steering percentage braking strength and throttle trim by simply touching and dragging the sliders on the screen Real Time Telemetry When you equip your model with sensors the Traxxas Link dashboard comes to life showing you speed battery voltage RPM and temperature Set threshold warnings and log maximums minimums o...

Страница 29: ... Texas 75074 1 888 TRAXXAS MODEL 3603X MONSTER JAM and MONSTER JAM logo are registered trademarks of Feld Motor Sports Inc and used under license to Traxxas LP All MONSTER JAM photography and artwork Feld Motor Sports Inc All rights reserved ...

Страница 30: ...л т з з любым д бным б м гл т чн я л жб дд ж и Д т в з з в в ии ф мл ни дит нл н з 2 мин ты м нии Д т в и л т вин и тзывы ции и ид и Grave Digger 1 10 30th Anniv Traxxas Описание Характеристики ...

Отзывы: