Page 37
MASONRY FIREPLACE INSERT INSTALLATION (Cont.)
Installation Using a Positive Connection (Continued)
8.
With the connector in place, you have now completed the positive connection for your insert. It is a
good idea to check your connection by trying to rock the chimney connector back and forth. If it feels
snug, a good connection is established. If you can feel some play when you rock it back in forth,
make sure that the insert is properly aligned and that the connector fits tight in the flue collar on top of
the insert.
9.
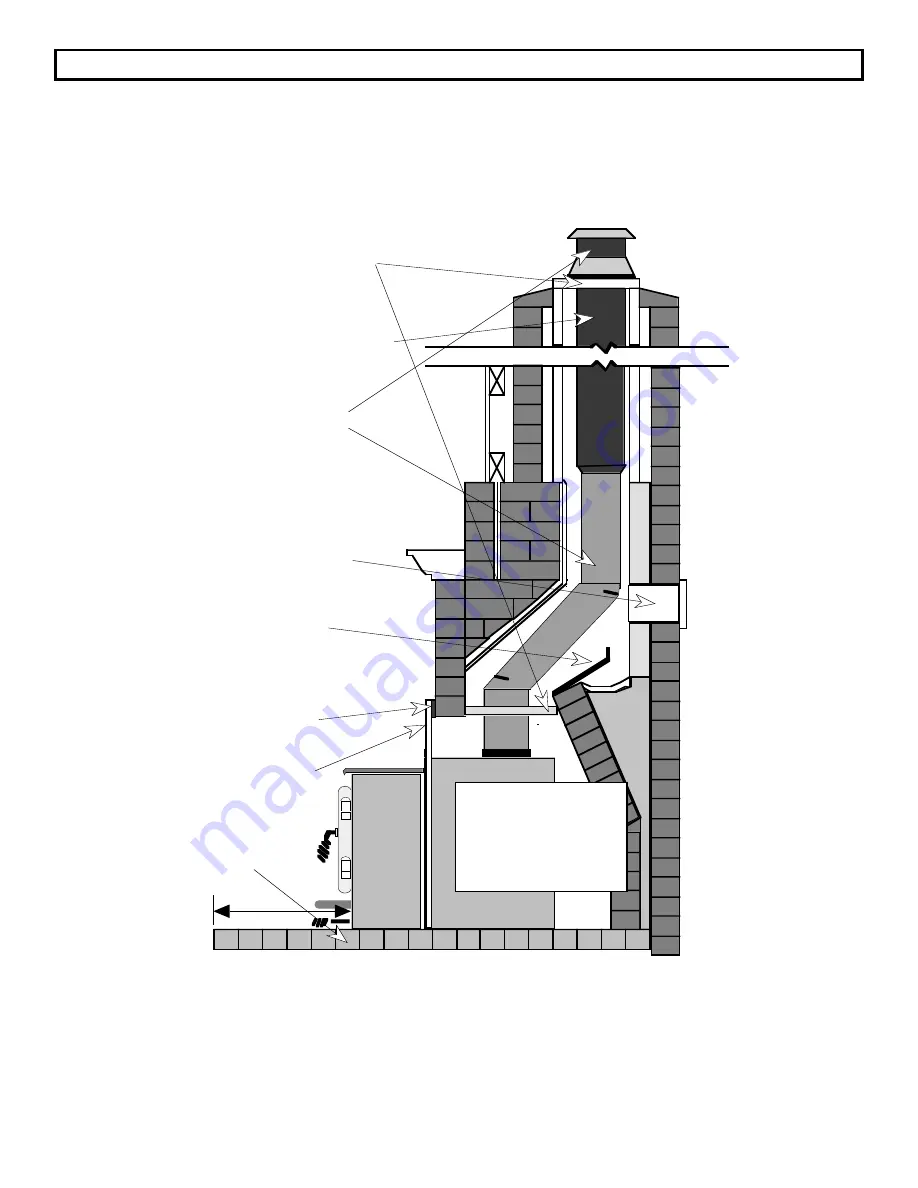
Take a look at the illustration below. Make sure all of the items listed below are completed.
Non-Combustible
Material
Remove Damper or
Wire it Open
Insulation
(Optional)
Airtight Insulated
Clean-Out
Stainless Steel
Chimney Liner System
Follow Liner
Manufacturer's
Instructions on
Installation and
Support
Optional Face Seal
Must be sealed at
the top (preferable)
or with a block-off
plate
18" Min.
The Extended Installation
is shown here. For the
flush or bay installation
follow the specifications
given for that type of
installation.
10. To install the surround panels, follow the directions listed in the section "INSTALLING SURROUND
PANELS" .
Follow the installation instructions in reverse order for periodic inspection and cleaning.


