background image

4

Driver Installation

     5.1 Windows detect & install new device
     

Make sure the OS of PC is Windows XP 

      and the version is above (or equal) SP2. 

      (Windows Vista is allowable).

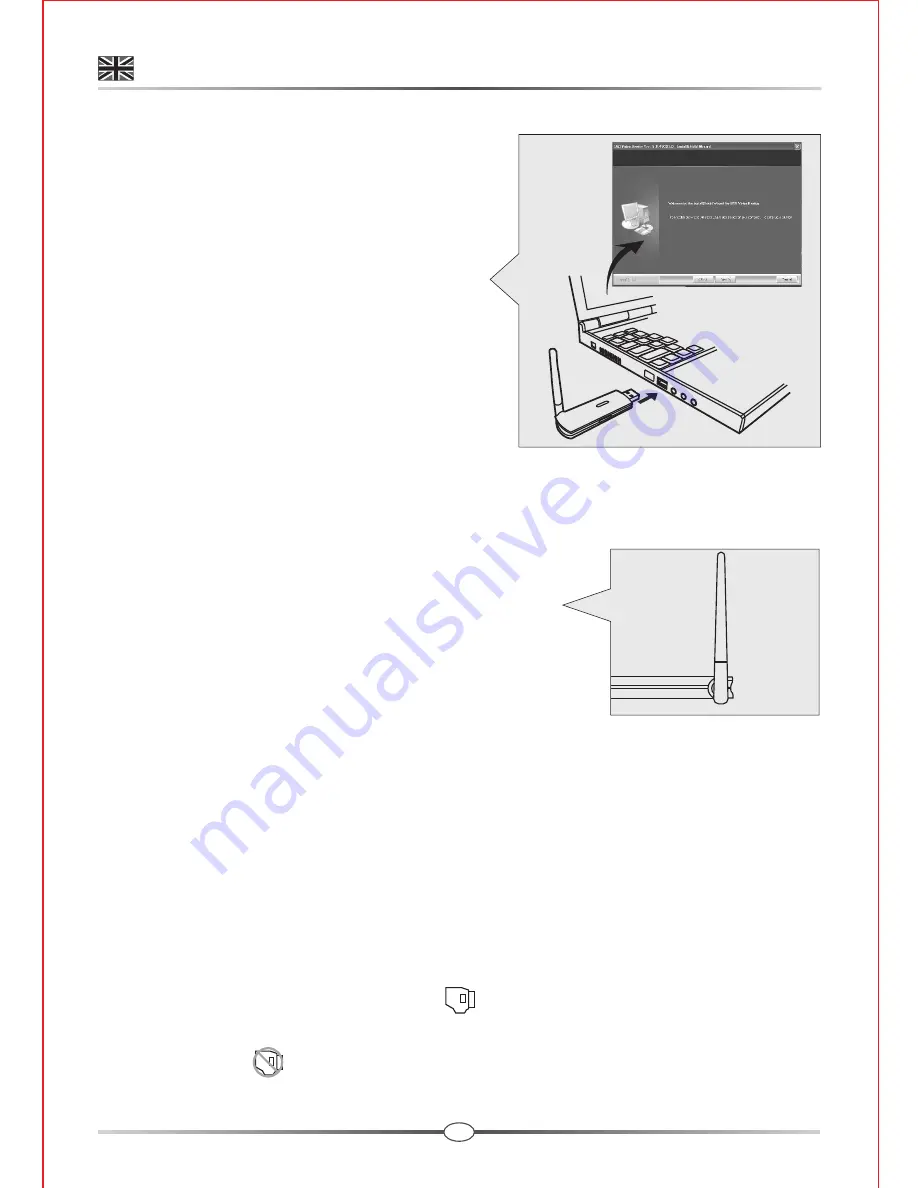
      1.   Insert the USB Receiver into one USB 

            port of PC and the "

Found New 

            Hardware wizard"

 screen will appear.


Note: 

If the device has been searched 

                      and the screen isn't showed, 

                      please follow 

5.2-2

.

      2.   Choose "

Install the software auto

            matically(Recommended)"

 in this screen and click "

Next"

. (The wizard 

            will detect & install the device automatically.) 

      3.   Click "

Finish"

 to complete the device installation.


Note: 

In order to let the USB receiver get the 

                      best function, we propose strongly to

                      consult the figure while you are 

                      operating.


5.2 Driver installation (Disk 1)

      1.   Insert the provided CD-ROM into your CD-ROM drive of PC and access to 

            D:\Driver\ (Where D is the letter of your CD-ROM drive). 

      2.   Double-click the execution file named "

RFVideoClassUSB20PCCam_

            v5.8.5003.X.exe"

 and the "

Welcome to the InstallShield Wizard for 

            USB Video Device"

 screen will appear.

      3.   Follow the steps and click"

Finish

" to complete the driver installation.

      4.   Restart the computer, you can use the USB Receiver correctly now.


Note 1:

 When the USB driver is well installed and the USB Receiver plug in 

                   the computer, you can find         icon on the task tray. If the USB 

                   Receiver unplug from the computer, the icon displays with a cross 

                   mark        . 


ENGLISH

Receiver

Содержание GigaAir D8252

Страница 1: ...2 4 GHz Digital Wireless USB Camera User s Manual Preliminary Version 2 3...

Страница 2: ...ng 4 3 Night Light Night Vision 5 Receiver Setup 5 1 Windows Detect Install New Device 5 2 Driver Installation 5 3 Skype Resident Program Installation 5 4 Monitoring Software 5 5 Pairing 6 Details on...

Страница 3: ...cator LEDs 3 Camera switch Pairing button 4 USB plug Note For Pairing see section 5 5 Camera 1 Antenna 2 Power indicator LED 3 Infrared LEDs 4 Lens 5 Supporting stand 6 Night light IR control pairing...

Страница 4: ...ttery compartment cover 3 Insert 4 AAA size batteries follow the plus and minus signs inside the battery compartment 4 Close the battery compartment cover and make sure it is locked securely Note 1 Do...

Страница 5: ...s the observation area and adjust the angle by rotating the lens head 4 3 Night Light Night Vision Press the night light button the night light LEDs will remain ON The camera has nine high intensity i...

Страница 6: ...receiver get the best function we propose strongly to consult the figure while you are operating 5 2 Driver installation Disk 1 1 Insert the provided CD ROM into your CD ROM drive of PC and access to...

Страница 7: ...ls on the Skype resident program installation see the following section 6 5 4 Monitoring Software Disk 2 For further details on the Monitoring software installation please consult the manual file in t...

Страница 8: ...cess button to permit Remote Monitoring program to connect to Skype In case if you click Deny access button or forgot to click Allow access button you can enable Remote Monitoring program to access Sk...

Страница 9: ...ring program operation Three states of program icon When the Remote Monitoring program is well installed and launched you can find its program icon on the task tray If the camera s USB dongle unplug f...

Страница 10: ...watch camera remotely You can set up camera to monitor secure area remotely Setup camera 1 Turn on the computer and make sure the USB receiver plugged to the computer securely Adjust the camera view t...

Страница 11: ...security area 2 After several ringing the call will be answered with a chat message asking for a password 3 If the password you enter is not correct a chat message will ask you to enter password again...

Страница 12: ...n on the infra red light Turn off the infra red light Set the infra red light to auto mode The infra red light turns on if the lighting condition is not good Set the infra red light to manual mode LED...

Страница 13: ...e electronic circuit boards Do not attempt to open the case Non expert handling of the device may damage the system Avoid dropping or strong shocks Operate this product using only with the power suppl...

Страница 14: ......

Отзывы: