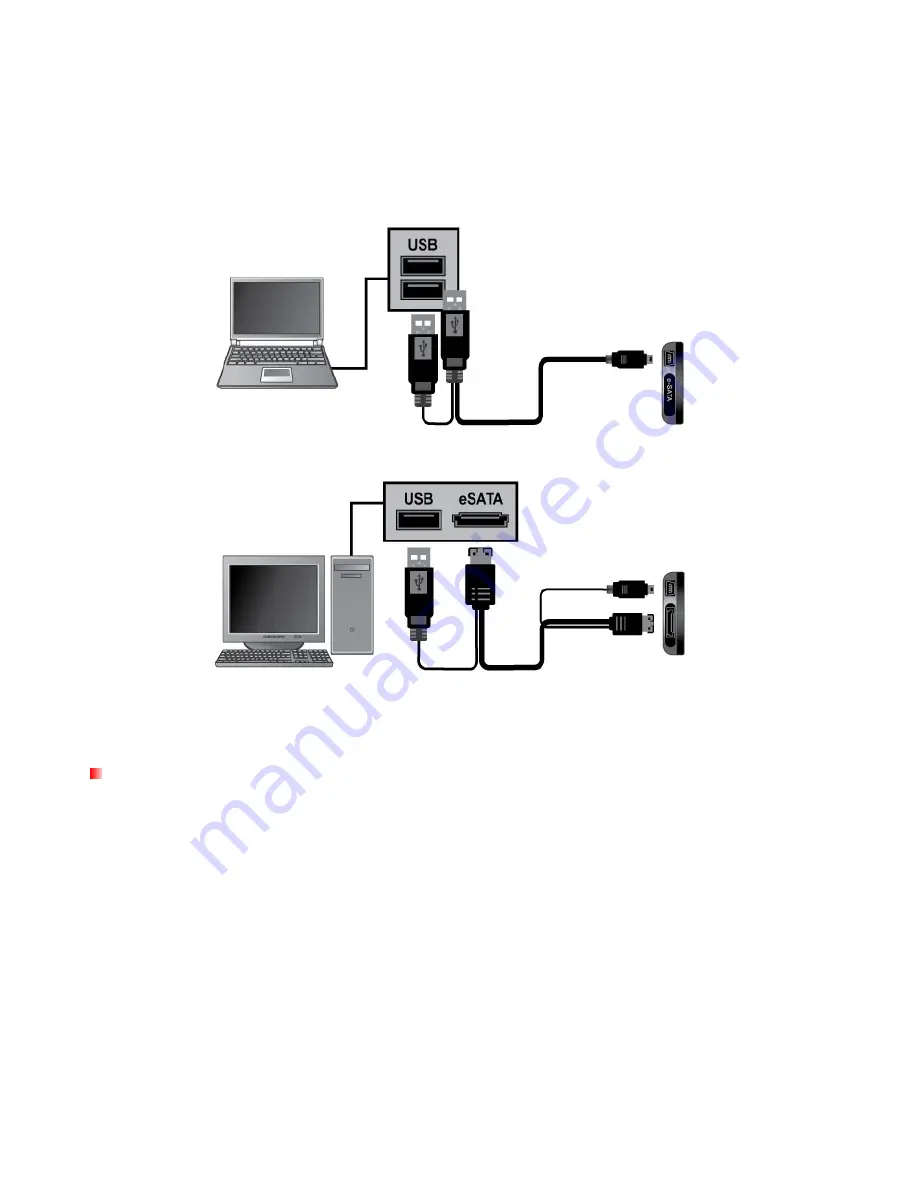
Connecting to a Computer
︱
The SSD can be connected to your computer in two ways:
USB 2.0
or
eSATA.
To get the best performance
results from your SSD, we strongly recommend using the eSATA interface. If your computer does not have
an eSATA port, you may need to purchase an SATA to eSATA adapter bracket (often included in PC
motherboard packaging) or a PCI / PCI-X / PCI-Express eSATA card to connect your SSD using eSATA.
Otherwise, you can simply connect the SSD via USB.
Connecting to Notebook or PC using USB
Connecting to a PC using eSATA
Windows
®
2000/XP
1.
Connect the SSD to your computer:
– eSATA –
A. Plug both the eSATA and mini USB ends of the eSATA cable into the SSD.
B. Connect the large USB connector on the other end of the cable to a working USB port on your
desktop computer. The SSD requires this connection to ensure adequate power.
C. Plug the other eSATA connector into your computer’s eSATA port (usually on the back of the
computer)
– USB –
A. Plug both large ends of the USB Y-cable into available USB ports on your desktop computer or
notebook.
B. Plug the small end of the cable into the mini USB port on the SSD.
2.
When the SSD is successfully connected to a computer, Windows will automatically detect and install
drivers for it. If you connected via eSATA and Windows does not auto-detect the SSD, you may have to
enter the Device Manager and select “
Scan for Hardware Changes
.”
7
Содержание SSD18M
Страница 1: ...1 8 Solid State Drive User s Manual 1...
Страница 6: ...Product Overview A USB Port B eSATA Port C LED Indicator Light 6...
Страница 13: ...4 In the Policies tab ensure that the Enable write caching option is not checked 13...
Страница 21: ...21 9 Type mkdir mnt SSD 10 Type mount mnt SSD...


