background image


10


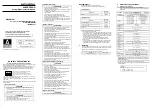
Section 3.0 Installation and Calibration  


3.1 Mechanical Installation 

The SSD120-(XX)M series altitude encoder/digitizer may be mounted in 
any attitude within the body of the altimeter, but should be mounted to 
insure no interference with the altimeter mechanism, and no obstruction of 
the SSD120-(XX)M static pressure inlet. The mounting position should 
insure that the 26 pin mating connector does not interfere with the 
altimeter static port connection or other electrical or mechanical 
connections required for the altimeter’s operation. 
 
Manufacture an opening in the altimeter case per the outline drawing for 
the 

Connector Panel Cutout 881667

. Be sure to provide a flat surface to 

which the connector O-Ring can seal. Secure the encoder/digitizer to the 
altimeter case using the 1

c

-18 nut provided. Refer to the outline drawing 

for mechanical dimensions and the sample installation diagram. 


3.2 Electrical Installation 

The encoder/digitizer is designed to operate with a +9 to +28VDC power 
source. This voltage can be A+ switched power provided by the 
transponder or can be provided by the avionics buss, protected with the 
appropriate fuse or circuit breaker. 


3.2.1 Parallel Altitude Data Connection 

The outline drawing provides electrical connector pin/function 
data. Use this information when connecting the encoder/digitizer to 
the transponder. In some installations where older transponders are 
in use, the transponder may not provide an “altitude disable” 
function. In this case a panel mounted switch may be required. 


3.2.2 Serial Altitude Data Connection 

Connect the TxD (transmit data) pin X (TxD1) or pin U (TxD2) 
from the connector to the receive data RxD port on the GPS or 
other navigation device. See connection 

Table V 

as well as the


GPS Connection Data.

 Be sure to connect a ground from the 

encoder/digitizer to the receiving GPS unit to ensure good data 
transmission. Shielded cable is recommended for both serial and 
parallel data wiring assemblies. 


Содержание SSD120 M Series

Страница 1: ...Pending Model SSD120 XX M Modular Altitude Encoder Digitizer Series TSO C88a Approved Trans Cal Industries Inc Van Nuys Airport 16141 Cohasset Street Van Nuys CA 91406 2908 818 787 1221 FAX 818 787 8...

Страница 2: ...c type or class of aircraft to determine that the aircraft operating conditions are within TSO standards Trans Cal Industries Inc 16141 Cohasset Street Van Nuys CA 91406 818 787 1221 800 423 2913 818...

Страница 3: ...2 1 Parallel Altitude Data Connection 10 3 2 2 Serial Altitude Data Connection 10 3 3 Serial Data Port Test Equipment 11 3 4 Parallel Data Port Test Equipment 11 Section 4 0 Configuration and Calibrat...

Страница 4: ...mission In accordance with U S National Standards for Common System Component Characteristics for the I F F Mark X SIF Air Traffic Control Radar Beacon System SIF ATCRBS The serial altitude data is pr...

Страница 5: ...tizer serial data is 100 feet To enable 10 foot resolution configure the SSD120 XX M via software see 4 4 1 2 4 Mechanical Characteristics Model Number Dimensions Weight All models See outline drawing...

Страница 6: ...Maximum Sink Current 50 milliamperes Maximum Cable Length 4000 feet 1219 meters Input Signal Requirement Pin A strobe or signal common must be either rounded or connected to the transponder 1 4 Serial...

Страница 7: ...is referred to in 4 4 Protocol 1 which is compatible with UPS Aviation Technologies Apollo IIMorrow Navigation devices At a baud rate of 1200 bps the encoder sends a seventeen byte message beginning w...

Страница 8: ...rate of 1200 bps the encoder sends a seventeen byte message beginning with MGL followed by a sign and five altitude digits then T 25 a checksum and concludes with a carriage return Examples of serial...

Страница 9: ...ncoder digitizer will be automatically supplied power when the transponder is energized in others power to the encoder digitizer is provided directly from the avionics buss follow the power up procedu...

Страница 10: ...tallation diagram 3 2 Electrical Installation The encoder digitizer is designed to operate with a 9 to 28VDC power source This voltage can be A switched power provided by the transponder or can be pro...

Страница 11: ...DGE TERMINAL Windows 3 x or HYPERTERMINAL Windows 95 98 B Use a dedicated serial data test box such as BLACK BOX RS232 Monitor C Test for serial output using an oscilloscope to view the 9 VDC square w...

Страница 12: ...XX M digitizers are calibrated to NIST traceable pressure standards however the error allowed on altimeters at altitudes above 30 000 feet can lead to a combined error in excess of 125 feet between th...

Страница 13: ...hilgraeve com Software Note The Hyper Terminal program which is shipped with Windows 98 will not function correctly You must download version 5 0 or better to use this calibration program 4 Digitizer...

Страница 14: ...e Choose Connect Using Com 1 or whatever Com port you have chosen to use After your selection click on OK Under the Com Properties Sets communication properties Under the Port Settings tab set the fol...

Страница 15: ...a protocols simultaneously 1 Construct a wiring harness per the Wiring Harness Diagram 881668 This harness may be ordered directly from Trans Cal Industries Please specify 9 pin or 25 pin connector 2...

Страница 16: ...D1 0 Use D Sub connector protocol hardware jumpers 1 UPS Aviation Technologies 1200 bps 2 Trimble Garmin 9600bps 3 Northstar 2400bps 4 Magellan 1200bps 5 ARNAV 9600bps c The third digit represents the...

Страница 17: ...e the Hyper Terminal Clear Screen function to remove any extra characters that may be cluttering the screen Click on Edit then click on Clear Screen Note Backspace does not function in Hyper Terminal...

Страница 18: ...the encoder digitizer reads 20 080 Type ADJ enter the computer should now display A Type S20 enter S20 represents Save 20 000feet 4 5 SSD120 XX M Calibration Adjustment Procedure continued The digiti...

Страница 19: ...0 30 000 31 000 32 000 33 000 34 000 35 000 36 000 37 000 38 000 39 000 40 000 41 000 42 000 43 000 44 000 45 000 46 000 47 000 48 000 49 000 50 000 51 000 52 000 53 000 54 000 55 000 56 000 57 000 58...

Страница 20: ...st all error table data P enter Port status command displays the current port status See 4 4 Pabc enter Port command sets the serial port resolution and protocol See 4 4 Q Quit command Returns to top...

Страница 21: ...0 26000 53000 2000 27000 54000 3000 28000 55000 4000 29000 56000 5000 30000 57000 6000 31000 58000 7000 32000 59000 8000 33000 60000 9000 34000 61000 10000 35000 62000 11000 36000 12000 37000 13000 38...

Страница 22: ...r N D2 1 1 1 L D4 1 1 V K A1 6 M G J A2 7 K H H A4 9 J J G B1 4 E K F B2 1 C L E B4 2 B M D C1 3 D P C C2 8 L R B C4 10 H S A Strobe Signal Common Connect to aircraft ground Connect to aircraft ground...

Страница 23: ...12 13 or 25 or aircraft ground a 14 to 9 18 13 14 to 28VDC 28VDC Input Input b Ground Connect to aircraft Connect to 14 Connect to ground aircraft ground aircraft ground Serial Data Connection for the...

Страница 24: ...G B1 12 7 6 9 F B2 13 8 5 10 E B4 14 9 4 11 D C1 8 10 8 14 C C2 6 11 11 16 B C4 4 12 9 12 A Strobe Signal Common 2 3 Connect to aircraft ground 19 a 14 to 28VDC Input Connect to aircraft s avionics bu...

Страница 25: ...cted by a fuse or circuit breaker Connect to aircraft s avionics buss protected by a fuse or circuit breaker Connect to aircraft s avionics buss protected by a fuse or circuit breaker b Ground Connect...

Страница 26: ...26 26 Pin Connector Assignments Table V...

Страница 27: ...lo 37 Pin D Sub Connector SSD120 XX M 26 Pin Connector RxD2 21 U or X Ground 20 R or W Optional configure the SSD120 XX M for 10 resolution See 4 4 Apollo GX50 GX60 GX65 Software Configuration In test...

Страница 28: ...tion Installation Setup Access the 2101 installation setup submenu and go to the SERIAL I O SETUP Select the GPS serial port which is to receive the pressure altitude data SERIAL 1 IN or SERIAL 2 IN S...

Страница 29: ...ENCODER Garmin International Garmin 400 Series GPS Devices Garmin 78 Pin Conn P4001 Function SSD120 XX M 26 Pin Connector 57 TxD U or X 77 or 78 Ground R or W Configure the SSD120 XX M for Trimble Gar...

Страница 30: ...30 26 Pin Connector Cutout 881667...

Страница 31: ...31 Wiring Harness Diagram 881668...

Страница 32: ...32 Calibration Block Diagram 881669...

Страница 33: ...33 Outline Drawing Modular Altitude Digitizer SSD120 XX M...

Страница 34: ...34 Wiring Diagram 101802...

Страница 35: ...35...

Страница 36: ...ard must be completed and returned to Trans Cal Industries properly filled out and signed by the dealer selling or installing this equipment Mail to Trans Cal Ind Inc 16141 Cohasset St Van Nuys CA 914...

Отзывы: