INSTALLATION
TOOLS REQUIRED:
1.
Electric Drill with 7/8” (22mm), 5/16” (10mm) and 1/8” (3mm) Drill Bits
2.
Adjustable (Crescent style) wrench
3.
Socket and driver
MATERIALS REQUIRED
1.
Mounting Hardware - For Titan 450 use countersink head bolts – for Titan 300 use hex head or round head bolts.
4 sets- 5/16 (10mm) stainless steel bolts (length = mounting s 1.5” (40mm), washers, and lock-nuts.
2.
Wire – if longer than 2 meters is required.
INSTALLING ANCHOR WINCH ON BOAT DECK
The anchor winch can be installed above or below deck. It is important that the anchor roller line up with the centerline of the rope
drum for proper loading of rope. To install the anchor winch, follow these steps.
1.
Place the winch in location and directly inline and centered with the anchor roller.
2.
Examine both sides of the installation surface for obstructions to bolts and wire routing.
3.
Mark the winch bolt locations and wire holes if any are required.
4.
Remove winch, drill necessary holes, seal holes with marine grade silicone sealant.
5.
Seal the exposed deck material inside the hole with marine silicone sealant.
6.
Secure the winch to the deck. Consider using large fender washers and backer board under the deck to ensure the
greatest strength and to spread the load.
INSTALLING ANCHOR WINCH IN THE ANCHOR WELL
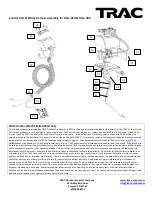
Identify location of winch, battery wire and switch wire. Follow steps 1-7 to install. If installing in a narrow anchor well, it might be
necessary to rotate the gear-motor 90 degrees as shown. To rotate the gear-motor, remove battery positive wire from battery. At
the winch location, snip and remove plastic wire ties around the wire harness to make added wire length available. Locate the bolts
holding the gearbox to winch frame. Remove nuts, remove bolts, rotate gear-motor (without removing gear-motor) to the desired
location. Reinsert bolts, attach and tighten the nuts. Group extra wire in a bundle and secure with new plastic wire ties.


