Accessing the Switch
Command Line Interface Access
User Guide
13
3.3 SSH Login
SSH login supports the following two modes: Password Authentication Mode and Key
Authentication Mode. You can choose one according to your needs:
■
Password Authentication Mode: Username and password are required, which are both
admin
by default.
■
Key Authentication Mode (Recommended): A public key for the switch and a private key
for the client software (PuTTY) are required. You can generate the public key and the
private key through the PuTTY Key Generator.
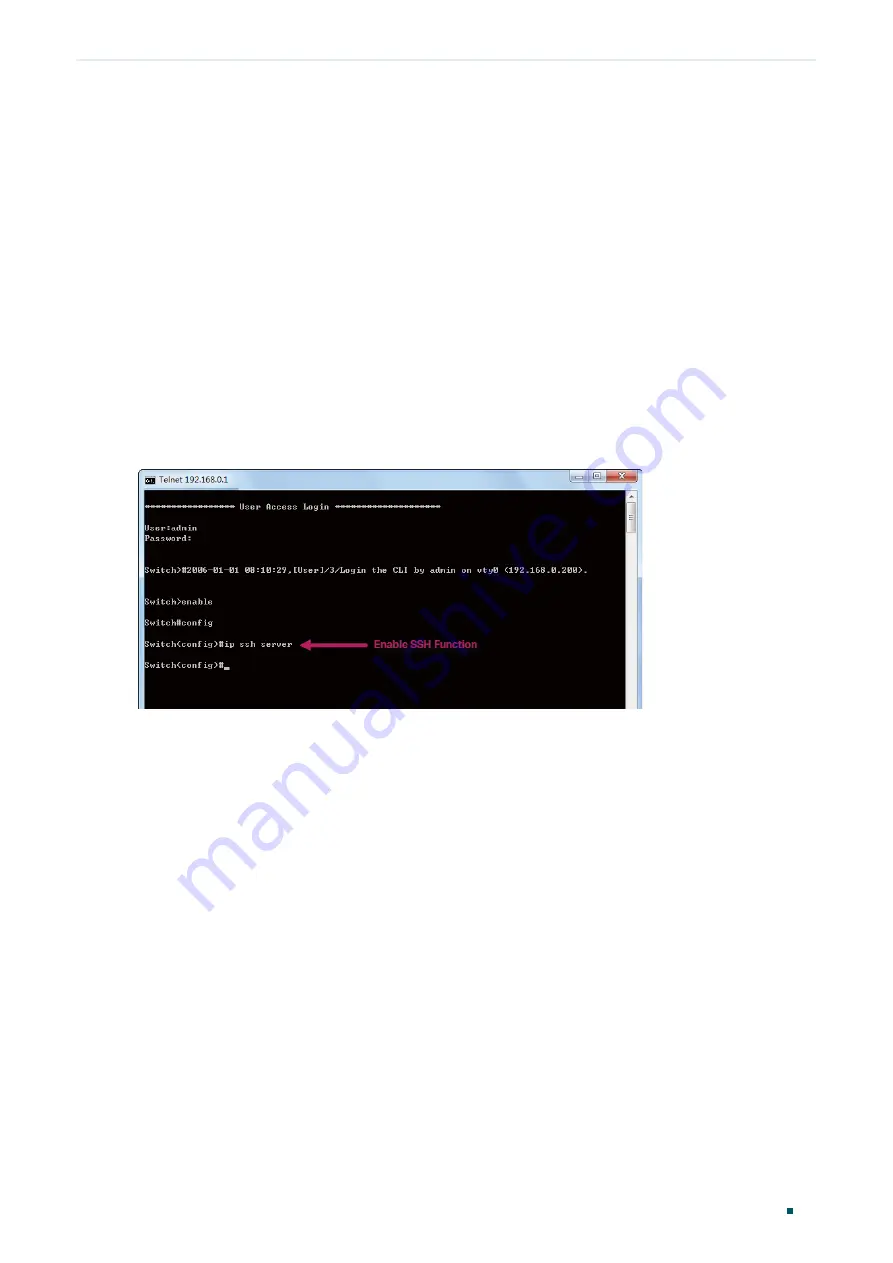
Before logging in via SSH, follow the steps below to enable SSH on the terminal emulation
program:
Figure 3-7
Enable SSH
Password Authentication Mode
1) Open PuTTY and go to the Session page. Enter the IP address of the switch in the
Host
Name
field and keep the default value 22 in the
Port
field; select
SSH
as the Connection
type. Click
Open
.
Содержание JetStream T2600G-28TS
Страница 32: ...Part 1 Accessing the Switch CHAPTERS 1 Overview 2 Web Interface Access 3 Command Line Interface Access ...
Страница 136: ...Part 4 Configuring LAG CHAPTERS 1 LAG 2 LAG Configuration 3 Configuration Examples 4 Appendix Default Parameters ...
Страница 154: ...Part 5 Configuring DDM Only for Certain Devices CHAPTERS 1 Overview 2 DDM Configuration 3 Appendix Default Parameters ...
Страница 264: ...Configuring VLAN VPN Configuration Examples User Guide 235 Figure 4 2 Create VLAN 100 ...
Страница 265: ...User Guide 236 Configuring VLAN VPN Configuration Examples Figure 4 3 Create VLAN 200 ...
Страница 268: ...Configuring VLAN VPN Configuration Examples User Guide 239 Figure 4 7 Creating VLAN 100 ...
Страница 275: ...User Guide 246 Configuring VLAN VPN Configuration Examples Figure 4 11 Create VLAN 100 ...
Страница 276: ...Configuring VLAN VPN Configuration Examples User Guide 247 Figure 4 12 Create VLAN 200 ...
Страница 277: ...User Guide 248 Configuring VLAN VPN Configuration Examples Figure 4 13 Create VLAN 1050 ...
Страница 280: ...Configuring VLAN VPN Configuration Examples User Guide 251 Figure 4 18 Creating VLAN 100 ...
Страница 285: ...Part 11 Configuring GVRP CHAPTERS 1 Overview 2 GVRP Configuration 3 Configuration Example 4 Appendix Default Parameters ...
Страница 512: ...Part 16 Configuring L2PT CHAPTERS 1 Overview 2 L2PT Configuration 3 Configuration Example 4 Appendix Default Parameters ...
Страница 633: ...Part 21 Configuring ARP CHAPTERS 1 Overview 2 ARP Configurations 3 Appendix Default Parameters ...
Страница 718: ...Configuring QoS Configuration Examples User Guide 689 Extended Power Via MDI Yes Inventory Management Yes ...
Страница 748: ...Part 24 Configuring AAA CHAPTERS 1 Overview 2 AAA Configuration 3 Configuration Examples 4 Appendix Default Parameters ...
Страница 801: ...Part 26 Configuring Port Security CHAPTERS 1 Overview 2 Port Security Configuration 3 Appendix Default Parameters ...
Страница 859: ...User Guide 830 Configuring ACL Configuration Example for ACL Figure 3 18 Configuring Rule 3 ...
Страница 874: ...Configuring ACL User Guide 845 ...
Страница 962: ...Part 31 Configuring DoS Defend CHAPTERS 1 Overview 2 DoS Defend Configuration 3 Appendix Default Parameters ...
Страница 969: ...Part 32 Monitoring the System CHAPTERS 1 Overview 2 Monitoring the CPU 3 Monitoring the Memory ...
Страница 974: ...Monitoring the System Monitoring the Memory User Guide 945 Unit Current Memory Utilization 1 74 ...
Страница 975: ...Part 33 Monitoring Traffic CHAPTERS 1 Traffic Monitor 2 Appendix Default Parameters ...
Страница 982: ...Part 34 Mirroring Traffic CHAPTERS 1 Mirroring 2 Configuration Examples 3 Appendix Default Parameters ...
Страница 1043: ...Part 37 Configuring DLDP CHAPTERS 1 Overview 2 DLDP Configuration 3 Appendix Default Parameters ...
Страница 1111: ...User Guide 1082 Appendix Default Parameters Parameter Default Setting Interval 1800 seconds Owner monitor Status Disabled ...
Страница 1112: ...Part 39 Diagnosing the Device Network CHAPTERS 1 Diagnosing the Device 2 Diagnosing the Network 3 Appendix Default Parameters ...


