


25
Chapter 5
TP-Link Cloud Service
from the same router as
User
s. All accounts can monitor and manage the router locally
or remotely, but user accounts cannot:
• Reset the router to its factory default settings either on the web management page
or in the Tether app.
• Add/remove other TP-Link IDs to/from the router.
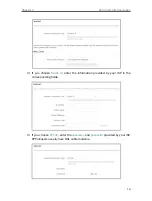
5 3 1 Add TP-Link ID to Manage the Router
1. Visit
, and log in with your TP-Link ID.
2. Go to
Advanced
>
TP-Link ID
, and focus on the
Bound Accounts
section.
3. Click
, enter another TP-Link ID as needed and click
Save
.
Note:
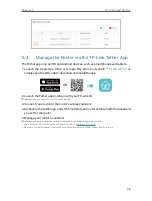
If you need another TP-Link ID, please register a new one via the Tether app. Refer to
to install the app and register a new TP-Link ID.
4. The new TP-Link ID will be displayed in the Bound Accounts table as a
User
.
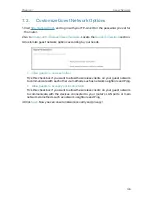
5 3 2 Remove TP-Link ID(s) from Managing the Router
1. Visit
, and log in with your TP-Link ID.
2. Go to
Advanced
>
TP-Link ID
, and focus on the
Bound Accounts
section.
3. Tick the checkbox(es) of the TP-Link ID(s) you want to remove and click
Unbind
.
Содержание Archer AX53
Страница 1: ...2021 TP Link 1910013106 REV1 0 0 User Guide AX3000 Gigabit Wi Fi 6 Router Archer AX53...
Страница 15: ...Chapter 3 Log In to Your Router...
Страница 56: ...52 Chapter 10 Network Security...
Страница 71: ...67 Chapter 12 VPN Server...
Страница 97: ...93 Chapter 14 Manage the Router...