14
❏
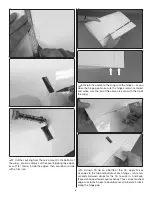
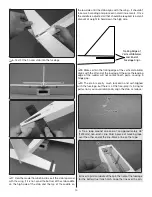
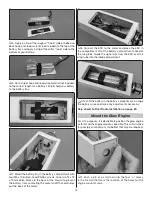
6. Temporarily fi t the rudder to the fi n and fuselage with
the hinges. Make the rudder pushrod the same way you
made the elevator pushrods, but don’t cut the wire. Slide
the pushrod into the fuselage, align the horn over the rudder
and mark the location of the screw holes.
❏
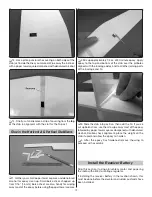
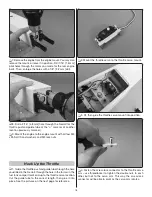
7. Remove the rudder and pushrod and leave the hinge
nearest the horn in the rudder. Drill the holes through the
rudder for the screws – if the holes intersect the hinge, just
drill through the hinge.
❏
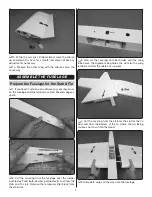
8. Mount the rudder horn to the rudder (with the hinge
in place), fi t the rudder back to the fuselage and glue in the
hinges with thin CA.
❏
9. After the CA on all the hinges has hardened, fl ex the
elevators and rudder up and down and pull on them to make
sure they are secure.
Hook Up the Elevator and Rudder
❏
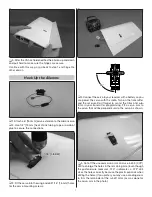
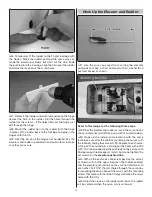
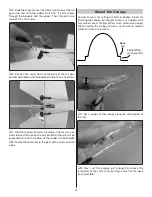
1. Use the wire you saved from cutting the elevator
pushrods to make a short pushrod with an L-bend for a
pushrod keeper as shown.
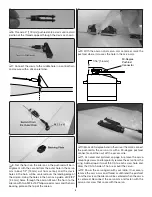
Refer to this image for the following three steps.
❏
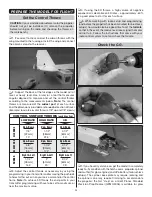
2. Place the elevator and rudder servos in the servo tray as
shown, but do not mount the servos until instructed to do so.
❏
3. Hook up the rudder and elevators with the same
techniques used for the ailerons (centering the servos with
the radio on, fi nding the servo arm 90-degrees to each servo,
cutting off the unused arms, drilling out the holes with a #49
[.073"] drill and connecting the pushrods to the servos with
90-degree pushrod keepers). Install, but do not tighten the
set screws on the
elevator pushrod link
.
❏
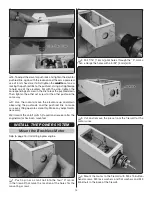
4. With all the pushrods connected, position the servos
as shown with a little space between the rudder pushrod
and the elevator pushrod link so they will not interfere with
each other. Drill 1/16" [1.6 mm] holes through the servo tray
for mounting the servos. Mount the servos with the mounting
screws that came with them (don’t forget to harden the screw
holes with thin CA).
❏
5. Adjust the clevis on the rudder pushrod so the rudder
will be centered when the servo arm is centered.


