30
Make the Aileron Pushrods
Skip this section if you’re using four aileron servos.
1/4"
[6mm]
1/4"
[6mm]
5-7/8"
[150mm]
❏
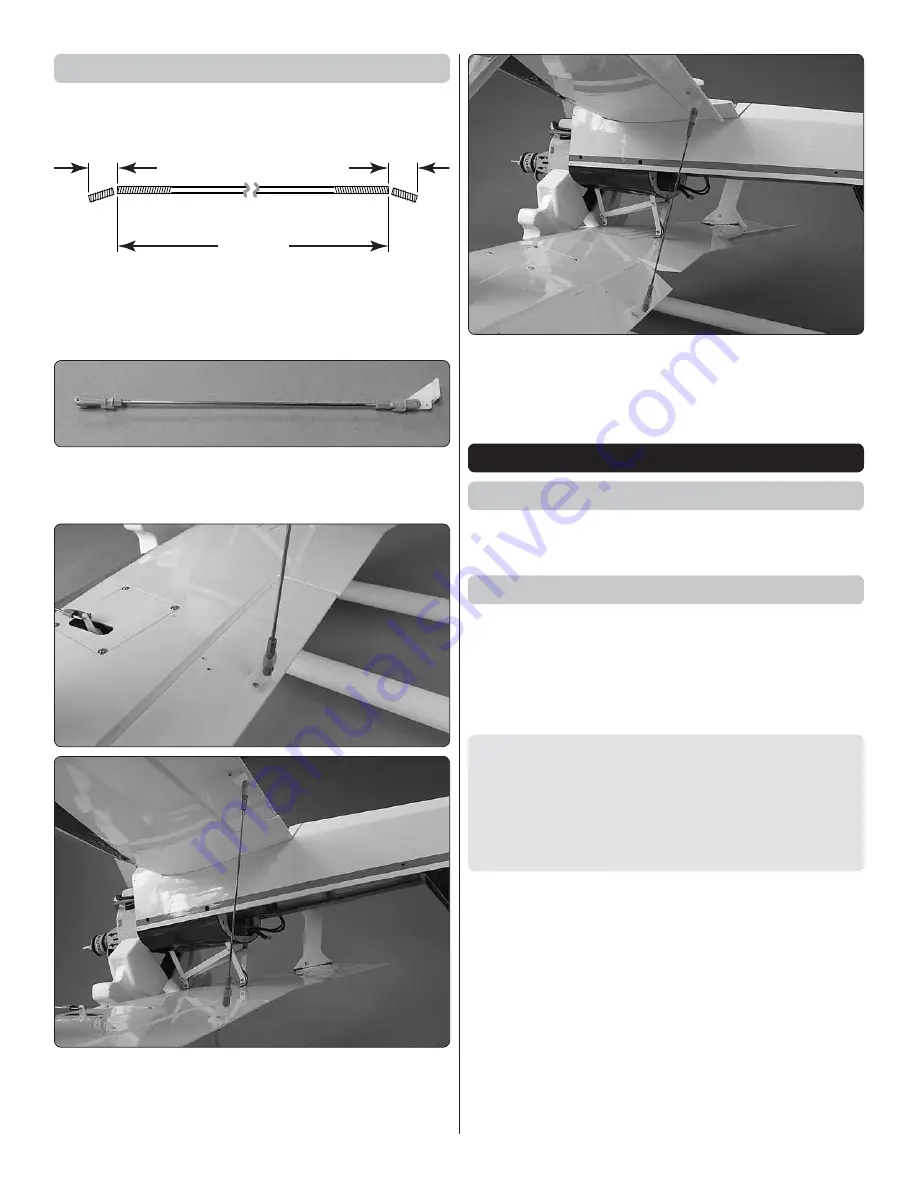
1. Make two 5-7/8" [150mm] pushrods by cutting an equal
amount from both ends of a 6-3/8" [160mm] pushrod. Use
a metal fi le or a cutoff wheel to remove any burrs from the
cut ends of the wire.
❏
2. Prepare the pushrods as shown with a clevis and silicone
retainer on both ends and a small control horn on one end.
(The clevis is in the second-from-the-outer hole in the horn.)
❏
3. Turn the model upside-down. Connect one of the
pushrods to the aileron horn previously mounted to the bottom
aileron, then mount the other horn to the aileron on the top
wing with two more M2 x 10 screws and the back plate.
❏
4. Adjust the length of the pushrod so the ailerons will
be in synch with each other. Operate the ailerons with your
transmitter to make sure everything moves smoothly.
❏
5. Hook up the other aileron the same way.
PREPARE THE MODEL FOR FLIGHT
Apply the Decals
Cut the included decals from the decal sheet and apply
them to the plane.
Set the Control Throws
In addition to the C.G., the control throws have a major effect
on how the model fl ies and whether or not your fi rst fl ight will
be successful. Do not skip this important step and make sure
the throws are as specifi ed. If necessary, use programming in
your transmitter and/or change the locations of the pushrods
in the servo arms and/or control horns to adjust the throw.
CAUTION:
If using a brushless motor and powering the
receiver and servos through the BEC in the ESC, the throws
should be set and checked
without
the propeller mounted
to the motor. If the throttle is inadvertently bumped the
motor will turn possibly causing injury or damage, so make
sure the propeller is removed while operating the radio in
the workshop.
❏
1.
Before checking the throws, be certain to set the
Fail Safe
function in your transmitter
so that, in the case
of signal loss (or if the transmitter is inadvertently turned off
before power is disconnected from the motor) the motor will
not turn. Refer to the instructions that came with your radio
control system to set the Fail Safe.
With Tactic radios, the Fail Safe is set by pressing the “Link”
button in the receiver while the transmitter and receiver
are powered. When signal is lost, the throttle will go to the
setting where the throttle stick was when the Link button
was pressed, so to set the Fail Safe correctly make sure the
throttle stick is
all the way down
(motor off) when pressing
the Link button.


