6
❏
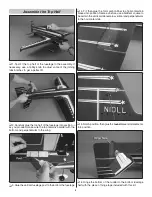
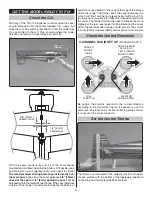
7. Lay weights over the structure to hold everything down,
making sure the surfaces are fl at. Working from back-to-front,
test-fi t but
do not glue
all the 1mm carbon fi ber
bottom
braces
and the laser-cut plastic
wing brace “posts”
into
position. So as not to build any stress into the airframe which
could later cause a twist, it may be necessary to trim a mm
or two off one or two of the braces so they aren’t forced into
place and are the perfect length.
❏
8. Start by gluing the ends of the braces to the
horizontal
surfaces only — use just a drop of foam-safe CA so it doesn’t
wick down through the top. All the braces will be reinforced
with more glue later.
❏
9. Glue the other end of the braces to the vertical part of
the fuselage using a builder’s square as you proceed to make
sure the fuselage remains vertical.
❏
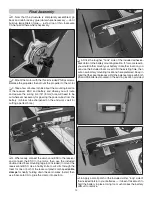
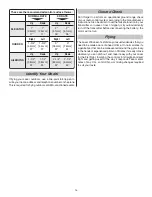
10. Test-fi t the landing gear and the ABS landing gear
doublers into position. Align the wheels so they are parallel
with each other and study the assembly from all angles to
make sure everything is properly aligned. Once satisfi ed, glue
the gear and doublers into position.
Содержание Laser 200 Flatty
Страница 16: ......


