Air to Air Heat Exchanger
Installation Manual
EN
Air to Air Heat Exchanger
Installation Manual
– 6 –
7
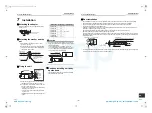
Installation
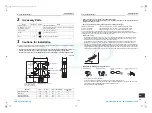
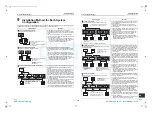
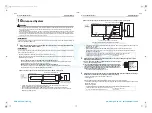
Attaching the adapter
• Attach the adapter to the unit using the accessory
screws (4 or 6).
Attaching the washer and the
nut
1) Preparation of the hanging bolt, nut, and
washer is required.
2) Attach the washer and the nut to the hanging
bolt (see the table on the below) according to
the diagram on the below.
Fixing the unit
1) Hang the hanging bracket on the hanging bolt,
then adjust the nut so that the unit is level.
2) Use a double nut and fasten it firmly so that the
nut does not become loose.
• If the unit is not installed properly, it will vibrate
and may pose a hazard.
• If the unit is not level, the damper unit will not
work properly.
• Install the unit firmly enough to support its own
weight.
CAUTION
• Use a commercially available vibration-proof fixture
when the unit is installed in a place where preventing
vibration is necessary.
• Leave a space of 450mm x 450mm or more for
checking the filter, heat exchanging element, power
source, or motor. Refer to “Cautions for Installation”
for the location of the space required.
Cautions installing unit body
upside down
• The hanging bracket does not need to be replaced.
• The printed image is reversed.
Screws (accessory:
4 or 6 screws)
Adapter
Washer (M10 or M12)
Washer (M10 or M12)
Use the washer just under
the hanging bracket to
prevent the bolt from
falling off.
Nut (M10 or M12)
Hanging bolt
(M10 or M12)
Nut (M10 or M12)
Hanging bracket
Hanging bolt
(M10 or M12)
Hanging bolt
Nut
Washer
Hanging
bracket
Washer
Nut
Model name
Weight (kg)
Hanging bolt
VN-M150HE
36
M10, M12
VN-M250HE
36
VN-M350HE
38
VN-M500HE
53
VN-M650HE
53
VN-M800HE
70
VN-M1000HE
70
Hanging bolt
Vibration-proof fixture
Vibration-proof fixture
Unit
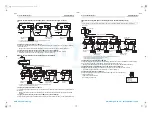
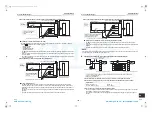
Duct Installation
• Duct installation is necessary to protect against access to live parts, rain water or contact with moving parts.
• Seal the junction of an adaptor and a duct with an aluminium tape firmly to prevent any air leakage.
• The room intake opening should be positioned as far as possible from the indoor supply opening.
• Use the specified ducts. (See the Model List)
• Install two outdoor ducts so they will be in the down gradient toward outdoor to prevent water from coming in.
(Gradient: 1/100~1/50) (See the figure below)
Heat-insulate two outdoor ducts (including outdoor air and exhaust air duct) to prevent dewing.
(Material: Glass Wool, Thickness-25mm) (See the figure below)
To pierce the metal duct through the metal lath or the wire lath or the metal plate of the wooden facility, insulate
electrically between the duct and the wall. (Refer to the laws and regulations of the country concerned and the
technical standard.)
• It is recommended that an electric damper is used together with the Air to Air Heat Exchanger, as wind may enter
the room while the unit is not in operation in windy places.
Heat insulator
(Insulates the adapter and the aluminium tape)
Outdoor air intake duct, Exhaust air duct
Adapter
Aluminium tape
Aluminium tape
Aluminium tape
Slope
(1/100 to 1/50)
Heat insulator
Duct
Unit
11-EN
12-EN
+00ET9X463301_01EN.book Page 6 Thursday, January 20, 2011 4:41 PM
AMP Air Conditioning
www.ampair.co.uk | [email protected]

