Reference Information
2-14
Toshiba
GB
32
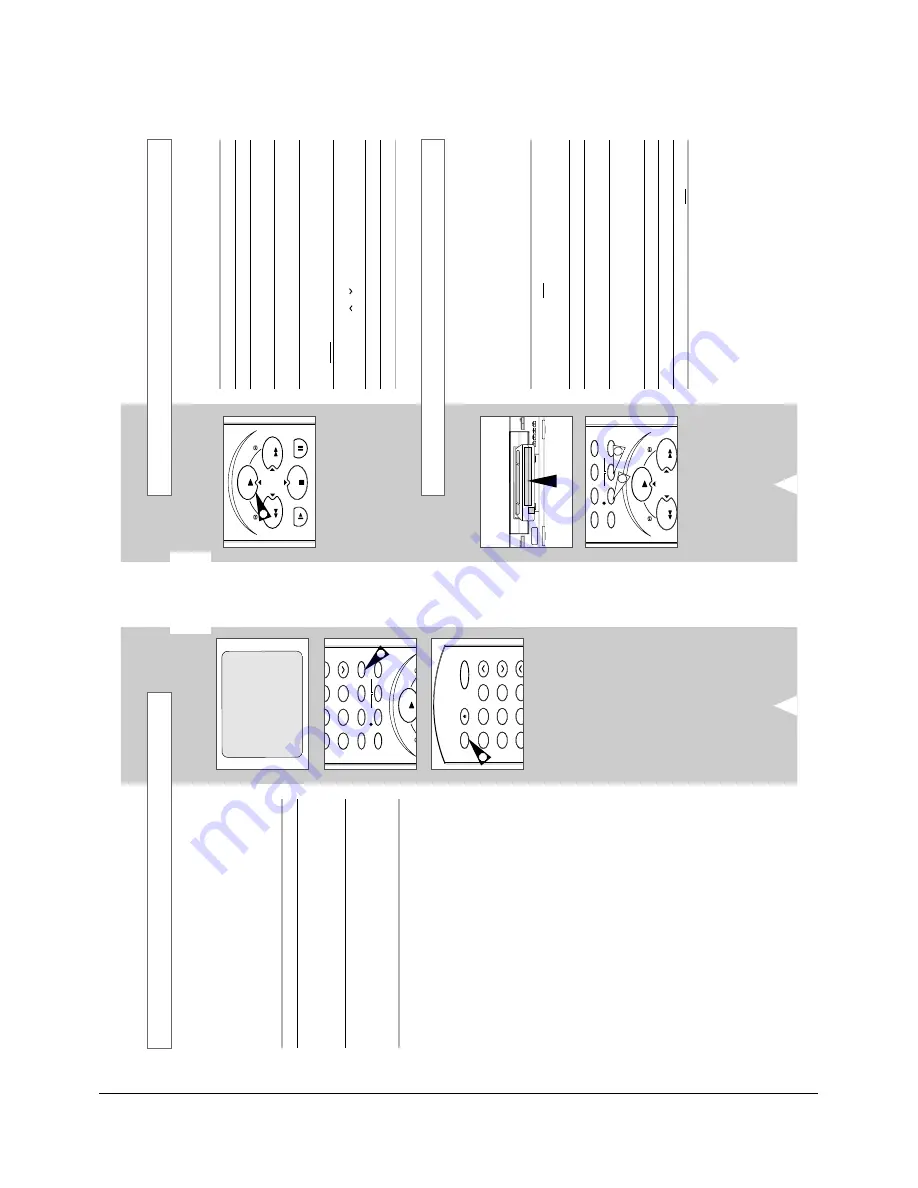
This function allows you to start a new recording at a specific
position on the cassette while maintaining a very smooth scene
change.
1
Insert the cassette to be edited in your VCR.
2
Press the
button to start playback.
3
When you reach the position from which you wish to start the new
recording, press the PAUSE/STILL button.
4
Press the F.ADV button as often as necessary to advance frame
by frame, until the exact recording position is located.
5
While the VCR is in still mode, hold the REC button down for
a while to activate the Assemble Edit function.
Result
:
Record symbol flashes in the display.
6
Select the source from which you wish to record by pressing:
◆
The CH ( or
) buttons for television channels
◆
The I.SELECT button for the LINE IN 1 input sources
7
Press the
button to start recording.
8
When you have finished recording, press
■
.
You can copy a cassette to your VCR from another video source,
such as another VCR or a camcorder.
☛
It is an infringement of copyright laws to copy
prerecorded cassettes or to re-record them in any form
without the permission of the owners of the
corresponding copyright.
1
Connect the VCR, from
which the cassette is to be copied, to the
appropriate RCA audio and video input connectors on the rear of
your VCR, as indicated on page 10.
2
Insert a blank cassette in your VCR.
3
Insert the pre-recorded cassette in the other video source (VCR or
camcorder).
4
Press the I.SELECT button to select the appropriate input on your
VCR:
◆
LINE IN 1 for the rear input
5
Start playing back the cassette to be copied.
6
Hold REC down for a while to start recording on your VCR.
7
When you have finished recording, press
■
on both
VCRs.
➢
If you wish to view the cassette being copied:
◆
Your VCR must be connected as usual to the
television (see page 9 for further details)
Using the Assemble Edit Function
Recording from Another VCR or Camcorder
MENU
PLA
Y
REW
TIMER
REC
CLR/RST
FF
COUNT/TR
INDEX
F
.ADV
CURSOR
OK
SLOW
PLA
Y
REW
ST
OP
FF
P
AUSE
/STILL
CURSOR
2
6
6
GB
31
Using the T
a
pe Counter
7
8
9
0
MENU
PLA
Y
COUNT
.RST
TIMER
REC
CLR/RST
I.SELECT
COUNT/TR
INDEX
TRK
F
.ADV
ON/
STANDBY
1
2
3
4
5
6
CH
VTR
DISPLAY
EJECT
0:00:00
2
2
The tape counter:
◆
Indicates the elapsed time in the play and record modes
(hours, minutes and seconds)
◆
Is reset when a cassette is inserted in the VCR
◆
Allows you to find the beginning of a sequence easily
☛
If the remaining time is to be calculated correctly, you
must indicate the type of cassette being used.
1
Insert a cassette in your VCR.
2
To set the tape counter to zero at the beginning of a sequence:
◆
Press DISPLAY.
twice to display the counter
◆
Press CLR/RST when you want to set the tape counter to
zero
3
When you are ready,
◆
Start playback or Recording.
◆
Press the
■
button.
◆
To fast-froward or rewind to the sequence at which the
counter was set to zero, press
¥¥
or
.
➢
Some VCR information, such as the counter, can be
displayed on the television screen (unless you have
deactivated the OSD mode; refer to page 14).
Press DISP:
◆
Once to display the current function, programme
number, recording speed, date, time and counter
◆
Twice to display the counter only
◆
Three times to display the time remaining on the cassette
◆
Four times to clear the display
Содержание VE28
Страница 1: ...SERVICE MANUAL FILE NO 120 200167 VIDEO CASSETTE RECORDER V E28 MAY 2001 ...
Страница 21: ...Reference Information 2 16 Toshiba 2 2 1 IC301 LA71598M 2 2 IC Blocks ...
Страница 22: ...Reference Information Toshiba 2 17 2 2 3 IC601 uPD784928 ...
Страница 23: ...Reference Information 2 18 Toshiba MEMO ...
Страница 25: ...Product Specifications 3 2 Toshiba MEMO ...
Страница 45: ...4 20 Toshiba Disassembly and Reassembly MEMO ...
Страница 55: ...Exploded View 6 2 Toshiba 6 1 Packing Assembly Y101 A702 A701 Y102 UT01 A702 ...
Страница 59: ...Exploded View 6 6 Toshiba MEMO ...
Страница 68: ...Replacement Parts List Toshiba 7 9 MEMO ...
Страница 69: ...Toshiba 8 1 8 Block Diagram WITHOUT CANAL MODELS ...
Страница 70: ...Block Diagram 8 2 Toshiba MEMO ...
Страница 71: ...Toshiba 9 1 9 PCB Diagrams 9 2 9 1 Main ...
Страница 72: ...PCB Diagrams 9 2 Toshiba 9 1 Main ...
Страница 73: ...PCB Diagrams Toshiba 9 3 ...
Страница 74: ...PCB Diagrams 9 4 Toshiba MEMO ...
Страница 77: ...Schematic Diagrams Toshiba 10 3 10 1 S M P S FREE ...
Страница 78: ...Schematic Diagrams 10 4 Toshiba 10 2 Power ...
Страница 79: ...Schematic Diagrams Toshiba 10 5 10 3 System Control Servo Display ...
Страница 80: ...Schematic Diagrams 10 6 Toshiba 10 4 Audio Video ...
Страница 81: ...Schematic Diagrams Toshiba 10 7 10 5 TM Block ...
Страница 82: ...Schematic Diagrams 10 8 Toshiba 10 6 OSD VPS PDC ...
Страница 83: ...Schematic Diagrams Toshiba 10 9 10 7 Input Output ...
Страница 84: ...Schematic Diagrams 10 10 Toshiba MEMO ...


