82
ESV16
User’s
Manual
NVR Setup -- System Configurations
Network Setup
The “System Configurations” page provides users options to setup the
device quickly and properly. After properly configuring all settings in all
the sub-pages, users should expect a fully working network video
recorder that is ready to manage cameras on the network. We will
start by configuring its network settings to make sure it works
correctly in your network. Next, we will help you adjust the system
time so videos will be recorder with correct timestamp. To better
secure the system for unwanted disturbance, we will guide you on
setting up user’s account and privileges to prevent settings gets
altered by users other than the system administrator. Lastly, we will
tell you what you should expect after installing a hard disk and how to
prepare the hard disk for the video recording.
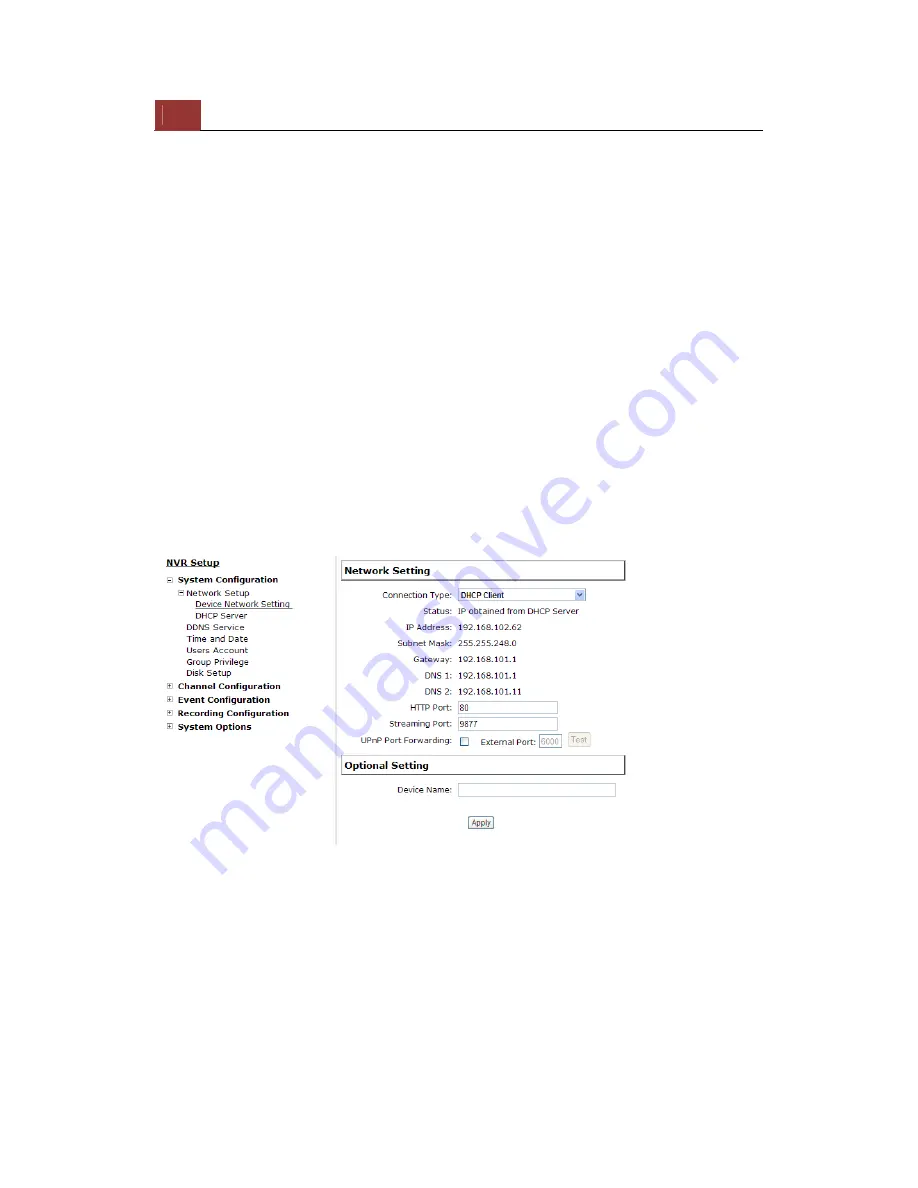
Network Settings
You need to adjust settings in this page for the device to work properly
in your network. It is critical that settings here are configured correctly
based on your network configurations so that the recorder can be
administered through the local area network and cameras can be
connected from it.
By default, the recorder is set to "Auto Mode" which if there's a DHCP
server in the same local network, the NVR can obtain IP address from
Содержание Surveillix ESV16
Страница 5: ...ESV16 User s Manual 5 System Overview Front View Rear View ...
Страница 6: ...6 ESV16 User s Manual LED Status ...
Страница 9: ...ESV16 User s Manual 9 Push the tray door back to the case to secure it ...
Страница 33: ...ESV16 User s Manual 33 A new window should display and load the snapshot image ...
Страница 34: ...34 ESV16 User s Manual The new window displays the snapshot ...
Страница 45: ...ESV16 User s Manual 45 Type in the IP address of the NVR in the address bar ...
Страница 46: ...46 ESV16 User s Manual You should be prompted to enter the username and password to access the NVR ...
Страница 47: ...ESV16 User s Manual 47 Upon successful login you should see the live view video of the first channel ...
Страница 48: ...48 ESV16 User s Manual Click on the Channel drop down menu to select other cameras ...
Страница 52: ...52 ESV16 User s Manual Press the button highlighted above to go back to the browser ...
Страница 53: ...ESV16 User s Manual 53 Type in the IP address of the NVR in the address bar ...
Страница 54: ...54 ESV16 User s Manual You should be prompted to enter its username and password for access ...
Страница 63: ...ESV16 User s Manual 63 You may click Update to update the list to display the most recent results ...
Страница 66: ...66 ESV16 User s Manual A new window should display and load the snapshot image ...
Страница 67: ...ESV16 User s Manual 67 The new window displays the snapshot ...
Страница 79: ...ESV16 User s Manual 79 Locate the exported AVI file and click open Normally under C ExportFolder ...
Страница 100: ...100 ESV16 User s Manual Please wait for a few moments while the NVR is creating the RAID volume ...
Страница 155: ...ESV16 User s Manual 155 Type in the default username admin and password admin to log in ...
Страница 159: ...ESV16 User s Manual 159 Live events are listed in the side menu along with the time information ...
Страница 166: ...166 ESV16 User s Manual Video window surrounded with blue color means it s currently selected ...
Страница 169: ...ESV16 User s Manual 169 The snapshot of the video will be displayed on a pop up window ...
Страница 172: ...172 ESV16 User s Manual Click and drag the mouse diagonally on an area in which you would like to zoom in to ...
Страница 186: ...186 ESV16 User s Manual ...
Страница 189: ...ESV16 User s Manual 189 Double click on one from the search result to add it and for more detail configurations ...
Страница 191: ...ESV16 User s Manual 191 Click Apply to finish and save the settings ...
Страница 197: ...ESV16 User s Manual 197 Locate the image file jpg and click Open to finish ...
Страница 228: ...228 ESV16 User s Manual You can double click on the video again to go back to the Local map view ...


