12
Connections
About HDMI
HDMI (High Definition Multimedia Interface) supports both video
and audio on a single digital connection for use with DVD players,
DTV, set-top boxes, and other AV devices. HDMI was developed
to provide the technologies of High Bandwidth Digital Content
Protection (HDCP) as well as Digital Visual Interface (DVI) in
one specification. HDCP is used to protect digital content
transmitted and received by DVI-compliant or HDMI-compliant
displays.
HDMI has the capability to support standard, enhanced, or high-
definition video plus standard to multi-channel surround-sound
audio. HDMI features included uncompressed digital video, a
bandwidth of up to 2.2 gigabytes per second (with HDTV) signals, one
connector (instead of several cables and connectors), and
communication between the AV source and AV devices such as
DTVs.
HDMI, the HDMI logo and High-Definition Multimedia Interface are
trademarks or registered trademarks of HDMI licensing LLC.
Switching the output signal (interlaced / progressive)
using the remote control
You can temporarily switch the output signal for better picture quality.
Press PROGRESSIVE button repeatedly on the remote control to
select Video Output to P-Scan mode during stop.
If your TV does not support the progressive scan format, the picture
will appear scrambled or blank. To return to normal picture, press
PROGRESSIVE button repeatedly to turn off progressive mode.
• Make the following setting.
On-screen display
Select:
Page
Notes
• Refer to the owner’s manual of the connected equipment as well.
• When you connect the DVD player to other equipment, be sure to turn off the power and unplug all of the equipment from the wall outlet
before making any connections.
• If you place the DVD player near a tuner or radio, the radio broadcast sound might be distorted. In this case, place the DVD player away from
the tuner and radio.
• The output sound of the DVD player has a wide dynamic range. Be sure to adjust the receiver’s volume to a moderate listening level.
Otherwise, high volume sound may damage your hearing as well as the speakers.
• Turn off the amplifier before you connect or disconnect the DVD player’s power cord. If you leave the amplifier power on, the speakers may
be damaged.
• Analog audio out will not have sound if DTS playback is selected.
• ColorStream
®
and ColorStream Pro
®
are registered trademarks of Toshiba America Cousumer Products L.L.C.
“PCM” or
“Raw”
“Digital Output”
Component
*P-Scan
(Progressive)
“Video Out”
* Only for TV equipped with component video
input jacks which support the progressive scan.
31
32
480p, 720p, 1080i and 1080p are signals created with this DVD
Player from original 480i signal. The resolution of the picture may
not be increased even if they are selected.
illuminates “ • 1080i ”
1080i (interlaced)
illuminates “ • 720p ”
720p (progressive)
illuminates “ • 480p ”
480p (progressive)
Press
Press
Press
• Make the following setting.
On-screen display
Select:
Page
“PCM”
“Digital Output”
HDMI
“Video Out”
31
32
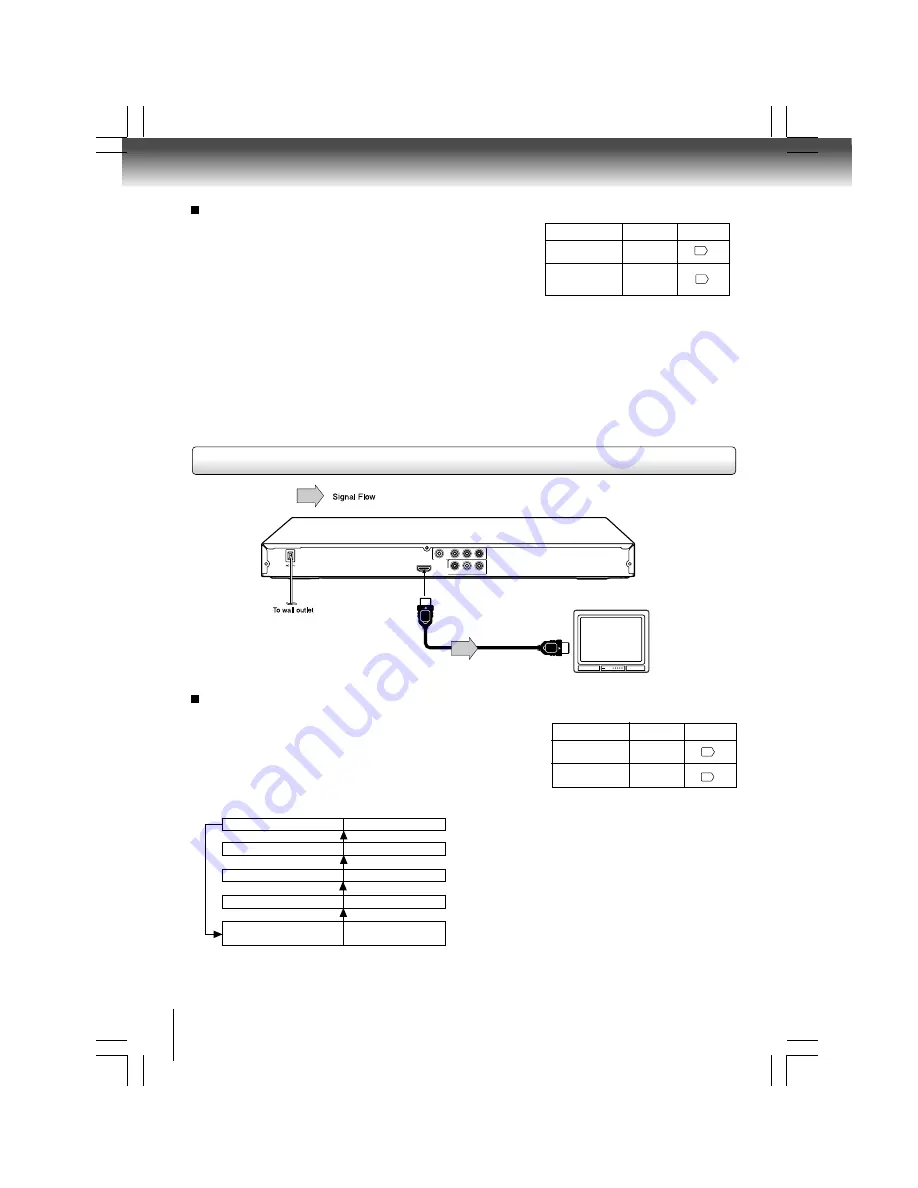
Connecting to a display (Using a HDMI
TM
cable)
Press
illuminates “• 480p, • 720p,
•
1080i, • 1080p”
Auto
Press
HDMI-compatible display
HDMI Cable
To HDMI
Output
Y
VIDEO
PB
PR
HDMI OUT
ANALOG
COAXIAL DIGITAL
R
L
VIDEO OUT
AUDIO
OUT
Available output signals are below:
•
Auto
•
480p (progressive)
•
720p (progressive)
•
1080i (interlaced)
•
1080p (progressive)
Switching the video quality (HDMI mode) using HDMI
button on the remote control or HDMI SELECT button on
the front panel.
Press HDMI button on the remote control or HDMI SELECT button
on the front panel to receive a suitable video quality in STOP mode.
The video quality is required to match your TV having HDMI feature
and suitable quality. Please also check your TV owner’s manual.
Press this button to change the output signals as below. See the
HDMI indicator and select the appropriate output signal.
illuminates “ • 1080p ”
1080p (progressive)
HDMI indicator
Video output signal


