background image

14

Connections

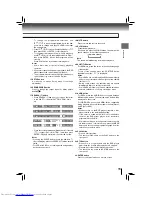
About HDMI

HDMI (High Defi nition Multimedia Interface) supports both video 
and audio on a single digital connection for use with DVD players, 
DTV, set-top boxes, and other AV devices. HDMI was developed 
to provide the technologies of High Bandwidth Digital Content 
Protection (HDCP) as well as Digital Visual Interface (DVI) in one 
specifi cation. HDCP is used to protect digital content transmitted 
and received by DVI-compliant or HDMI-compliant displays.
HDMI has the capability to support standard, enhanced, or high-
defi nition video plus standard to multi-channel surround-sound 
audio. HDMI features included uncompressed digital video, a 
bandwidth of up to 2.2 gigabytes per second (with HDTV) signals, 
one connector (instead of several cables and connectors), and 
communication between the AV source and AV devices such 
as DTVs.

HDMI, the HDMI logo and High-Defi nition Multimedia Interface 
are trademarks or registered trademarks of HDMI licensing 
LLC.


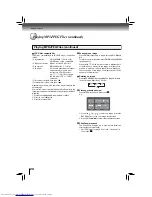
Switching the output signal (interlaced / progressive) 
using the remote control 


You can temporarily switch the output signal for better picture 
quality. Press 

PROGRESSIVE

 button repeatedly on the remote 

control to select Video out to P-Scan or HDMI mode.

  If your TV does not support the progressive scan format, the 

picture will appear scrambled or blank. To return to normal picture, 
press 

PROGRESSIVE

 button repeatedly to turn off progressive/

HDMI mode. Sometimes it can take awhile before the correct 
mode is displayed.

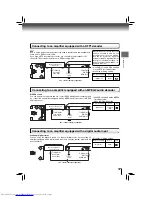
•  Make the following setting.

On-screen display

Select:

Page

Notes

•  Refer to the owner’s manual of the connected equipment as well.
•  When you connect the DVD player to other equipment, be sure to turn off the power and unplug all of the equipment from the wall outlet 

before making any connections.

•  If you place the DVD player near a tuner or radio, the radio broadcast sound might be distorted. In this case, place the DVD player away 

from the tuner and radio.

•  The output sound of the DVD player has a wide dynamic range. Be sure to adjust the receiver’s volume to a moderate listening level. 

Otherwise, high volume sound may damage your hearing as well as the speakers.

•  Turn off the amplifi er before you connect or disconnect the DVD player’s power cord. If you leave the amplifi er power on, the speakers 

may be damaged.

•  Analog audio out will not have sound if DTS playback is selected.
• ColorStream

®

 and ColorStream Pro

®

 are registered trademarks of Toshiba America Consumer Products L.L.C.

“PCM” or 

“Raw”

“Digital out”

Component

*P-Scan

(Progressive)

“Video”

*  Only for TV equipped with component video 

input jacks which support the progressive 
scan.

22

480p, 720p, 1080i and 1080p are signals created with this DVD 
Player from original 480i signal. The resolution of the picture may 
not be increased even if they are selected.

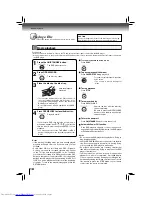
•  Make the following setting.

On-screen display

Select:

Page

“PCM”

“Digital out”

HDMI

“Video”

22

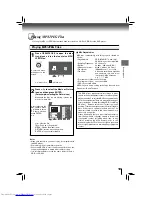
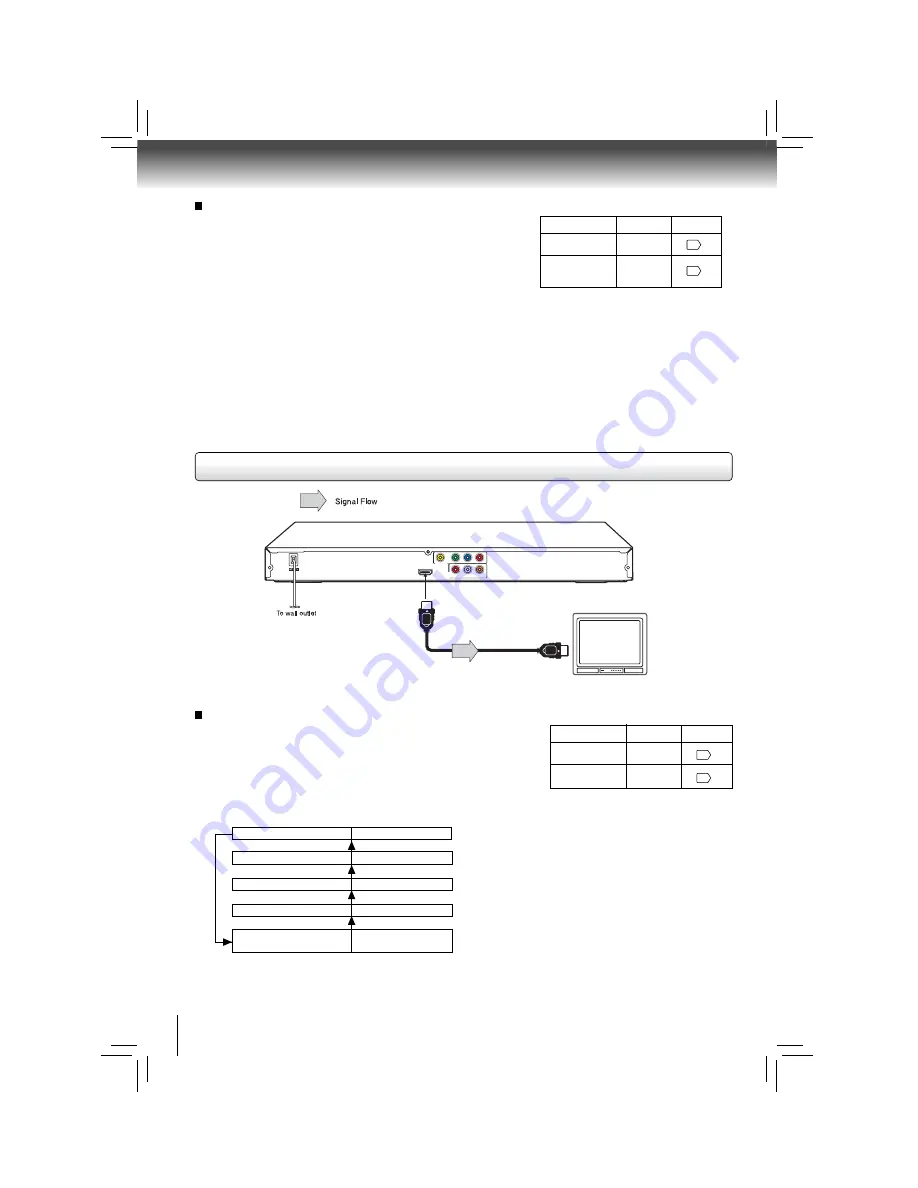
Connecting to a display (Using a HDMI

TM

 cable)

HDMI-compatible display

HDMI Cable

To HDMI

Output

Y

VIDEO

PB

PR

HDMI OUT

ANALOG

COAXIAL DIGITAL

R

L

VIDEO OUT

AUDIO

OUT

(Supplied)

Available output signals are below:
• Auto
• 480p 

(progressive)

• 720p 

(progressive)

• 1080i 

(interlaced)

• 1080p 

(progressive)


Switching the video quality (HDMI mode) using HDMI 
button on the remote control or HDMI SELECT button on 
the front panel.

Press 

HDMI

 button on the remote control or 

HDMI SELECT


button on the front panel to receive a suitable video quality. The 
video quality is required to match your TV having HDMI feature 
and suitable quality. Please also check your TV owner’s manual. 
Press this button to change the output signals as below. See the 
HDMI indicator and select the appropriate output signal.

illuminates “ • 1080i ”

1080i (interlaced)

illuminates “ • 720p ”

720p (progressive)

illuminates “ • 480p ”

480p (progressive)

Press

Press

Press

Press

illuminates “• 480p, • 720p,

 1080i, • 1080p”

Auto

Press

illuminates “ • 1080p ”

1080p (progressive)

HDMI indicator

Video output signal

22

22

Содержание SD-K1000

Страница 1: ...setup Others 2010 Toshiba Corporation Owner s Record The model number and serial number are on the back of your DVD Player Record these numbers in the spaces below Refer to these numbers whenever you communicate with your Toshiba dealer about this DVD Player Model number Serial number OWNER S MANUAL ...

Страница 2: ...ER OUTLET THEN FULLY INSERT FCC NOTICE This equipment has been tested and found to comply with the limits for a Class B digital device pursuant to part 15 of the FCC Rules These limits are designed to provide reasonable protection against harmful interference in a residential installation This equipment generates uses and can radiate radio frequency energy and if not installed and used in accordan...

Страница 3: ...n flames away from this product at all times Notes on handling When shipping the DVD player the original shipping carton and packing materials come in handy For maximum protection repack the unit as it was originally packed at the factory Take care not to give it a shock or shake when carrying Do not use volatile liquids such as insect spray near the DVD player Do not leave rubber or plastic produ...

Страница 4: ...N DISCS On VIDEO CDs This DVD player supports VIDEO CDs equipped with the PBC Version 2 0 function PBC is the abbreviation of Playback Control You can enjoy two playback variations depending on types of discs VIDEO CD not equipped with PBC function Version 1 1 Sound and movie can be played on this DVD player in the same way as an audio CD VIDEO CD equipped with PBC function Version 2 0 In addition...

Страница 5: ...VIDEO CDs Approx 4 hours single sided disc Approx 8 hours double sided disc Approx 80 minutes single sided disc Approx 160 minutes double sided disc Approx 74 minutes Approx 20 minutes 8 cm 12 cm 8 cm 12 cm Audio video moving pictures Audio video moving pictures Audio CDs Approx 74 minutes Approx 20 minutes 8 cm CD single 12 cm Audio The following discs are also available DVD R RW and DVD ROM disc...

Страница 6: ...Optional Equipment 15 Connecting to an amplifier equipped with a Dolby Digital decoder 16 Connecting to an amplifier equipped with Dolby Surround Pro Logic 16 Connecting to an amplifier equipped with a DTS decoder 17 Connecting to an amplifier equipped with an MPEG2 audio decoder 17 Connecting to an amplifier equipped with a digital audio input 17 Basic playback Playing a Disc 18 Basic playback 18...

Страница 7: ...L R L VIDEO OUT AUDIO OUT During playback Example During playback Example During playback Example Some discs may only display chapter numbers Some discs may only display track numbers Some discs may only display track numbers Title Chapter Track number Indicator Multifunctional indicator indicates operating status or messages etc No disc Bad disc OPEN LOAD CLOSE Power off DVD VIDEO VIDEO CD Audio ...

Страница 8: ...te sensor of the DVD player to a strong light source such as direct sunlight or other illumination If you do so you may not be able to operate the DVD player via the remote control Notes on the remote control Direct the remote control at the remote sensor of the DVD player When using the remote control press the buttons at intervals of about 1 second to ensure the correct mode of operation Do not ...

Страница 9: ...mote control The instructions in this manual describe the functions on the remote control See the page in for details 10 HDMI button 10 10 10 10 10 10 10 10 10 10 10 10 11 11 10 11 11 11 11 11 11 10 10 11 12 12 12 12 12 12 12 12 1 3 4 5 6 7 8 9 10 11 12 13 14 15 16 2 17 19 20 21 22 23 8 9 24 25 26 27 28 29 30 31 32 SEARCH T button ON STANDBY button MUTE MUTE button 18 11 ...

Страница 10: ...LAY MODE button While playing a disc press the PLAY MODE button repeatedly to select a repeat mode For DVD Repeat Chapter currently playing chapter Repeat Title currently playing title Repeat All entire disc Off cancel For Video CD Audio CD Repeat Single currently playing track Repeat All entire disc Off cancel For MP3 JPEG Repeat Single currently playing file Repeat Folder current folder Repeat A...

Страница 11: ...le between different audio modes The selected audio mode will be displayed on the screen For VIDEO CDs press the AUDIO button repeatedly during playback to hear a different audio channel Stereo Left Right or MIX Notes When you turn on the DVD player or replace a disc player returns to the initial default setting If you select a sound track which is not included on the disc the DVD player plays a p...

Страница 12: ...SPLAY a third time for the elapsed time display of the played tracks 4 Press DISPLAY a fourth time for the remaining time display of the disc 5 To turn off the display press DISPLAY again 6CH 1 1 Audio language Subtitles Camera angle D TT Title Chapter Elapsed time of the DVD CH TT Title Chapter DVD CH Remaining time of the current title current chapter TT Title Chapter Elapsed time of the DVD CH ...

Страница 13: ...or monitor for optimum performance Progressive outputs ColorStream Pro Some TVs or monitors are equipped with component video inputs that are capable of reproducing a progressively scanned video signal Connecting to these inputs allows you to view the highest quality pictures with less flicker Consumers should note that not all high definition television sets are fully compatible with this product...

Страница 14: ... might be distorted In this case place the DVD player away from the tuner and radio The output sound of the DVD player has a wide dynamic range Be sure to adjust the receiver s volume to a moderate listening level Otherwise high volume sound may damage your hearing as well as the speakers Turn off the amplifier before you connect or disconnect the DVD player s power cord If you leave the amplifier...

Страница 15: ...s The output sound of the DVD player has a wide dynamic range Be sure to adjust the receiver s volume to a moderate listening level Otherwise the speakers may be damaged by a sudden high volume sound Turn off the amplifier before you connect or disconnect the DVD player s power cord If you leave the amplifier power on the speakers may be damaged Connecting to Optional Equipment You can enjoy high ...

Страница 16: ...und sound technology used in theaters showing the latest movies and is now available to reproduce this realistic effect in the home You can enjoy motion picture and live concert DVDs with this dynamic realistic sound by connecting the DVD player to a 6 channel amplifier equipped with a Dolby Digital decoder or Dolby Digital processor If you have a Dolby Surround Pro Logic decoder you will obtain t...

Страница 17: ... now available for home use on DVDs or audio CDs If you have a DTS decoder or processor you can obtain the full benefit of 5 1 channel DTS encoded sound tracks on DVDs or audio CDs Use DVDs or audio CDs encoded via the DTS recording system Make the following setting On screen display Select Page Digital out Raw 75 Ω coaxial cable not supplied Connecting to an amplifier equipped with a DTS decoder ...

Страница 18: ...ed to the DVD player When you want to enjoy the sound of discs from the audio system turn on the audio system and select the input connected to the DVD player Notes If the disc tray is holding a disc you have already played playback will begin from the location where you last stopped Some video CD are recorded with PBC Playback Control a menu with recorded contents may appear on the TV if you have...

Страница 19: ...dable disc formats including CD R containing MP3 files Because this area of technology is still evolving Toshiba cannot guarantee that all recordable discs will produce optimal playback quality The technical criteria set forth in this owner s manual are meant only as a guide Please be advised that you must obtain permission from the applicable copyright owners to download copyrighted content inclu...

Страница 20: ...xif C0001 784k C0002 704k C0003 684k C0004 584k C0005 804k C0006 484k 1 Press the to select an image press the ENTER button to view one image in full screen 2 Press SKIP to view other thumbnail screen Slide Show playback The Slide Show enables you to view picture files one after another automatically Set JPEG Interval setting to 5 seconds 10 seconds or 15 seconds 22 Playing MP3 JPEG Files continue...

Страница 21: ...t be played in a different language than you selected A prior language may be programmed on the disc Some DVDs may be set to display subtitles in a different language other than you selected A prior subtitle language may be programmed on the disc Some DVDs allow you to change subtitle selections only via the disc menu If this is the case press the MENU button and choose the appropriate subtitle la...

Страница 22: ...or 1080p according to the connected TV JPEG Interval To set the JPEG Interval for slide show playback Select Off to disable the slide show feature 5 seconds Plays back images in the form of a slide show at 5 seconds interval 10 seconds Plays back images in the form of a slide show at 10 seconds interval 15 seconds Plays back images in the form of a slide show at 15 seconds interval 1 Press SETUP d...

Страница 23: ...he factory default the DVD player will take 3 5 seconds to reset 1 Press SETUP during stop 2 Press button to select TV System 3 Press button to select the setting item Default Screen Saver or HDMI CEC 4 Press button then use button to select the setting choice on the right 5 Press ENTER button 6 Press SETUP button to exit the menu TV System Default Screen Saver HDMI CEC Rating DVD DVDs equipped wi...

Страница 24: ... picture has oc casional distortion The disc is dirty Remove the disc and clean it 4 It is in fast forward or fast reverse playback Sometimes a small amount of picture distortion may appear This is not a malfunction Brightness is unstable or noises are present in the playback pictures The effect of copy protection Connect the DVD player directly to the TV Avoid connecting the DVD player to a VCR o...

Страница 25: ...surable level less than 0 001 W PEAK Operating conditions Temperature 5 C to 35 C Operation status Horizontal Video output 1 0 V p p 75 Ω pin jack x 1 Component video output Y 1 0 V p p 75 Ω pin jack x 1 PB PR 0 7 V p p 75 Ω pin jack x 2 Audio output COAXIAL DIGITAL 0 5V p p 75 Ω pin jack x 1 Audio output ANALOG 2 0 V rms 680 Ω pin jacks L R x 1 HDMI output 19 pin DVD Player Outputs Audio video ca...

Страница 26: ...a systems are your responsibility 5 Warranties extend only to defects in materials or workmanship as limited above and do not extend to any DAV Product or parts that have been lost or discarded by you or to damage to the DAV Product or parts caused by fires misuse accident Acts of God such as lightning or fluctuations in electric power improper installation improper maintenance or use in violation...

Страница 27: ... authorized by TCL to service the DAV Product b Replacement of missing discarded or lost parts the provision of retrofits or preventive maintenance c Repair of damage that is cosmetic only or does not affect the DAV Product functionality such as wear and tear scratches and dents d Service on Toshiba branded accessory items such accessory items may be covered by their own warranty e Service on thir...

Страница 28: ...ons where DAV Product failure could lead to injury to persons or loss of life or catastrophic property damage IF THE CUSTOMER USES THE DAV PRODUCT IN ANY CRITICAL APPLICATION THE CUSTOMER AND NOT TCL ITS AFFILIATES ADRs OR ASPs ASSUME SOLE AND FULL RESPONSIBILITY FOR SUCH USE TCL RESERVES THE RIGHTTO REFUSETO SERVICE ANY DAV PRODUCT USED IN A CRITICAL APPLICATION TCL ITS AFFILIATES ADRs and ASPs H...

Отзывы: