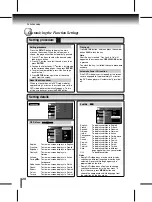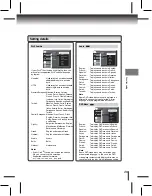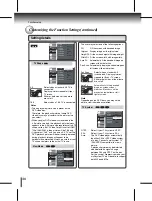
background image

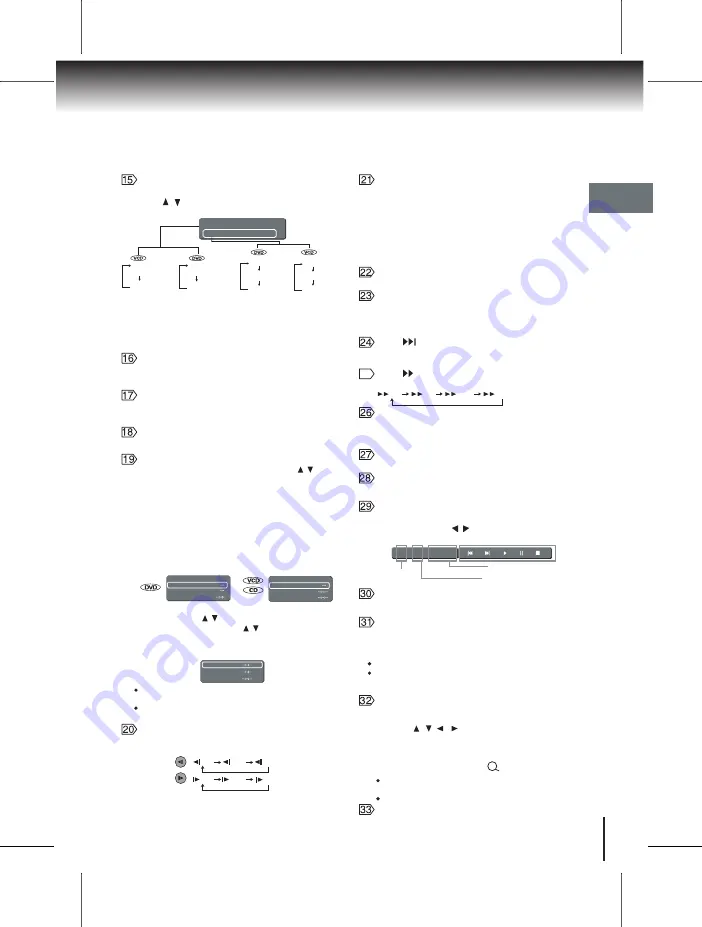
15

Introduction

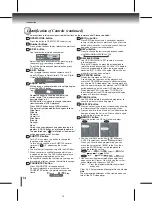
Press once to stop playback and hold the last

position in memory. Playback can be resumed

where it was left off by pressing PLAY. Press

twice to clear the last playback position.  

STOP button

Advanced to the next chapter/track on DVD and 

other discs.

SKIP       button

Press to toggle between PBC On and PBC Off. 

(Only applicable to VCD2.0/SVCD discs)

PBC button

Press to switch the video quality. See pages 23-24.

HDMI button

Selects options in menus. Plays a disc, chapter or

track with some discs. For other discs, press PLAY 

instead.

ENTER button

Press to return to menu display for VCD(2.0) disc 

with menu. 

RETURN button

Display the menu of DVD disc.

MENU button

Set the beginning and end points of a section to 

repeat.

A-B RPT button

Notes

Some discs may not permit A-B repeat operation.

There may be a slight difference between point 

and the location where playback actually resumes 

depending on the disc.

Notes

     The magnification level varies depending on the 

     picture size you select.

     Some discs may not respond to ZOOM feature.

Press this button to zoom in the current picture. 

There are three zooming modes. Press cursor 

buttons (    /    /    /    ) to view a different part of the

zoom in image. You may move the image from the

centre position to UP, DOWN, LEFT, RIGHT 

direction. To resume normal playback, press ZOOM

button repeatedly until the “      Off ” is displayed.

ZOOM button

For DVD discs, press this button to toggle between

different audio modes. The selected audio mode 

will be displayed on the screen. The abbreviation of 

the language will appear instead of the language 

name. Refer to the list of languages and their  

abbreviations on page 34. For stereo discs, press to

switch the audio channel output. For bilingual edition

VCD discs, press the AUDIO button to select your 

audio channel (Left,Right,Mix or Stereo).

AUDIO button

Press to start playback.

PLAY button

Access the on-screen Setup menu for settings
adjustment.

SETUP button

Turn the unit on or set the unit to Standby mode.

POWER button

Press to change the output signal for better picture
quality during stop mode. (See page 22.)

PROGRESSIVE button

All

Off

Track

SEARCH(T) button

Title

Search

Chapter
Time

Track

Search

Track Time
Disc Time

Press SEARCH(T) once and then press   /   to 

select Title search / Chapter or Track search and 

Time search. 

When you select a chapter/track 

number greater than "10", press number "1" plus 

any single number. For example, if you want to 

select chapter/track 12, just press the number 

button "1" and "2". The chapter /track number 

"12" will appear on the Search menu screen. 

Then press ENTER. But if you want to select 

chapter/track number 10, press +10 and then 

ENTER. If you input a wrong number, press

CLEAR button. 

Press 

SEARCH(T)

 twice to display Bookmark 

screen.  Press    /    and then press ENTER to mark

the desired scene. Press    /   and then ENTER to 

play the favourite bookmark. Press CLEAR to cancel

the marked scene. Press 

SEARCH(T)

 again to clear 

the Bookmark screen.

Bookmark 1

Bookmark 2

Bookmark 3

Notes

For VCD, only Track Time Search function is 

possible if the PBC mode is on. 

The marking is cancelled when you open the disc

tray or turn the power off.

Press to display and access features and settings.

Elapsed time

Chapter number 

Title/Track

number

NAVI button

Select by pressing    /    then press ENTER to 

access the feature.

1/2     1/4     00:00:05

SLOW buttons

Reverse/Forward slow playback. Press this button

to toggle among the following modes:

Note

Reverse slow playback is not applicable for DivX

file.

®

     1/2        1/4        1/8

     1/2        1/4       1/8

Chapter: 

Repeats the current chapter.

Title: 

Repeats all chapters within the current title.

Track: 

Repeats the current track.

All:

 Repeats the entire disc.

Off: 

Resumes normal playback.

Title

Off

Chapter

Off

On

Off

On

Shuffle                       


 : Off

Play Mode

Repeat                         : Off

Press PLAY MODE button to select desired features

using    /    and then press ENTER button to toggle

desired mode.

PLAY MODE button

Press to change the fast forward playback speed.

25

FWD     button

     X2         X8         X30         X100

Содержание SD-469EKE

Страница 1: ...2 Introduction 17 21 28 Connections Function setup Others 34 Disc playback 2007 Toshiba Corporation DIGITAL VIDEO 1 SD 469EKE SD 470EKE 576p ...

Страница 2: ...USE OF THIS PRODUCT PLEASE READ THIS OWNER S MANUAL CAREFULLY AND RETAIN FOR FUTURE REFERENCE 3HOULD THE UNIT REQUIRE MAINTENANCE CONTACT AN AUTHORIZED SERVICE LOCATION 5SE OF CONTROLS OR ADJUSTMENTS OR PERFORMANCE OF PROCEDURES OTHER THAN THOSE SPECIFIED HEREIN MAY RESULT IN HAZARDOUS RADIATION EXPOSURE 4O PREVENT DIRECT EXPOSURE TO LASER BEAM DO NOT TRY TO OPEN THE ENCLOSURE 6ISIBLE AND INVISIBL...

Страница 3: ...TURER S INSTRUCTIONS O NOT RESTRICT THE AIR FLOW OF THE UNIT BY PLACING IT IN A PLACE WITH POOR AIR FLOW BY COVERING IT WITH A CLOTH OR BY PLACING IT ON CARPETING 2EAD THESE INSTRUCTIONS EEP THESE INSTRUCTIONS EED ALL WARNINGS OLLOW ALL INSTRUCTIONS O NOT USE THIS APPARATUS NEAR WATER LEAN ONLY WITH DRY CLOTH ...

Страница 4: ...ACHMENTS ACCESSORIES SPECIFIED BY THE MANUFACTURER 5NPLUG THIS APPARATUS DURING LIGHTNING STORMS OR WHEN UNUSED FOR LONG PERIODS OF TIME 2EFER ALL SERVICING TO QUALIFIED SERVICE PERSONNEL 3ERVICING IS REQUIRED WHEN THE APPARATUS HAS BEEN DAMAGED IN ANY WAY SUCH AS POWER SUPPLY CORD OR PLUG IS DAMAGED LIQUID HAS BEEN SPILLED OR OBJECTS HAVE FALLEN INTO THE APPARATUS THE APPARATUS HAS BEEN EXPOSED T...

Страница 5: ...NNECT THE PLUG FROM THE WALL OUTLET AT ONCE 4HE MAINS PLUG IS USED AS THE DISCONNECT DEVICE THE DISCONNECT DEVICE SHALL REMAIN READILY OPERABLE AT ANY TIME 7HEN YOU USE HEADPHONES KEEP THE VOLUME AT A MODERATE LEVEL F YOU USE THE HEADPHONES CONTINUOUSLY WITH HIGH VOLUME SOUND IT MAY CAUSE HEARING DAMAGE O NOT OVERLOAD WALL OUTLETS EXTENSION CORDS OR INTEGRAL CONVENIENCE RECEPTACLES AS THIS CAN RES...

Страница 6: ...ODVKLQJ RU REMHFWV ILOOHG ZLWK OLTXLGV VXFK DV YDVHV WR EH SODFHG RQ WKH HTXLSPHQW 21 7 SODFH KRW REMHFWV RU QDNHG IODPH VRXUFHV VXFK DV OLJKWHG FDQGOHV RU QLJKWOLJKWV RQ RU FORVH WR HTXLSPHQW LJK WHPSHUDWXUHV FDQ PHOW SODVWLF DQG OHDG WR ILUHV 21 7 XVH PDNHVKLIW VWDQGV DQG 1 9 5 IL OHJV ZLWK ZRRG VFUHZV WR HQVXUH FRPSOHWH VDIHW DOZD V ILW WKH PDQXIDFWXUHU V DSSURYHG VWDQG RU OHJV ZLWK WKH IL LQJV...

Страница 7: ...W THAT PRODUCT S INSTRUCTIONS NSPECTION AND AINTENANCE 4HIS 6 VIDEO PLAYER IS A HIGH TECHNOLOGY PRECISION DEVICE F THE OPTICAL PICK UP LENS AND DISC DRIVE PARTS BECOME DIRTY OR WORN DOWN THE PICTURE QUALITY MAY BE REDUCED 4O AVOID REDUCTION IN PICTURE QUALITY IT IS RECOMMENDED THAT REGULAR INSPECTION AND MAINTENANCE CLEANING OR PARTS REPLACEMENT BE PERFORMED EVERY HOURS OF USE OR FURTHER DETAILS C...

Страница 8: ...R HAPTER HAPTER HAPTER 3TRUCTURE OF DISC CONTENTS ORMALLY 6 VIDEO DISCS ARE DIVIDED INTO TITLES AND THE TITLES ARE SUB DIVIDED INTO CHAPTERS 6 S AND AUDIO S ARE DIVIDED INTO TRACKS 6 VIDEO DISC 6 AUDIO ACH TITLE CHAPTER OR TRACK IS ASSIGNED A NUMBER WHICH IS CALLED hTITLE NUMBERv hCHAPTER NUMBERv OR hTRACK NUMBERv RESPECTIVELY 4HERE MAY BE DISCS THAT DO NOT HAVE THESE NUMBERS OTES ON COPYRIGHT 4HE...

Страница 9: ...escribed under that heading You can use this function with DVD video discs You can use this function with Video CDs You can use this function with Audio CDs CD R CD RW CDs Playable discs This DVD video player can play the following discs DVD video discs Disc Mark Contents Disc Size Maximum playback time Approx 4 hours single sided disc Approx 8 hours double sided disc Approx 80 minutes single side...

Страница 10: ...ing to a TV Using the SCART socket 21 Connecting to a TV Using the phono type jacks 21 Connecting to an audio system and a TV Using the component video jacks 22 Connecting to a display Using a HDMITM cable 23 Connecting to Optional Equipment 25 Connecting to an amplifier equipped with a Dolby Digital decoder 26 Connecting to an amplifier equipped with Dolby Surround Pro Logic 26 Connecting to an a...

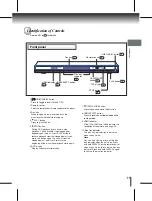
Страница 11: ...u can only light up or turn off the disc tray indicator when the unit is on Press and hold DISPLAY on the remote control when the unit is on to turn off the disc tray indicator Press and hold DISPLAY again to light up the disc tray indicator 1 ON STANDBY button Press to toggle the unit ON and OFF 3 Disc tray When loading a disc place the disc in the disc tray with the label side facing up 4 PLAY b...

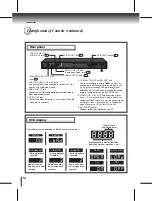
Страница 12: ... 5 VIDEO OUT Y PB PR Component video jacks If your TV or monitor or other similar devices has component video inputs you can produce a higher quality picture on it by connecting its component video cable to the Y PB PR jack on this unit 4 COAXIAL DIGITAL AUDIO OUT jack Use to output digital audio recorded on discs by connecting to the coaxial digital audio input on an AV amplifier or receiver with...

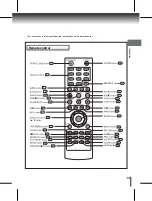
Страница 13: ...3 The instructions in this manual describe the functions on the remote control 1 13 27 5 6 10 12 23 8 9 17 4 2 16 14 29 19 SEARCH T button 3 20 25 24 22 7 26 21 30 18 11 28 15 31 32 Remote control HDMI HDMI button 33 ...

Страница 14: ...ideo player may resume playback from the point where you first pressed the TOP MENU button depending on the actual DVD video disc When playing JPEG if you press TOP MENU in full screen review the DVD video player will display a menu of 9 thumbnail images TOP MENU button Press once to bring up the on screen display showing the information of the current disc playing status Press and hold to turn of...

Страница 15: ... on screen Setup menu for settings adjustment SETUP button Turn the unit on or set the unit to Standby mode POWER button Press to change the output signal for better picture quality during stop mode See page 22 PROGRESSIVE button All Off Track SEARCH T button Title Search Chapter Time Track Search Track Time Disc Time Press SEARCH T once and then press to select Title search Chapter or Track searc...

Страница 16: ...E REMOTE CONTROL IS NOT TO BE USED FOR AN EXTENDED PERIOD OF TIME 4HIS WILL PREVENT BATTERY ACID FROM LEAKING INTO THE BATTERY COMPARTMENT OADING BATTERIES PERATING WITH THE REMOTE CONTROL 0OINT THE REMOTE CONTROL AT THE REMOTE SENSOR AND PRESS THE BUTTONS ISTANCE BOUT M FEET FROM THE FRONT OF THE REMOTE SENSOR E NGLE BOUT IN EACH DIRECTION OF THE FRONT OF THE REMOTE SENSOR O NOT EXPOSE THE REMOTE...

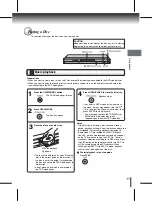
Страница 17: ...he audio system turn on the audio system and select the input connected to the DVD video player 1 2 3 Basic playback Press OPEN CLOSE to close the disc tray If you insert a DVD video disc that contains a top menu a menu may appear Use the to select the title you want to view then press ENTER to start playback You may need to press the TOP MENU or MENU button to display disc menu depending on the a...

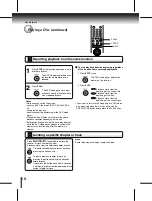
Страница 18: ... function when you play a PBC featured VIDEO CD while PBC is On you open the disc tray you disconnect the power plug of the DVD video player There may be a difference in the location where playback resumes depending on the disc Settings you changed using the on screen displays while the DVD video player keeps a location in the memory may function only after the memory is cleared Resuming playback ...

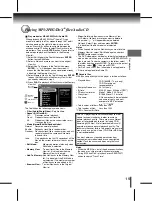
Страница 19: ...s tracks in the Memory View list Play modes for MP3 JPEG DivX Audio CD Clear Delete the files tracks in the Memory View list Select a file track or more you want to delete in stop mode will appear beside the deleted file track Select Clear and then press ENTER It is disabled if the Edit mode is not selected Playing MP3 JPEG DivX files Audio CD Playable files MP3 disc compatibility with this player...

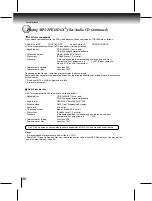
Страница 20: ...ALLY THE FOLLOWING CONDITIONS OF INCLUDED FILES WILL INCREASE THE DISC S DISABILITY 0IXELS OVER X IN HEIGHT AND OR WIDTH ILE FORMAT EXCEPT XIF 0 FILES COMPATIBILITY IV8 0LAYABLE FILES IV8 DISC COMPATIBILITY WITH THIS PLAYER IS LIMITED AS FOLLOWS s 0LAYABLE DISCS 2 MIN ONLY 27 MAYBE NOT RECOMMENDABLE s UDIO FORMAT 2 0 6 2 0 IV8 s NHANCE VIDEO 1PEL 0ROGRESSIVE FRAMES s RAME RATE TO FPS s PHYSICAL FO...

Страница 21: ... and then connect to your TV Connect the DVD video player directly to your TV If you connect the DVD video player to a VCR TV VCR combination or video selector the playback picture may be distorted as DVD video discs are copy protected Analogue audio out will not have sound if DTS playback is selected Connecting to a TV Using the phono type jacks Make the following setting On screen display Select...

Страница 22: ...ess PROGRESSIVE repeatedly to turn off progressive mode If yourTV does not support the progressive scan format the picture will appear scrambled or blank To return to normal picture press PROGRESSIVE button repeatedly to turn off progressive mode Notes Refer to the owner s manual of the connected equipment as well When you connect the DVD video player to other equipment be sure to turn off the pow...

Страница 23: ...UALITY IN 34 0 MODE 4HE VIDEO QUALITY IS REQUIRED TO MATCH YOUR 46 HAVING FEATURE AND SUITABLE QUALITY 0LEASE ALSO CHECK YOUR 46 OWNER S MANUAL 0RESS THIS BUTTON TO CHANGE THE OUTPUT SIGNALS AS BELOW 3EE THE INDICATOR AND SELECT THE APPROPRIATE OUTPUT SIGNAL P P I AND P ARE SIGNALS CREATED WITH THIS 6 0LAYER FROM ORIGINAL I I SIGNAL 4HE RESOLUTION OF THE PICTURE MAY NOT BE INCREASED EVEN IF THEY A...

Страница 24: ...devices with an HDMI input may not operate properly with this DVD player outputs No sound will be output from the HDMI cable if the digital output is not set to PCM see page 32 HDMI output is only available when the Video Output is set to If the TV with HDMI doesn t support DTS output decoding when playing DTS CD discs there will be noise during HDMI output HDMI Otherwise the HDMI button is invali...

Страница 25: ...KERS MAY BE DAMAGED s OR CONNECTION TO YOUR 46 SEE h ONNECTING TO A 46v SEE PAGES s 4HIS SECTION USES THE FOLLOWING REFERENCE MARKS RONT SPEAKER 2EAR SPEAKER 3UB WOOFER ENTER SPEAKER 3IGNAL FLOW RQQHFWLQJ WR 2SWLRQDO TXLSPHQW 9OU CAN ENJOY HIGH QUALITY DYNAMIC SOUNDS BY CONNECTING THE 6 VIDEO PLAYER TO OPTIONAL AUDIO EQUIPMENT 7ARNING s 7HEN YOU ARE CONNECTING VIA THE 8 4 5 54 JACK AN 6 DECODER TH...

Страница 26: ...two rear speakers With an amplifier equipped with Dolby Digital Connect the equipment the same way as described in Connecting to an amplifier equipped with a Dolby Digital decoder Refer to that amplifier s owner s manual and set the amplifier so you can enjoy Dolby Surround Pro Logic sound With an amplifier not equipped with Dolby Digital Connect the equipment as follows Connect one or two rear sp...

Страница 27: ... the following setting On screen display Select Page PCM or Bitstream Digital Output 32 To COAXIAL type digital audio input 75Ω coaxial cable not supplied Amplifier equipped with an MEPG2 audio decoder Connecting to an amplifier equipped with a DTS decoder Digital Theater Systems DTS DTS is a high quality surround technology used in theaters and now available for home use on DVD video discs or aud...

Страница 28: ...ted A prior subtitle language may be programmed on the disc Some DVD video discs allow you to change subtitle selections only via the disc menu If this is the case press MENU button and choose the appropriate subtitle language from the selection on the disc menu When you leave the unit in DVD stop mode for approximately 2 minutes the screen saver of the DVD video player automatically appears To tu...

Страница 29: ...splay DVD menus in Danish Danish To display DVD menus in Finnish Finnish To display DVD menus in Polish Polish To display DVD menus in Portuguese Portuguese To display DVD menus in Turkish Turkish German Italian Portuguese Dutch Notes If your DivX files do not include the subtitle file you cannot use this selection Supported subtitle file formats srt sub txt smi ssa ass psb German Italian Portugue...

Страница 30: ...f HD Jpeg Mode 5 Seconds JPEG Interval PAL TV System Auto Fit View Mode 4 3 HDMI Video Output 480p 576p HD Resolution Off HD Jpeg Mode 5 Seconds JPEG Interval TV Shape 4 3 16 9 Auto Fit Automatically fit the decoded image on screen without distortion Pan Scan Automatically display decoded image on full screen without distortion Pan Scan Select when a standard 4 3 is connected Displays pictures cro...

Страница 31: ... Fit View Mode 4 3 720p HD Resolution Off HD Jpeg Mode 5 Seconds JPEG Interval TV Shape Component Composite P Scan RGB HDMI Video Output PAL HDMI TV System Auto Fit View Mode 4 3 720p Off 5 Seconds JPEG Interval TV Shape 480p 576p 720p 1080i 1080p Video Output HD Resolution HD Jpeg Mode HD Jpeg Mode 5 Seconds TV System View Mode JPEG Interval TV Shape Video Output HD Resolution HD Jpeg Mode PAL HD...

Страница 32: ...t the parental level 1 Press SETUP button 3 Press button then the ENTER button to select Parental Enter Password screen will appear 2 Press buttons to select the Rating Selects the output sound format corresponding to your system connection Digital Output Audio Night Mode Night Mode is equivalent to Dynamic Range Compress When it is On it reduces the variation between loud and soft sounds in audio...

Страница 33: ...vate the Parental Level setting Set Password DVD New Password can be set to replace the default password 1 Press SETUP button 3 Press button then the buttons to select Set Password 4 Press ENTER button Enter Password screen will appear 2 Press buttons to select the Rating 5 Press the number buttons to input the current password If the password has not been set yet after you purchase this unit it i...

Страница 34: ...HAETO 2OMANCE IRUNDI 2UMANIAN 2USSIAN INYARWANDA 3ANSKRIT 3INDHI 3ANGO 3ERBO ROATIAN 3INGHALESE 3LOVAK 3LOVENIAN 3AMOAN 3HONA 3OMALI LBANIAN 3ERBIAN 3ISWATI 3ESOTHO 3UNDANESE 3WEDISH 3WAHILI 4AMIL 4ELUGU 4AJIK 4HAI 4IGRINYA 4URKMEN 4AGALOG 3ETSWANA 4ONGAN 4URKISH 4SONGA 4ATAR 4WI 5KRAINIAN 5RDU 5ZBEK 6IETNAMESE 6OLAPàK 7OLOF 8HOSA 9ORUBA ULU 9IDDISH AVANESE EORGIAN AZAKH REENLANDIC AMBODIAN ANNADA...

Страница 35: ...een TV and this unit Wrong connection PROGRESSIVE button is pressed on a TV equipped with component video input jacks but does not support progressive scan The equipment connected with the audio cable is not set to receive DVD signal output The audio cable is not connected securely The audio receiver or TV is turned off The setting of output sound format is incorrect The disc is dirty It is in fas...

Страница 36: ... IS TOO SMALL OR TOO LARGE s 4RAY OCK MODE HAS BEEN ENABLE BATTERIES IN THE REMOTE CONTROL ARE EXHAUSTED s NSERT A DISC s NSERT A PLAYABLE DISC HECK THE DISC TYPE AND COLOUR SYSTEM s 0LACE THE DISC WITH THE PLAYBACK SIDE DOWN s 0LACE THE DISC CORRECTLY INSIDE THE GUIDE ON THE DISC TRAY s LEAN THE DISC s ANCEL THE PARENTAL LOCK FUNCTION OR CHANGE THE PARENTAL LOCK LEVEL s 4HESE OPERATIONS MAY PREVE...

Страница 37: ...Audio output COAXIAL DIGITAL HDMI output Audio output ANALOG 0 5V 19 pin p p 75Ω pin jack x 1 2 0 V rms 680Ω pin jacks L R x 1 Audio video cable 1 Remote control SE R0217 1 Batteries AAA 2 This model complies with the above specifications Designs and specifications are subject to change without notice This model may not be compatible with features and or specifications that may be added in the fut...

Страница 38: ... 2ECYCLE PAPER 0RINTED IN HINA 43 6 ...

Отзывы: