12
-
English
C
onnections
Connecting an
Audio/Video Input
Cable
You can connect other audio/video equipment to your
DVD-VCR using audio/video cables if the appropriate
outputs are available on the equipment chosen.
Examples : • You wish to copy a video cassette with
the help of a second VCR.
• You wish to play back and/or copy
pictures taken with a camcorder
• Make sure that both the external devices
and the DVD-VCR are switched off
before connecting the cables.
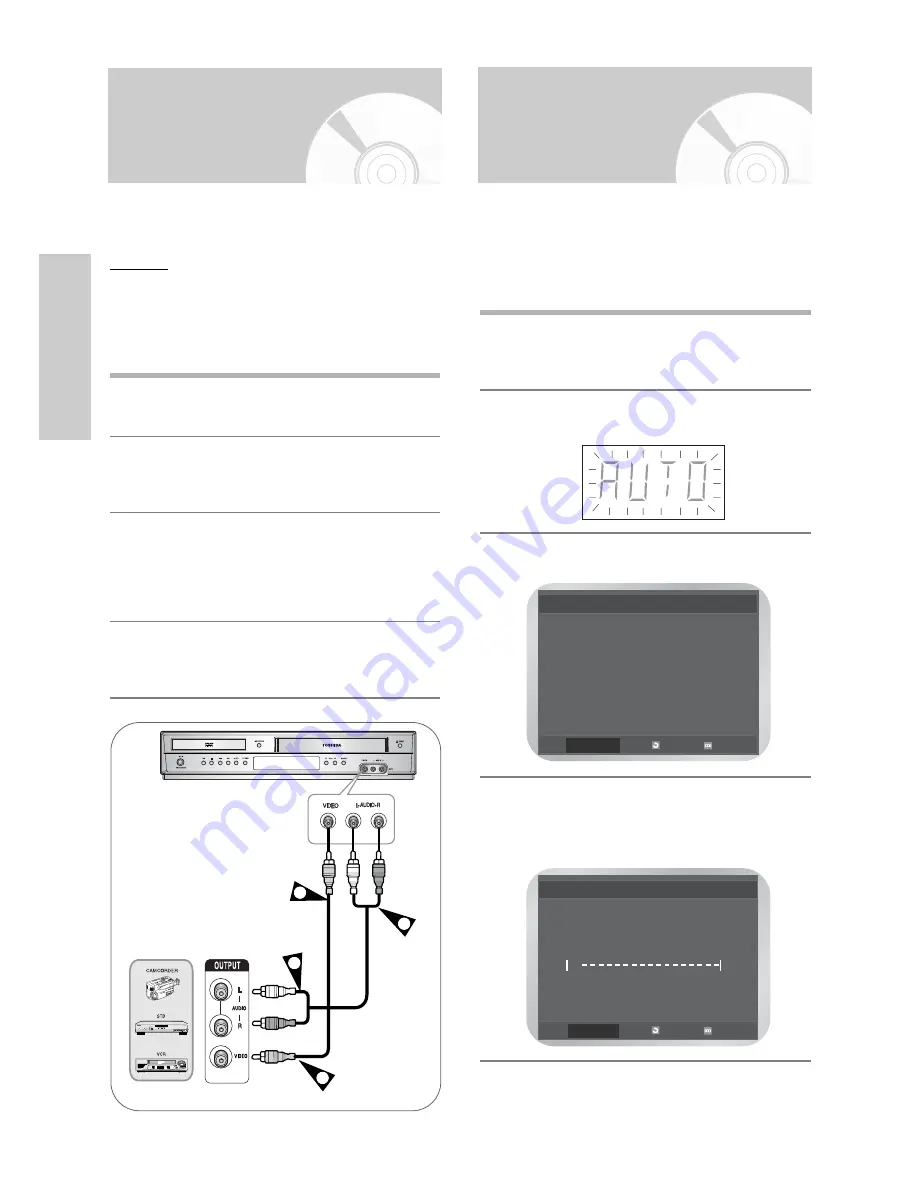
1
Connect one end of the video cable into the
VIDEO
input jack on the front of the DVD-VCR.
2
Plug the other end of the video cable into the
appropriate output connector on the other
system (VCR or Camcorder etc).
3
Connect one end of the audio cable supplied into
the
AUDIO
input jacks on the front of the DVD-
VCR.
• Take care to respect the colour coding of the
left and right channels.
4
Plug the other end of the audio cable into the
appropriate output connectors on the other
system (VCR, camcorder etc).
2
4
3
1
Plug & Auto Setup
Your DVD-VCR will automatically set itself up when it
is plugged into the mains for the first time.
TV stations will be stored in memory. The process
takes a few minutes. Your DVD-VCR will then be
ready for use.
1
Connect the RF Cable as indicated on page 9.
(Connecting Your DVD-VCR to the TV Using
the RF Cable)
2
Plug the DVD-VCR into the mains.
• “AUTO” in the front panel display flickers.
3
Start the auto setup.
4
Start the auto scanning.
The number of stations automatically stored by
the DVD-VCR depends on the number of
stations that it has found.
Auto Setup will be
started.
Check antenna and TV
cable connection.
RETURN
MENU
Auto Setup
RETURN
MENU
Please Wait
10%
√√


