4 Replacement Procedures
Error! Style not defined.
Error! Style not defined.
Satellite L450/Pro L450/L450D/Pro L450D Maintenance Manual
4-46
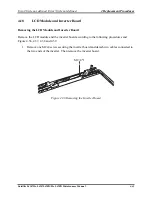
NOTE:
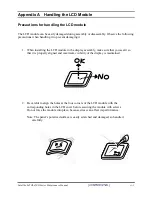
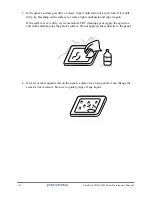
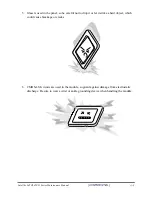
ICs are fragile. Use extreme care not to apply pressure to the ICs along the edges of the LCD
module.
Dispose of used LCD panels (fluorescent (FL) tubes) as required by local ordinances or
regulations.
The LVDS cable must be carefully peeled away before disconnecting it from the LCD panel.
Installing the LCD Module and Inverter Board
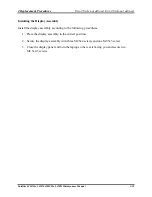
Install the inverter board according to the following procedures.
1.
Place the LCD module cover face down on a protective surface such as a foam pad.
2.
Connect the LVDS cable to the LCD panel connector.
3.
Turn the LCD right side up.
4.
Seat the LCD hinge assembly in the correct position beside the LCD panel and secure it
with six M2x3 screws.
5.
Seat the LCD module in the correct position in the LCD cover assembly and secure it to
the LCD cover assembly with ten M2.5x4 screws.
6.
Seat the inverter board in correct position and connect two cables to the two ends of the
inverter board. Then secure it with one M2x4 screw.
Содержание Satellite L450 series
Страница 1: ...Toshiba Personal Computer Satellite Maintenance Manual TOSHIBA CORPORATION CONFIDENTIAL ...
Страница 14: ...Chapter 1 Hardware Overview ...
Страница 17: ......
Страница 33: ...Chapter 2 Troubleshooting Procedures 2 ...
Страница 34: ......
Страница 82: ...3 Tests and Diagnostics 1 Chapter 3 Tests and Diagnostics ...
Страница 84: ...3 Tests and Diagnostics 3 3 19 1st HDD Test 33 3 19 2nd HDD Test 35 3 21 Read DMI 39 3 22 Write DMI 39 ...
Страница 98: ...3 Tests and Diagnostics 17 Memory Write Test Memory Read Write Test ...
Страница 104: ...3 Tests and Diagnostics 23 2 If the Magnetic switch test pass it will show below display ...
Страница 107: ...3 Tests and Diagnostics 26 If an error is detected and a test fails the following message displays ...
Страница 119: ...3 Tests and Diagnostics 38 If the picture shows as below it means he HDD function is NG ...
Страница 123: ...Chapter 4 Replacement Procedures ...
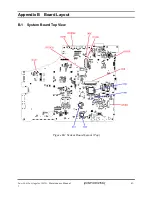
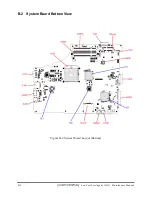
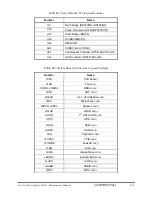
Страница 187: ...B 4 CONFIDENTIAL Low Cost Los Angeles 10AL Maintenance Manual PJP1 AC Adaptor conn PJP2 Battery conn ...
Страница 209: ...3 Thai TI Keyboard Figure TI keyboard 4 Korean KO Keyboard Figure KO keyboard ...
Страница 210: ...5 United Kingdom UK Keyboard Figure UK keyboard 6 US International UI Keyboard Figure UI keyboard ...
Страница 211: ...7 Hebrew HB Keyboard Figure HB keyboard 8 Danish DM Keyboard Figure DM keyboard ...
Страница 212: ...9 Swiss SW Keyboard Figure SW keyboard 10 Arabic ARE Keyboard Figure ARE keyboard ...
Страница 213: ...11 Czech CZ Keyboard Figure CZ keyboard 12 Russian RU Keyboard Figure RU keyboard ...
Страница 214: ...13 Portuguese PO Keyboard Figure PO keyboard 14 Slovakian SL Keyboard Figure SL keyboard ...
Страница 215: ...15 Italian IT Keyboard Figure IT keyboard 16 French FR Keyboard Figure FR keyboard ...
Страница 216: ...17 German GR Keyboard Figure GR keyboard 18 Greek GK Keyboard Figure GK keyboard ...
Страница 217: ...19 Canada French CF Keyboard Figure CF keyboard 20 Hungarian HG Keyboard Figure HG keyboard ...
Страница 218: ...21 Spanish SP Keyboard Figure SP keyboard 22 Turkish TR Keyboard Figure TR keyboard ...
Страница 219: ...3 Turkish F TF F Keyboard Figure TF F keyboard 24 Swedish SD Keyboard Figure SD keyboard ...
Страница 220: ...25 Belgian BE Keyboard Figure BE keyboard 26 Yugoslavian YU Keyboard Figure YU keyboard ...
Страница 221: ...27 Norwegian NW Keyboard Figure NW keyboard 28 Scandinavian ND Keyboard Figure ND keyboard ...
Страница 222: ...29 Canadian Multinational AC Keyboard Figure AC keyboard 30 Canadian Bilingual CB Keyboard Figure CB keyboard ...
Страница 223: ...31 Japanese JP Keyboard Figure JP keyboard 32 Romania RO Keyboard Figure RO keyboard ...
Страница 224: ...32 Bulgaria BU Keyboard Figure BU keyboard ...

