background image

3 CHECKING AND CANCELING THE COMMUNICATIONS

52    Checking Communications

3

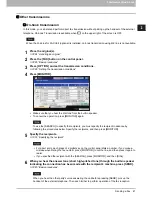
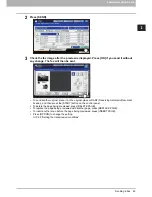
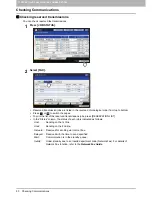
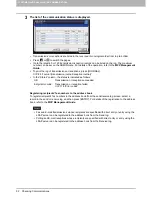
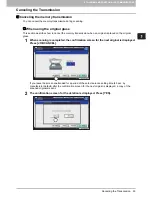
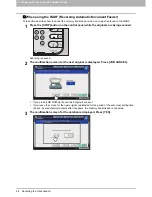
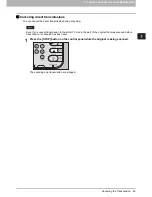
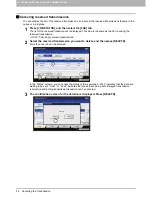
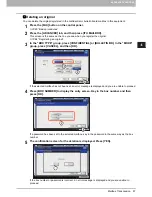
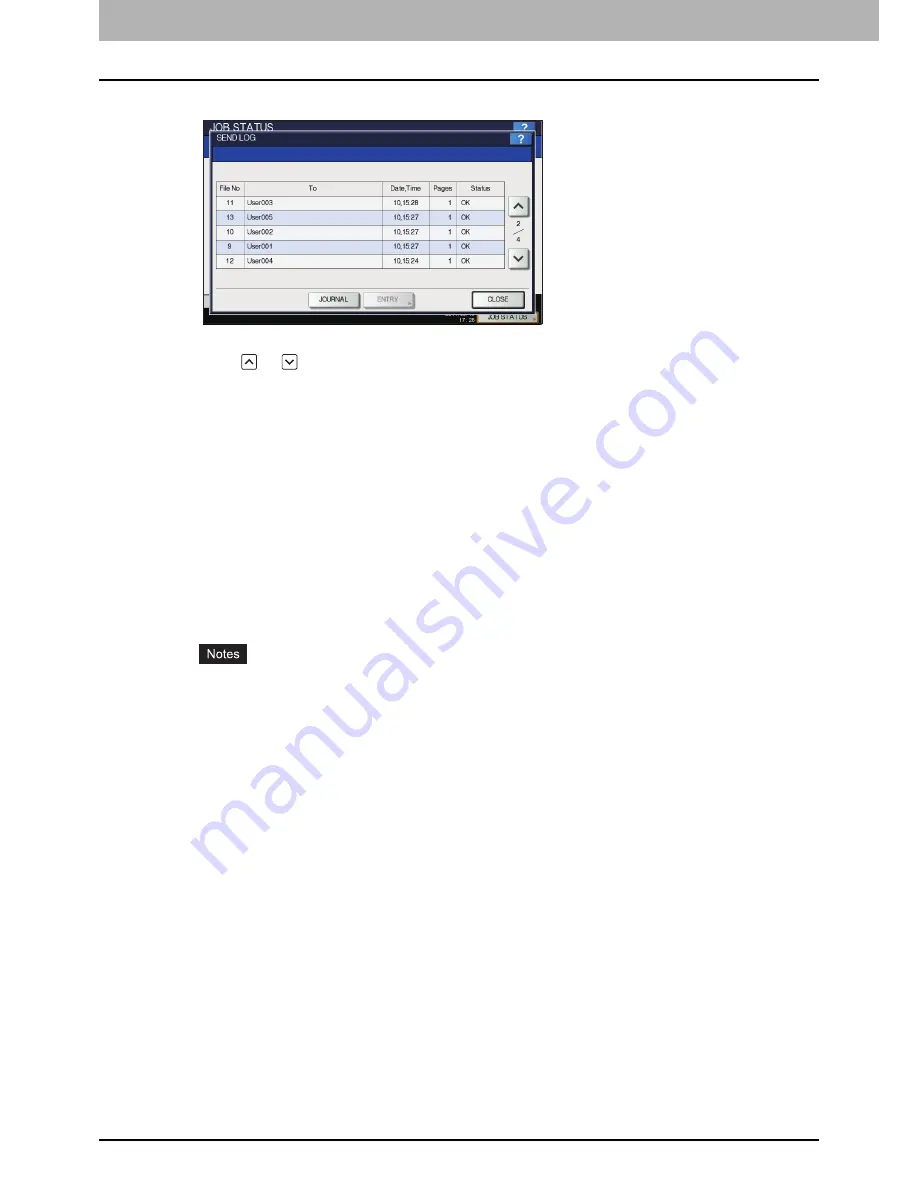
The list of the communication status is displayed.

Transmissions or receptions are listed in the reversed chronological order from top to bottom.

Press 

 or 

 to switch the pages.

Up to the latest 40 or 120 transmission/reception records can be listed on the log. The maximum 
number can be set on the ADMIN menu. For details of the operation, refer to the 

MFP Management 

Guide

.

To print the log of transmissions or receptions, press [JOURNAL].

 P.86 “Journal (transmission journal/reception journal)”

In the “Status” column, the status is indicated as follows:

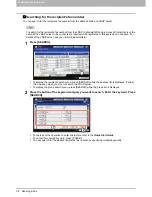
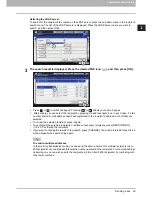
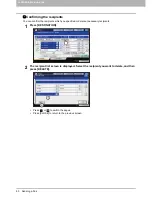
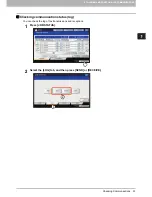
Registering recipients’ fax numbers to the address book

To register recipient's fax numbers in the address book from the send/receive log screen, select a 
record in the send or receive log, and then press [ENTRY]. For details of the registration to the address 
book, refer to the 

MFP Management Guide

.

Fax and E-mail transmissions whose recipients are specified with direct entry or entry using the 
LDAP server can be registered to the address book from the Send log.

Polling and E-mail receptions whose recipients are specified with direct entry or entry using the 
LDAP server can be registered to the address book from the Receive log.

OK:

Transmission or reception succeeded.

4-digit error code: Transmission or reception failed.

 P.118 “Error codes”

Содержание GD-1260

Страница 1: ...MULTIFUNCTIONAL DIGITAL SYSTEMS Operator s Manual for FAX Unit GD 1320 GD 1350 GD 1270 GD 1260 ...

Страница 2: ... 2012 2015 TOSHIBA TEC CORPORATION All rights reserved Under the copyright laws this manual cannot be reproduced in any form without prior written permission of TTEC ...

Страница 3: ... s Manual describes how to use the fax functions troubleshooting and its maintenance etc Before using the fax functions thoroughly read and understand this Operator s Manual To ensure that the fax functions are used in optimum working conditions keep this Operator s Manual in a handy place for future reference ...

Страница 4: ... It is designed to be connected to a compatible modular jack that is also compliant See installation instructions for details The REN is used to determine the number of devices that may be connected to a telephone line Excessive RENs on a telephone line may result in the devices not ringing in response to an incoming call In most but not all areas the sum of RENs should not exceed five 5 0 To be c...

Страница 5: ...presentative designated by the supplier Any repairs or alterations made by the user to this equipment or equipment malfunctions may give the telecommunications company cause to request the user to disconnect the equipment Users should ensure for their own protection that the electrical ground connections of the power utility telephone lines and internal metallic water pipe system if present are co...

Страница 6: ... terminal equipment indicates only that Telecom has accepted that the item complies with minimum conditions for connection to the network It indicates no endorsement of the product by Telecom nor does it provide any sort of warranty Above all it provides no assurance that any item will work correctly in all respects with another item of Telepermitted equipment of a different make or model nor does...

Страница 7: ...uct in restricted working environments are not the responsibility of TOSHIBA TEC The consequences of the use of this product in restricted working environments may be an electromagnetic interference with other devices or machines in the nearby surrounding area This can result into malfunction including data loss data error pertaining to this product or the other devices machines involved in the el...

Страница 8: ...r the available options refer to Options in the Quick Start Guide for your equipment Indicates a potentially hazardous situation which if not avoided could result in death serious injury or serious damage or fire in the equipment or surrounding objects Indicates a potentially hazardous situation which if not avoided may result in minor or moderate injury partial damage to the equipment or surround...

Страница 9: ...therefore R is not added to these sizes Trademarks The company names and product names in this manual are the trademarks of their respective companies Regarding paper printed by e STUDIO307LP Avoid the following actions as paper printed by e STUDIO307LP may discolor Store for long period of time Leave in places exposed to high temperature such as inside of a car Leave in places exposed to direct s...

Страница 10: ...any cause which prevents the Product from operating or functioning correctly which arises from or is attributable to either acts omissions events or accidents beyond the reasonable control of TOSHIBA TEC CORPORATION including without limitation acts of God war riot civil commotion malicious or deliberate damage fire flood or storm natural calamity earthquakes abnormal voltage or other disasters ad...

Страница 11: ...aper 45 Chapter 3 CHECKING AND CANCELING THE COMMUNICATIONS Checking Communications 50 Checking reserved transmissions 50 Checking communication status log 51 Canceling the Transmission 53 Canceling the memory transmission 53 Canceling direct transmissions 55 Canceling reserved transmissions 56 Chapter 4 ADVANCED FUNCTIONS Transmitting 2 Sided Originals 58 Priority Transmission 60 Polling Communic...

Страница 12: ... Transmission report 94 Multi transmission report 94 Multi polling report 95 Relay TX orig terminal report 95 Relay TX relay station report 96 Relay TX end terminal report 96 Relay station report 97 Mailbox reception report 97 Chapter 6 SETTING ITEMS User Settings 100 Fax settings 100 Administrator Settings 104 Registering the terminal ID 106 Setting the initial setup 107 Setting RX printing 109 S...

Страница 13: ...FORE USING FAX This chapter describes the basics of this equipment you should learn before you start using it Description of Each Component 12 Control panel 12 Touch panel 15 Options 16 Connecting Cables 17 ...

Страница 14: ...cribes the buttons on the control panel used for the fax functions For any details of the control panel not covered in this document refer to the Quick Start Guide e STUDIO2550C Series e STUDIO5055C Series e STUDIO507 Series e STUDIO307LP e STUDIO857 Series 1 2 3 4 5 6 11 12 7 8 10 9 1 2 3 4 5 6 7 8 13 11 12 10 9 ...

Страница 15: ...Digital keys Use these keys to enter fax numbers etc 4 FUNCTION CLEAR button Use this button to clear all current selected functions and return to the default settings 5 STOP button Use this button to stop any scanning in progress 6 START button Use this button to start scanning a document for fax transmission 7 CLEAR button Use this button to cancel entered numbers 8 Alarm lamp This lamp lights w...

Страница 16: ...utton Use this button to print a SECURE RECEIVE fax job 11 MEMORY RX This lamp lights when there is a received fax which is not printed yet and its data are still in the memory 12 Touch panel P 15 Touch panel 13 LINE This lamp lights when a telephone line is busy ...

Страница 17: ...ere 3 Operation object area Operation related buttons and text boxes are shown here 4 Alert message indication area Messages are shown here to inform you of various alerts such as the replacement time of toner cartridges and waste toner boxes or the existence of a received SECURE RECEIVE fax job 5 Date and time The current date and time are shown here 6 JOB STATUS button Use this button to view th...

Страница 18: ...ach Component Options This section describes the options related to the fax function FAX Unit This unit enables the use of the fax function 2nd Line for FAX Unit GD 1260 This board enables the use of 2 lines for sending and receiving faxes ...

Страница 19: ...Connecting Cables Be sure that the power of this equipment is turned OFF before connecting the cables e STUDIO2550C Series e STUDIO5055C Series e STUDIO6570C Series e STUDIO6550C Series e STUDIO507 Series e STUDIO307LP 3 2 1 3 2 1 1 2 3 1 2 3 ...

Страница 20: ... 2 LINE Connect a telephone line 3 TEL Connect an external telephone Do not connect this equipment and the external telephone to a telephone connector in parallel Use the external telephone without an answerphone or with the function off to be connected with the TEL The TEL connector is not available depending on the destinations 3 2 1 ...

Страница 21: ...ibes how to send and receive a fax Sending a Fax 20 Basic procedures 20 Handling an original 24 Setting the transmission conditions 29 Specifying the recipient 33 Other transmissions 41 Receiving a Fax 44 Reception mode 44 Originals and paper 45 ...

Страница 22: ...e the original s on the original glass or RADF Reversing Automatic Document Feeder in the correct direction The illustration above shows the original placed on the original glass P 24 Handling an original 2 Press the FAX button on the control panel The fax screen is displayed If you leave the screen unattended for the period of the auto clear setting time 45 sec by manufacturer default the screen ...

Страница 23: ...ent To specify the recipient dial the number using the digital keys on the control panel or use the address book P 33 Specifying the recipient 5 To display the preview screen press PREVIEW This feature is available when the hard disk is installed in the equipment P 42 Displaying the preview ...

Страница 24: ...on mode the fax number is dialed immediately and the scanned document will be sent Transmission conditions can be set in the transmission condition setting screen If memory becomes full during scanning in the memory transmission mode that original will not be stored in memory When that happens reduce the number of originals you are sending or try sending them in the direct transmission mode You ca...

Страница 25: ...ing the next original If an original is placed on the original glass and its scanning is completed the confirmation screen for the next original is displayed If you want to continue scanning of the next original place it on the original glass and then press the START button on the control panel Once all the originals are scanned press JOB FINISH If you place an original on the RADF Reversing Autom...

Страница 26: ...al size by yourself when placing the following originals whose sizes cannot be detected correctly Highly transparent originals e g overhead transparencies tracing paper Totally dark originals or originals with dark borders Non standard size originals e g newspapers magazines For details refer to the Copying Guide Location Maximum size Paper weight Original size Original glass Length 297 mm 11 69 W...

Страница 27: ... set an original on the original glass Originals are sent in the order they are placed on the original glass Do not place any heavy objects 4 kg 9 lb or over on the original glass and do not press on it with force Breaking the glass could injure you 1 Raise the Original Cover or RADF Reversing Automatic Document Feeder and place the original with its face down on the glass Raise it 60 degrees or m...

Страница 28: ... to a recipient is carried out so that the pre entered sender information is printed in position A in the figure When an original of LT A4 size is placed in the direction shown in the above right figure transmission to a recipient is carried out so that the pre entered sender information is printed in position B in the figure The pre entered sender information shows what is registered in the Termi...

Страница 29: ...ets 35 to 80 g m2 9 3 to 20 lb or 16 mm 0 62 in height 2 sided originals can be set and sent P 58 Transmitting 2 Sided Originals When an original of any size other than LT A4 is placed in the direction shown in the above left figure transmission to a recipient is carried out so that the pre entered sender information is printed in position A in the figure When an original of LT A4 size is placed i...

Страница 30: ...ing the transmission conditions Precautions for using the RADF Do not use the following originals as they may misfeed or become damaged The following originals should be handled carefully 1 Badly wrinkled or folded originals In particular originals whose leading edge are curled may fail to be fed 4 Clipped or stapled originals 2 Originals with carbon paper 5 Originals with holes or torn originals ...

Страница 31: ...return to the default settings after the transmission Each default setting of resolution original mode exposure transmission mode and ECM is adjustable P 100 Fax settings Making settings Pressing OPTION on the fax screen will display the transmission condition setting screen as shown below Set each setting item and then press OK Press or to switch the pages To cancel the operation and return to th...

Страница 32: ...xt and fine illustrations U FINE This is suitable for an original with ultra fine illustrations MEMORY TX Send the original after the scanned data are saved in the memory Up to 100 transmissions of up to 1000 pages per 1 transmission can be reserved or up to 50 transmissions when the hard disk is not installed DIRECT TX Send the original directly as it is being scanned Once a page has been scanned...

Страница 33: ...ors occurring decrease Even if the recipient s QUALTY TX setting is set to ON in the address book it becomes OFF at a fax transmission if you press OK on the OPTION screen without enabling the QUALTY TX setting MAIL BOX COMMUNICATION For the communication compatible with ITU T International Telecommunications Union Telecommunications standards specify a subaddress or password to be sent to the rec...

Страница 34: ... Press OPTION The illustration above shows the original placed on the original glass If you place an original on the RADF Reversing Automatic Document Feeder and press the CONTINUE button during scanning the confirmation screen for the next original is displayed after the scanning is completed If you press the STOP button during scanning the scanning halts and the confirmation screen for the next ...

Страница 35: ...vance For details of the operation refer to the MFP Management Guide or TopAccess Guide Direct entry with digital keys You can specify the recipient by entering its fax number on the control panel 1 Press INPUT FAX No 2 Key in the recipient s fax number and press OK You can also enter the recipient s address with the digital key on the control panel To delete the entered fax number one number at a...

Страница 36: ...d recipients or delete unnecessary recipients press DESTINATION P 40 Confirming the recipients To send to multiple addresses In the memory transmission mode you can send the same document to multiple recipients up to 400 recipients at once Press MULTI and then enter the recipient s fax number Repeat this operation until you specify all the recipients You can also specify up to a total of 400 recip...

Страница 37: ...elected To cancel the selected recipient press it again To confirm all the selected recipients or delete unnecessary recipients press DESTINATION P 40 Confirming the recipients To refine your search only for items including specified characters press the pull up menu A list of recipients can be displayed using 11 to 15 characters per name To send to multiple addresses In the memory transmission mo...

Страница 38: ... items including specified characters press the pull up menu To send to multiple addresses In the memory transmission mode you can specify multiple groups up to 200 groups up to a total of 400 recipients to send the same document at once Repeat this selection until you select all the recipients For the multi address transmission you can also specify the recipients up to a total of 400 recipients b...

Страница 39: ...e box In such case if a fax number and an E mail address have been registered to the recipient s address both of them are selected To cancel the selected recipient press it again To confirm all the selected recipients or delete unnecessary recipients press DESTINATION P 40 Confirming the recipients To send to multiple addresses In the memory transmission mode you can send the same document to mult...

Страница 40: ...e LDAP server ask your network administrator 1 Press SEARCH To display the recipient search menu press SEARCH while the address list is displayed Perform this operation when you want to search the LDAP server To display the group search menu press SEARCH while the group list is displayed 2 Press the button of the keyword category you want to search Enter the keyword Press SEARCH For details of the...

Страница 41: ... fax number and an E mail address have been registered to the recipient s address both of them are selected To cancel the selected recipient press it again To confirm all the selected recipients or delete unnecessary recipients press DESTINATION P 40 Confirming the recipients If you want to change the results of the search press CHANGE You will be returned to the Step 2 screen Specify the search s...

Страница 42: ...an confirm the recipients which you specified or delete unnecessary recipients 1 Press DESTINATION 2 The recipient list screen is displayed Select the recipient you want to delete and then press DELETE Press or to switch the pages Press CLOSE to return to the previous screen ...

Страница 43: ...o cancel the operation press MONITOR again To use the SEARCH to specify the recipients you must specify the recipient in advance by following the procedures below Specify the recipients and then press MONITOR 5 Specify the recipients P 33 Specifying the recipient For direct entry each press of a digital key on the control panel dials a number If you make a mistake when dialing the fax number press...

Страница 44: ...ial the machine dials each number you enter If you make a mistake when dialing the fax number replace the handset to cut the line and then pick up the handset again to redial 6 When you hear the answer tone short high pitched tone through the built in speaker indicating the connection has been made with the recipient s machine press SEND P 20 Basic procedures When you hear the other party s voice ...

Страница 45: ...ther original place it on the original glass or RADF Reversing Automatic Document Feeder and then press the START button on the control panel To delete the page being previewed press DELETE PAGE To replace the page being previewed with another page press REPLACE PAGE To insert another scan before the page being previewed press INSERT PAGE Press OPTION to change the setting P 29 Setting the transmi...

Страница 46: ...call Users do not have to do anything when receiving a fax When the 2nd Line for FAX Unit is installed the reception mode of the 2nd line is limited to AUTO reception MANUAL reception Faxes are manually received by using an external telephone when you have an incoming call 1 Pick up the handset of the external telephone when you have an incoming call If the incoming call is a telephone call you ca...

Страница 47: ...its on the receiving tray Drawers can be set for fax use only For details of the operation refer to the Copying Guide Default setting for RX printing To print the received fax the paper with the same width as the original is used Depending on the length of the original RX reduction printing or Discard printing both of them are set to ON by manufacturer default are applied P 109 Setting RX printing...

Страница 48: ...r size is not available in most cases the scanned original is printed on paper of a larger size However the sender s fax machine may reduce the scanned original to fit the paper size available in the recipient s fax machine this equipment Ex LD LT The paper priority varies according to the RX reduction printing and Discard printing settings For details contact your service technician Size of Origi...

Страница 49: ...uce the scanned original to fit the paper size available in the recipient s fax machine this equipment Ex A3 A4 The paper priority varies according to the RX reduction printing and Discard printing settings For details contact your service technician Priority Size of Original being Received A3 B4 A4 A5 A5 A4 B5 A3 B4 A4 A4 A4 A4 A4 B5 B5 A3 A3 B4 A4 A4 B5 B4 A3 A3 B5 B4 A3 A4 B4 1 2 3 4 5 6 7 FOLI...

Страница 50: ......

Страница 51: ...o check and cancel fax communications Checking Communications 50 Checking reserved transmissions 50 Checking communication status log 51 Canceling the Transmission 53 Canceling the memory transmission 53 Canceling direct transmissions 55 Canceling reserved transmissions 56 ...

Страница 52: ... or to switch the pages To print the list of the reserved transmissions jobs press RESERVATION LIST In the Status column the status of each job is indicated as follows Line1 Sending on the 1st line Line2 Sending on the 2nd line Network Reserved for sending via Internet Fax Delayed Reserved with the time to send specified Wait Communication is in the standby queue Invalid Under standby due to an in...

Страница 53: ...TIONS Checking Communications 51 3 CHECKING AND CANCELING THE COMMUNICATIONS Checking communication status log You can check the log of fax transmissions and receptions 1 Press JOB STATUS 2 Select the LOG tab and then press SEND or RECEIVE ...

Страница 54: ...mn the status is indicated as follows Registering recipients fax numbers to the address book To register recipient s fax numbers in the address book from the send receive log screen select a record in the send or receive log and then press ENTRY For details of the registration to the address book refer to the MFP Management Guide Fax and E mail transmissions whose recipients are specified with dir...

Страница 55: ...e memory transmission when an original is placed on the original glass 1 When scanning is completed the confirmation screen for the next original is displayed Press JOB CANCEL If you leave the screen unattended for a period of the auto clearance setting time 45 sec by manufacturer default after the confirmation screen for the next original is displayed a copy of the scanned originals is sent 2 The...

Страница 56: ...he control panel while the originals are being scanned Scanning is paused 2 The confirmation screen for the next original is displayed Press JOB CANCEL If you press JOB FINISH the scanned originals are sent If you leave the screen for the next original unattended for the period of the auto clear setting time 45 sec by manufacturer default after it appears the memory transmission is canceled 3 The ...

Страница 57: ...t transmissions You can cancel the direct transmission during scanning Even if you cancel transmission in the direct TX mode the part of the original that was scanned before transmission is canceled has been sent 1 Press the STOP button on the control panel while the original is being scanned The scanning and transmission are stopped ...

Страница 58: ...his step is the same as that for checking the reserved transmission P 50 Checking reserved transmissions 2 Select the reserved transmission you want to delete and then press DELETE More than one job can be selected In the Status column you can check the status of the reservation Wait indicates that the data are waiting to be sent Line1 or Line2 indicates that the data are being sent Delayed transm...

Страница 59: ...olling transmission 61 Polling reception 62 Mailbox Transmission 63 Registering printing deleting an original 64 Sending retrieving an original 68 Creating modifying deleting a mailbox 71 Chain Dial Communication 76 Delayed Transmission Reservation 77 Recovery Transmission 78 Onramp Gateway 79 Offramp Gateway 80 Save as File 81 Printing SECURE RECEIVE fax jobs 83 ...

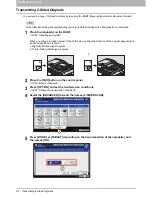
Страница 60: ...andling an original When you place a 2 sided original of the LT A4 size change the direction of the original depending on its bound position as follows 1 Right to left book type original 2 Top to bottom tablet type original 2 Press the FAX button on the control panel P 20 Basic procedures 3 Press OPTION and set the transmission conditions P 29 Setting the transmission conditions 4 Select the ADVAN...

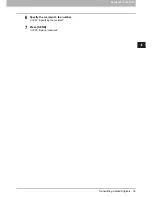
Страница 61: ...4 ADVANCED FUNCTIONS Transmitting 2 Sided Originals 59 4 ADVANCED FUNCTIONS 6 Specify the recipient s fax number P 33 Specifying the recipient 7 Press SEND P 20 Basic procedures ...

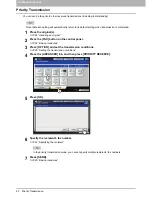
Страница 62: ...lace the original s P 24 Handling an original 2 Press the FAX button on the control panel P 20 Basic procedures 3 Press OPTION and set the transmission conditions P 29 Setting the transmission conditions 4 Press the ADVANCED tab and then press PRIORITY RESERVE 5 Press OK 6 Specify the recipient s fax number P 33 Specifying the recipient In the priority transmission mode you cannot specify multiple...

Страница 63: ...specific recipients to receive the original using the polling transmission To use the polling communication function with the password verification applied the fax machines of both the sender and recipient have to be Toshiba Fax machines MFP 1 Place the original s P 24 Handling an original 2 Press the FAX button on the control panel P 20 Basic procedures 3 Press OPTION and set the transmission con...

Страница 64: ...nd then press POLLING 3 If the password is set to the data of the original in the sender s fax machine press PASSWORD to display the entry screen Key in the password and then press OK If you do not have to key in the password leave this entry box blank and then press OK 4 Specify the sender s fax number P 33 Specifying the recipient This equipment supports two types of receptions Individual pollin...

Страница 65: ...he mailbox Relay station mailbox Using this mailbox an original sent from a fax machine is relayed to pre registered multiple recipients To inform a user of the result of the relay a report called RELAY TX END TERMINAL REPORT can be sent to a specific recipient A copy of the original can be printed out regularly or when an error occurs Example of how to use the relay station mailbox If you want to...

Страница 66: ...al or bulletin board mailbox must be created in advance P 71 Creating modifying deleting a mailbox 1 Place the original s P 24 Handling an original 2 Press the FAX button on the control panel P 20 Basic procedures 3 Press OPTION and set the transmission conditions P 29 Setting the transmission conditions 4 Press the ADVANCED tab and then press ITU MAILBOX 5 In the BOX TYPE group press CONFIDENTIAL...

Страница 67: ...in the password in the same way as the box number If you have selected the confidential mailbox it is not necessary to key in a password since it is not verified If the box number or password is incorrect an error message is displayed and you are unable to proceed 7 Press the START button on the control panel When you cancel the registration press the STOP button on the control panel and then JOB ...

Страница 68: ...NFIDENTIAL or BULLETIN BD In the MODE group press PRINT and then OK If the selected mailbox has not been set an error message is displayed and you are unable to proceed 4 Press BOX NUMBER to display the entry screen and key in the box number If a password has been set to the selected confidential mailbox key in the password in the same way as the box number If you have selected the bulletin board ...

Страница 69: ... Registering an original 3 In the BOX TYPE group press CONFIDENTIAL or BULLETIN BD In the MODE group press CANCEL and then OK If the selected mailbox has not been set an error message is displayed and you are unable to proceed 4 Press BOX NUMBER to display the entry screen Key in the box number and then press OK If a password has been set to the selected mailbox key in the password in the same way...

Страница 70: ...l bulletin board relay station mailbox in this equipment 1 Place the original s P 24 Handling an original 2 Press the FAX button on the control panel P 20 Basic procedures 3 Press OPTION and set the transmission conditions P 29 Setting the transmission conditions 4 Press the ADVANCED tab and then press ITU MAILBOX 5 In the BOX TYPE group press CONFIDENTIAL BULLETIN BD or RELAY In the MODE group pr...

Страница 71: ...ards 7 Specify the recipient s fax number P 33 Specifying the recipient 8 Press SEND P 20 Basic procedures You can cancel the transmission of the original P 53 Canceling the Transmission Retrieving an original You can retrieve an original from the confidential or bulletin board mailbox in the recipient s fax machine 1 Press the FAX button on the control panel P 20 Basic procedures 2 Press the ADVA...

Страница 72: ...t to the selected mailbox key in the password in the same way as the box number The box number and the password you specified here are sent to the recipient s fax machine as SUD box number and SID password of the command compatible with the ITU T standards 5 Specify the recipient s fax number P 33 Specifying the recipient 6 Press SEND P 20 Basic procedures ...

Страница 73: ...mailbox registered to this equipment P 88 Mailbox relay box report Creating the confidential or bulletin board mailbox You can create the confidential or bulletin board mailbox in this equipment 1 Press the FAX button on the control panel P 20 Basic procedures 2 Press the ADVANCED tab and then press ITU MAILBOX 3 In the BOX TYPE group press CONFIDENTIAL or BULLETIN BD In the MODE group press BOX S...

Страница 74: ...ceed Creating modifying a relay station mailbox You can create or modify the relay station mailbox 1 Press the FAX button on the control panel P 20 Basic procedures 2 Press the ADVANCED tab and then press ITU MAILBOX This screen is the same as the one you see when you create the confidential bulletin board mailbox P 71 Creating the confidential or bulletin board mailbox 3 In the BOX TYPE group pre...

Страница 75: ...le to proceed 5 Specify the recipient to be registered and then press OK P 33 Specifying the recipient Specify the recipient from the address book because this cannot be done with direct dialing 6 The confirmation screen for sending a relay transmission report is displayed If you want to send the report select YES If not select NO By default the relay transmission end terminal report is sent when ...

Страница 76: ...an error occurs press the ON ERROR Deleting a mailbox You can delete the confidential bulletin board relay station mailbox registered in this equipment The confidential and bulletin board mailbox in which the original is registered cannot be deleted To delete the mailbox delete the original in advance P 67 Deleting an original 1 Press the FAX button on the control panel P 20 Basic procedures 2 Pre...

Страница 77: ...an error message is displayed and you are unable to proceed 4 Press BOX NUMBER to display the entry screen Key in the box number and then press OK If a password has been set to the selected mailbox key in the password in the same way as the box number 5 The confirmation screen for the deletion is displayed Press YES If the box number or password is incorrect an error message is displayed and you a...

Страница 78: ... 1 Place the original s P 24 Handling an original 2 Press the FAX button on the control panel P 20 Basic procedures 3 Press OPTION and set the transmission conditions P 29 Setting the transmission conditions 4 Press the ADVANCED tab and then press CHAIN DIAL COMM 5 Repeat this operation until the desired number is formed P 33 Specifying the recipient You can form the dialing number which is up to ...

Страница 79: ... press DELAYED TX RESERVE 5 Key in the date hour and minute using the digital keys on the control panel and then press OK The acceptable range of reservation is up to one month later Press and to move the cursor Specify the time on a 24 hour basis To correct the entry press the FUNCTION CLEAR button on the control panel and then key in the correct number 6 Specify the recipient s fax number P 33 S...

Страница 80: ...be set on the ADMIN menu For the details of the current setting ask your administrator P 111 Setting recovery transmission 1 Press the FAX button on the control panel P 20 Basic procedures 2 Press OPTION and set the transmission conditions P 29 Setting the transmission conditions 3 Press the ADVANCED tab and then press RECOVERY TX 4 Select the transmission job and then press SEND You can change th...

Страница 81: ...reate modify delete a relay station mailbox see the following section P 71 Creating modifying deleting a mailbox To use the onramp gateway you need to set an E mail address and Internet Fax to this equipment For details of the operation refer to the TopAccess Guide ITU T Compatible G3 Fax machine Internet Intranet e STUDIO Relay Box Internet Fax machine Client Computer Mail Server Mail Server Mail...

Страница 82: ...y FQDN The fax number of the final recipient is specified in xxxxxxxx and the subaddress in yyyy e g In case that the fax number is 1234567890 the subaddress is 1234 and the domain name of this equipment FQDN is host1 toshibatec ifax com the fax should be sent to FAX 1234567890 T33S 1234 host1 toshibatec ifax com Setting up the SMTP server SMTP is a server protocol for sending and receiving E mail...

Страница 83: ...hard disk is installed Be sure to back up the files in the shared folder to protect them from unexpected data loss events If the forced encryption function for PDF security is enabled this function is not available For the details of the security settings refer to the MFP Management Guide The PDF security may not be available depending on the equipment 1 Place the original s P 24 Handling an origi...

Страница 84: ...the shared folder of the hard disk in this equipment it is saved in the TXFAX folder under the FILE_SHARE folder When PDF SINGLE TIFF SINGLE or XPS SINGLE is selected another folder with the same file name is automatically created in the TXFAX folder in which the file is saved 6 Specify the recipient s fax number P 33 Specifying the recipient 7 Press SEND P 20 Basic procedures When fax transmissio...

Страница 85: ...ress the PRINT button on the control panel The print screen is displayed If you leave the screen unattended for the auto clear setting time 45 sec by manufacturer default the screen returns to the default one automatically 2 Select SECURE RX LINE 1 or SECURE RX LINE 2 in the pull down menu If the equipment is running in the High Security mode SECURE RX LINE 1 and SECURE RX LINE 2 are not displayed...

Страница 86: ...CTIONS 84 Printing SECURE RECEIVE fax jobs 4 Press PASSWORD 5 Enter the password for printing a received SECURE RECEIVE fax and then press OK to start printing Use the password set by your administrator for each line ...

Страница 87: ...8 Printing Lists Reports Automatically 89 Lists Reports Samples 90 Transmission journal 90 Reception journal 91 Reservation list 91 Mailbox relay box report 92 Memory transmission report 93 Transmission report 94 Multi transmission report 94 Multi polling report 95 Relay TX orig terminal report 95 Relay TX relay station report 96 Relay TX end terminal report 96 Relay station report 97 Mailbox rece...

Страница 88: ...ing lists can be printed manually For details of the operation refer to the MFP Management Guide Journal transmission journal reception journal You can print a list of transmissions and receptions This equipment logs up to the latest 40 or 120 transmission reception records This number can be set on the ADMIN menu For details of the operation refer to the MFP Management Guide 1 Press JOB STATUS 2 ...

Страница 89: ...TS AND REPORTS 3 Press JOURNAL If JOURNAL is pressed with the transmission reception records selected the journal of the selected file is printed Reservation list You can print a list of the reserved transmissions 1 Press JOB STATUS 2 Press the FAX and then press RESERVATION LIST ...

Страница 90: ...ports Manually Mailbox relay box report You can print a list of the current status of the mailboxes registered to this equipment 1 Press the FAX button on the control panel P 20 Basic procedures 2 Press the ADVANCED tab and then press ITU MAILBOX LIST ...

Страница 91: ...ssion is completed the report is printed You have an option to add a reduced image of the transmitted document MULTI POLLING REPORT When a multi polling RX is completed the report is printed RELAY TX ORIG TERMINAL REPORT When the document transmission from an originator terminal to a relay station is completed during the mailbox transmissions the report is printed You have an option to add a reduc...

Страница 92: ...rror code OK Succeeded 4 digit error code Failed Special communication mode P Polling communication SB Mailbox communication SR R Relay mailbox communication SF F Forward mailbox communication ML Internet Fax communication I N W Fax communication O Offramp Gateway communication The number of pages for the communication Destination telephone number or name registered in the address book Date and ti...

Страница 93: ...up entry method NO FILE NO DATE TIME DURATION PGS FROM DEPT MODE STATUS 001 003 05 10 14 23 00 00 0 Aaabbb USA HQ NG 00B1 002 007 05 10 17 20 00 32 1 3109998888 EC 603 OK RECEPTION JOURNAL XXXXXXXXXXX XXXX XXX TIME 05 10 2012 17 55 FAX NO 1 2131234567 FAX NO 2 2131235678 NAME Aaabbb L A TX RX FILE NO DATE TIME FUNCTION PGS TO DELAY TIME 017 05 10 18 41 MULTI TX 1 G ABC EXPRESS RESERVATION LIST TIM...

Страница 94: ... TYPE PGS FILE NO DATE TIME FROM 11222 BULLETIN BD 11231 CONFIDENTIAL 1 008 05 10 17 24 LOCAL MAILBOX RELAY BOX REPORT TIME 05 10 2012 18 00 FAX NO 1 2131234567 FAX NO 2 2131235678 NAME Aaabbb L A RELAY BOX NO END STATION REPLY TO NUMBER 12345 ADDRESS 001 002 003 004 005 12345 GROUP 001 002 FORWARD INBOUND FAX TSI BOX NO AGENT DESTINATION 22222 E MAIL To ADDRESS 001 GROUP 001 Cc ADDRESS 002 003 GR...

Страница 95: ...es in the STATUS column see the following section P 118 Error codes FILE NO 004 DATE 05 10 17 11 TO ABC EXPRESS DOCUMENT PAGES 1 START TIME 05 10 17 13 END TIME 05 10 17 14 STORED TIME 05 10 23 14 PAGES SENT 0 STATUS 0050 MEMORY TRANSMISSION REPORT TIME 05 10 2012 17 48 FAX NO 1 2131234567 FAX NO 2 2131235678 NAME Aaabbb L A TX FAILURE NOTICE FILE NO 005 ITU MAILBOX 12345 DATE 05 10 17 25 TO 22212...

Страница 96: ...pecified with the direct entry method NO FILE NO DATE TIME DURATION PGS TO DEPT MODE STATUS 002 007 05 10 17 20 00 32 1 3109998888 EC 603 OK TRANSMISSION REPORT XXXXXXXXXXX XXXX XXX TIME 05 10 2012 17 55 FAX NO 1 2131234567 FAX NO 2 2131235678 NAME Aaabbb L A FILE NO 013 DATE 05 10 18 01 DOCUMENT PAGES 1 START TIME 05 10 18 01 END TIME 05 10 18 17 STORED TIME 05 11 00 17 SUCCESSFUL ADDRESS BOOK 00...

Страница 97: ...direct entry method FILE NO 014 DATE 05 10 18 02 START TIME 05 10 18 17 END TIME 05 10 18 18 SUCCESSFUL ADDRESS BOOK 001 Cccddd ADMIN UNSUCCESSFUL FAX NUMBER 2139998888 MULTI POLLING REPORT TIME 05 10 2012 18 18 FAX NO 1 2131234567 FAX NO 2 2131235678 NAME Aaabbb L A FILE NO 016 DATE 05 10 18 22 TO 2139998888 RELAY BOX 12345 DOCUMENT PAGES 1 START TIME 05 10 18 22 END TIME 05 10 18 22 PAGES SENT 1...

Страница 98: ...5 SUCCESSFUL GROUP NUMBER 002 USA 1 ADDRESS BOOK 001 005 ASIA 1 UNSUCCESSFUL ADDRESS BOOK PAGE SENT 001 Cccddd ADMIN 0 RELAY TX RELAY STATION REPORT TIME 05 10 2012 14 46 FAX NO 1 2131234567 FAX NO 2 2131235678 NAME Aaabbb L A FILE NO 013 DATE 05 10 14 45 DOCUMENT PAGES 3 FROM 7141234567 START TIME 05 10 14 45 END TIME 05 10 14 46 RELAY BOX 12345 SUCCESSFUL ADDRESS BOOK 005 XYZ CORPORATION UNSUCCE...

Страница 99: ...DATE 05 10 13 33 RELAY BOX 777 DOCUMENT PAGES 1 FROM 214 RELAY STATION REPORT TIME 05 10 2012 13 33 FAX NO 1 2131234567 NAME Aaabbb L A FILE NO 016 DATE 05 10 18 22 BOX NUMBER 12345 BOX TYPE CONFIDENTIAL DOCUMENT PAGES 1 TOTAL 2 FROM LOCAL MAILBOX RECEPTION REPORT TIME 05 10 2012 18 22 FAX NO 1 2131234567 FAX NO 2 2131235678 NAME Aaabbb L A ...

Страница 100: ......

Страница 101: ...ttings related to the fax function User Settings 100 Fax settings 100 Administrator Settings 104 Registering the terminal ID 106 Setting the initial setup 107 Setting RX printing 109 Setting recovery transmission 111 Setting 2nd Line for FAX Unit 112 SECURE RECEIVE 113 ...

Страница 102: ...6 SETTING ITEMS 100 User Settings User Settings Fax settings Set the initial settings for the fax transmission functions 1 Press the USER FUNCTIONS button on the control panel 2 Press FAX ...

Страница 103: ... capable of receiving originals at the same resolution the resolution is automatically converted before being sent it to the recipient The higher the resolution is the longer it takes to send an original STANDARD This is suitable for an original with regular size text FINE This is suitable for an original with small size text and detailed illustrations U FINE This is suitable for an original with ...

Страница 104: ...N or OFF To enable this feature the Terminal ID must be registered to this equipment in advance P 106 Registering the terminal ID Setting this item may not be required since it may not be displayed on the screen it depends on your country or region TEXT This is suitable for an original with text and line drawings TEXT PHOTO This is suitable for an original with a mixture of text and photos PHOTO T...

Страница 105: ...e line status The ECM communication is not available for voice communication PREVIEW SETTING Switch the preview setting ON or OFF This feature is available when the hard disk is installed in the equipment INITIAL PREVIEW TYPE Set the preview type to be displayed as an initial This feature is available when the hard disk is installed in the equipment MULTIDEST CONFIRMATION Selects whether to displa...

Страница 106: ...ction describes the FAX menu managed by the administrator Follow the procedures below to display the menu you want to operate 1 Press the USER FUNCTIONS button on the control panel 2 Press ADMIN tab and then press PASSWORD 3 Enter the administrator password and then press OK ...

Страница 107: ...6 SETTING ITEMS Administrator Settings 105 6 SETTING ITEMS 4 Press FAX The FAX menu is displayed The following section describes each menu ...

Страница 108: ...ge on the transmitted original and receiver information on the trailing edge on the received fax P 100 Fax settings 1 Press TERMINAL ID 2 Set each setting option and then press OK You can enter up to 20 characters in the ID NAME but whether they can all be displayed or not depends on their size When you add an international code press To enter a pause press Pause LINE2 NUMBER is displayed only whe...

Страница 109: ...inch from the bottom edge of the received copy of the original Setting the initial setup You can set the initial settings for the fax functions 1 Press INITIAL SETUP 05 10 2012 15 08 FROM Aaabbb 1234567890 T 069 P0001 0001 F 049 Date sent automatically attached Sender s ID name Number of pages Pages sent Total pages Communication number File number Sender s ID Fax number RECEIVED 05 10 2012 15 08 ...

Страница 110: ...ption MONITOR VOLUME COMPLETION TONE VOLUME Monitor tone volume line tone when on hook and Reception completion tone volume You hear this tone when reception is completed Each volume can be set in 8 levels 0 tone Off DIAL TYPE DIAL TYPE LINE2 There are 2 types of telephone lines When you first install this equipment or you change the connected telephone line set this according to the telephone lin...

Страница 111: ... of the options For details of the operation to print the list refer to the MFP Management Guide 1 Press RX PRINT 2 Set each option and then press OK DISCARD You can switch discard printing ON or OFF With it being set to ON if an original is up to 10 mm 0 4 inch longer than the printing area the part that exceeds the paper printing area is discarded P 45 Default setting for RX printing ...

Страница 112: ...depending on the received document size as shown in the figures below Received LD LG LT A3 A4 or B4 sized documents are printed so that they can be bound along the long edge of the direction Figure 1 Received ST A5 or B5 sized documents are printed so that they can be bound along the short edge of the direction Figure 2 REDUCTION You can switch RX reduction printing ON or OFF With it being set to ...

Страница 113: ...whether enabling or disabling this function 1 Press RECOVERY TX 2 Press 24H or 1H to set the document stored time and then press OK When the screen is returned to the one shown in step 1 above make sure that an orange line is marked on RECOVERY TX This line indicates that the recovery transmission function is ON If you press RECOVERY TX again the orange line disappears that is the function is OFF ...

Страница 114: ...et the dial type P 107 Setting the initial setup 1 Press LINE 2 MODE 2 Set how you want to use the 2nd line and then press OK TX RX The 2nd line is used for both transmission and reception RX ONLY 24HR The 2nd line is used only for reception RX ONLY TIMER The 2nd line is used only for reception during a specified period of time To move the cursor use or Specify the time period on a 24 hour basis u...

Страница 115: ...ng for each day of the week WEEKLY SCHEDULE by administrators The SECURE RECEIVE function can be manually enabled disabled or automatically enabled disabled at a specified time and day of the week If the equipment is being used in the High Security mode the SECURE RECEIVE function is not available The data lamp does not light when the equipment is in the Super Sleep mode In FAX in the USER tab you...

Страница 116: ...enable the function throughout the day set DISABLE ENABLE to 00 00 00 00 To disable the function throughout the day set DISABLE ENABLE to 00 00 24 00 To clear the entered time press the Clear button on the control panel Setting a password for printing You can set a password for printing a received SECURE RECEIVE fax 1 Select LINE 1 or LINE 2 A password for printing can be set for each line 2 Press...

Страница 117: ...ress OK 4 Press RETYPE NEW PASSWORD enter the same password again and then press OK Up to 20 alphanumeric characters including the following symbols can be entered for the password You can use alphanumerics and the following symbols _ 5 Press OK It can be set also on the TopAccess menu ...

Страница 118: ......

Страница 119: ... This chapter describes troubleshooting and specifications of GD 1320 GD 1350 GD 1270 GD 1260 Troubleshooting 118 Error codes 118 Error messages 118 Transmission reception trouble 119 Specifications of GD 1320 GD 1350 GD 1270 GD 1260 121 ...

Страница 120: ...d To clear the message press the FUNCTION CLEAR button twice 0053 Security mismatch in relay or mail box transmission Confirm the remote party s security code system password and your setup 00B0 00E8 Communication Error Retry communications Message Cause Remedy Memory overflow Memory overflowed when scanning documents to the memory Either wait for memory to be cleared or check the jobs and delete ...

Страница 121: ...arty trying to receive the original Originals are fed diagonally Are the document feeder slides adjusted to the width of the original that you are sending Does the original that you are sending match the conditions of the original that is available for sending 2 originals are fed together Have you placed more than the maximum number of originals that can be placed at one time Does the original tha...

Страница 122: ... remote Fax Check this with the party trying to send the original Paper is not output Is the equipment out of paper The received original is printed dark and is illegible or black stripes are printed on the original Make a local copy and confirm proper printing Is the original being sent a dirty copy Check this with the party trying to send the original Is the trouble due to a problem or operation...

Страница 123: ...D 1260 Model Name GD 1320 For FC 2050C 2550C FC 2555C 3055C 3555C 4555C 5055C GD 1350 For DP 2072 2572 3072 3572 4572 5072 DP 5570 6570 7570 8570 DP 3031 GD 1270 For FC 5560C 6560C 6570C FC 5540C 6540C 6550C Size of Original A B format A3 A4 A4 R A5 A5 R B4 B5 B5 R FOLIO Recording Paper Size A B format A3 A4 A4 R A5 R B4 B5 B5 R FOLIO LD LG LT LT R ST R COMP Compatibility Communication Modes Exclu...

Страница 124: ......

Страница 125: ...relay station mailbox 72 deleting a mailbox 74 deleting an original 67 printing an original 66 registering an original 64 retrieving an original 69 sending an original 68 MEMORY RX 14 MEMORY TX 30 102 MONITOR VOLUME 108 MULTIDEST CONFIRMATION 103 N Network Fax 50 Next original 23 O Off hook transmission 42 Offramp gateway 80 On hook transmission 41 Onramp gateway 79 OPTION 20 29 32 Options 16 Orig...

Страница 126: ...3 S Save as File 81 SECURE RECEIVE FORCED SETTING 102 Sender information 106 107 Sending 20 SMTP server 80 Specifications 121 START button 13 STOP button 13 T Telephone line 18 Terminal ID 106 Touch panel 15 Transmission conditions changing the settings for each page 32 making settings 29 Trouble 119 TTI 102 TX RX 112 TX SPEED LIMIT 103 TX TYPE 30 102 U USER FUNCTIONS button 13 User management 15 ...

Страница 127: ...Printed in Malaysia GD 1320 GD 1350 GD 1270 GD 1260 OME120024E0 ...

Страница 128: ...JAPAN MULTIFUNCTIONAL DIGITAL SYSTEMS Operator s Manual for FAX Unit GD 1320 GD 1350 GD 1270 GD 1260 2012 2015 TOSHIBA TEC CORPORATION All rights reserved Patent http www toshibatec co jp en patent 6LJ62063000 R120120L0506 TTEC Ver05 F 2015 01 ...

Отзывы: