16
SCREEN DIVISION BUTTONS
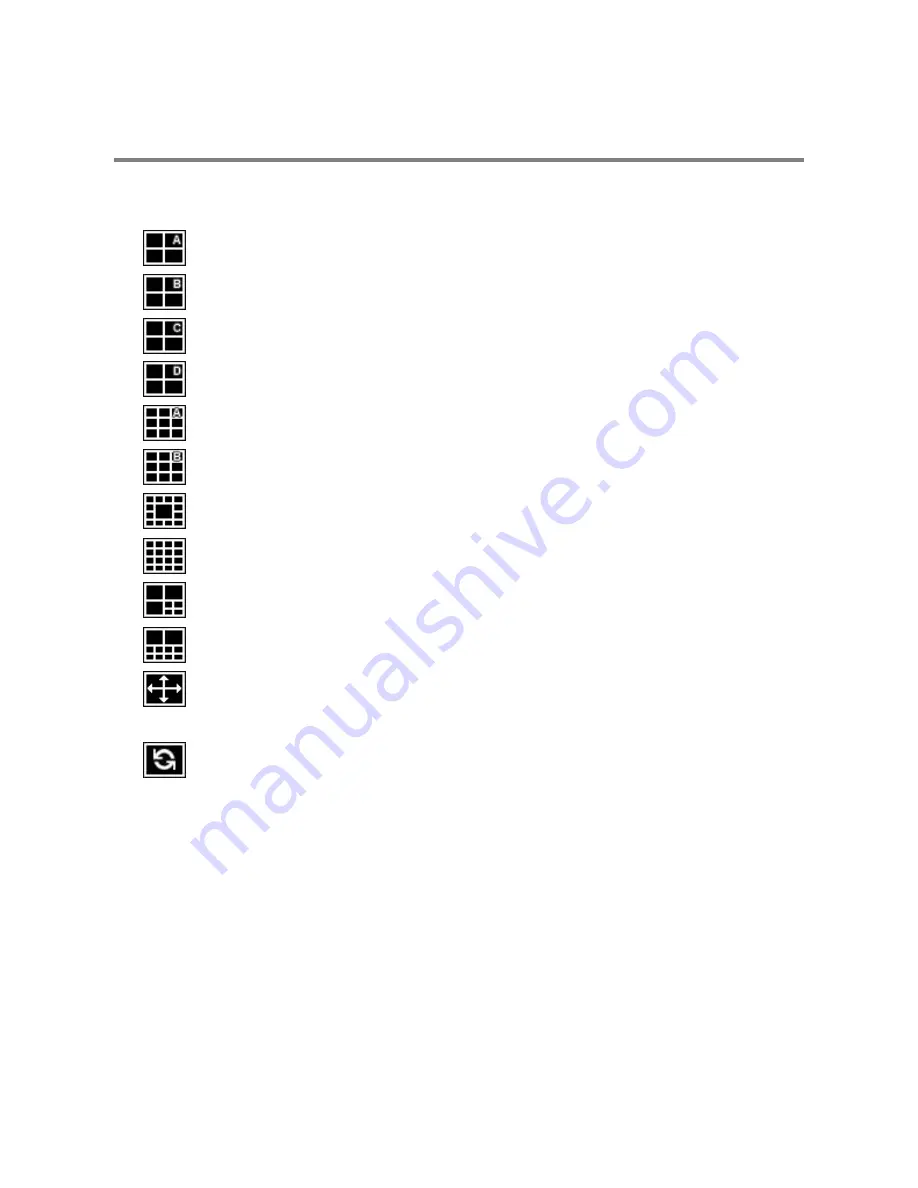
The Screen Division menu allows you to view cameras in groups such as two by two, three by three and four by four. The button
options are shown below.
Note
When viewing live video from Network Cameras, only 4CH will display at one time.
1st Four Cameras View – Displays cameras 1-4 in the Video Display Area. To return to a different Multi-Camera View,
select a different Screen Division option from the Screen Division menu.
2nd Four Cameras View – Displays cameras 5-8 in the Video Display Area. To return to a different Multi-Camera View,
select a different Screen Division option from the Screen Division menu.
3rd Four Cameras View – Displays cameras 9-12 in the Video Display Area. To return to a different Multi-Camera
View, select a different Screen Division option from the Screen Division menu.
4th Four Cameras View – Displays cameras 13-16 in the Video Display Area. To return to a different Multi-Camera
View, select a different Screen Division option from the Screen Division menu.
1st Nine Cameras View – Displays cameras 1-9 in the Video Display Area. To return to a different Multi-Camera View,
select a different Screen Division option from the Screen Division menu.
2nd Nine Camera View – Displays cameras 8-16 in the Video Display Area. To return to a different Multi-Camera View,
select a different Screen Division option from the Screen Division menu.
Multi-Camera View – Displays a group of cameras within the Video Display Area.
All Camera View – Displays all 16 cameras within the Video Display Area.
Multi-Camera View – Displays a group of cameras within the Video Display Area.
Multi-Camera View – Displays a group of cameras within the Video Display Area.
Full Screen
–
The Full Screen Option allows you to view the Video Display Area using the entire viewable area on the
monitor. When this is selected, no menu options are visible. You can activate the Full Screen Option by clicking on the
Full Screen button within the Screen Division menu. You can deactivate Full Screen mode by right clicking on the
screen.
Auto Sequence
–
Sequences through the Screen Divisions sets. For example, selecting the 1A and then the Loop
button will sequence through 1A, 2A, 3A, 4A and then repeat. This option is not available for the 7, 10 and 13 screen
divisions.
Содержание DVS32-240-2T
Страница 2: ...ii ...
Страница 4: ...iv ...
Страница 10: ...x NOTES ...
Страница 18: ...18 NOTES ...
Страница 70: ...70 NOTES ...
Страница 84: ...84 NOTES ...
Страница 87: ...29597AA 87 LDAP INTEGRATION This chapter includes the following information Installing LDAP ...
Страница 90: ...90 NOTES ...
Страница 91: ...29597AA 91 WEB VIEWER This chapter includes the following information Overview Configuring the Web Viewer ...
Страница 94: ...94 ...


