


8
Getting started
Ethernet
Connecting to the Internet
NOTES
• You get access to the Internet through your TV.
• We recommend to use a modem or router that supports Dynamic
Host Configuration Protocol(DHCP). Modems and routers that
support DHCP automatically provide the IP address, subnet mask,
gateway, and DNS, so you don’t have to enter them manually.
Most home networks already have DHCP.
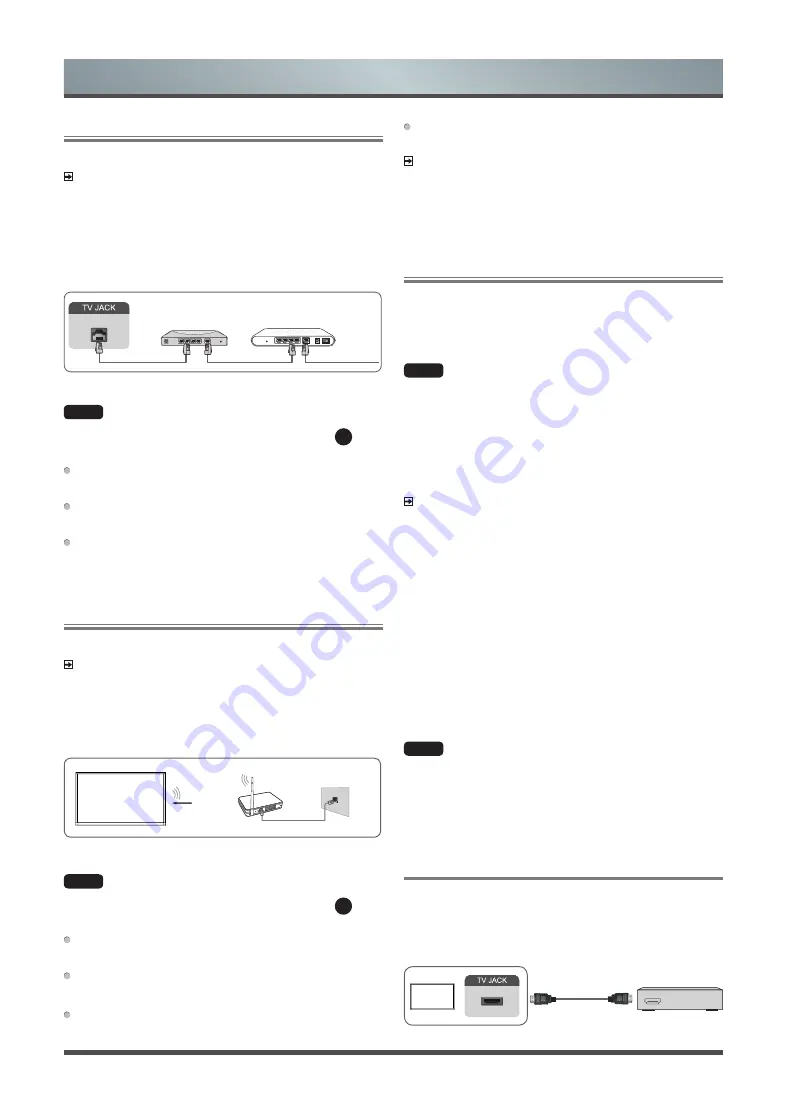
LAN
Modem Cable
LAN Cable
LAN Cable
External Modem
(ADSL / VDSL / Cable TV)
IP Sharer (Router)
(with DHCP server)
Connecting to a Wired (Ethernet) Network
HOME
˃
Settings
˃ Network ˃ Network Configuration
You set the TV network by selecting Configuration and press
OK
button
to enter the submenu.
Connection Type
Choose a wired network connection to access the Internet.
Ethernet
Display the network status.
IP Settings
Configure the IP setting for your network connection.
Wireless
Connecting to the Internet
NOTES
• You get access to the Internet through your TV.
• Connect to an available wireless network.
• Make sure that you have the wireless router’s SSID and password
before attempting to connect.
Wireless Adapter
built-in the TV set
LAN Cable
Wireless Router
The LAN Port
on the Wall
(not provided)
Connecting to a Wireless Network
HOME
˃
Settings
˃ Network ˃ Network Configuration
You set the TV network by selecting Configuration and press
OK
button
to enter the submenu.
Connection Type
Choose a wireless network connection to access the Internet.
Advanced Settings
Configure the advanced wireless network settings for the TV.
Add
You can add wireless network.
Refresh
Refresh wireless network.
NOTES
• If no wireless router is found, select
Add
and enter the network
name in the SSID.
• If no wireless router is found, select
Refresh
.
Using HDMI & CEC Function
Use the TV’s remote control to control external devices that are
connected to the TV by an HDMI cable. The external devices need to
support HDMI & CEC Function (HDMI-CEC).
Connecting an external device through HDMI & CEC Function
HOME
˃
Settings ˃ System
> HDMI & CEC Functions > CEC
Control
1. Set
CEC Control
to On.
2. Connect an HDMI-CEC-compliant device to the TV.
3. Turn on the connected external device. The device is
automatically connected to the TV. After connection is finished,
you can access the menu of the connected device on your TV
screen using your TV remote and control the device.
NOTES
• HDMI cables must be used to connect HDMI CEC-compatible
devices to your TV.
• The HDMI CEC feature of the connected device must be turned
on.
• If you connect an HDMI device that is not HDMI CEC-compatible,
all the HDMI-CEC control features do not work.
• Depending on the connected HDMI device, the HDMI-CEC
Control feature may not work.
• The HDMI CEC feature are supported One Touch Play, Routing
Control, System Standby, Device OSD Name Transfer, Remote
Control Pass Through, Give Device Power Status, System Audio
Control.
HDMI 2.0 Format function
HOME
˃
Settings ˃ System
> HDMI & CEC Functions > HDMI
2.0 Format
Select the
Enhanced format
if your HDMI device supports 4K HDR.
If you are not sure or if it does not support 4K HDR, please select
Standard format
.
Connecting with an HDMI(ARC) Cable
Connect an HDMI cable from an external digital audio system.
ARC enables the TV to directly output the digital sound through an
HDMI cable. Please note that it works only when the TV is connected
to the audio receiver that supports the ARC (Audio Return Channel)
function.
HDMI cable (not included)
Audio Amplifier/Speaker
HDMI
ARC
HDMI


