27
Using the TV’s features (General)
Setting the Sleep Timer
The Sleep Timer is especially useful if you want the TV to
turn itself off after a selected period of time.
1
From the
APPLICATIONS
menu, press
s
or
r
to
select
Sleep Timer
.
2
Press the
Number
buttons (0-9) to enter the amount
of time until the TV turns off. Alternatively, press
v
or
w
to adjust the time in blocks of 10 minutes up to
12 hours and 50 minutes.
3
Press
P
to start the timer.
Resetting the TV
Reset TV
will reset all TV settings, including stored
channels, to their original factory values.
1
From the
SETUP
menu, press
s
or
r
until
Reset
TV
is selected.
SETUP
DTV Settings
AV Connection
Picture Position
Quick Setup
Location
System Information
Software Licences
Germany
Antenna
Reset TV
English
Home
2
Press
Q
to select.
A screen will appear warning that all settings will be
lost. Select
Yes
, and then press
Q
to continue.
When the set powers back on, the
Quick Setup
screen will appear (
-
page 13). Press
Q
to continue,
and proceed to the
Auto Tuning
menu (
-
page 15).
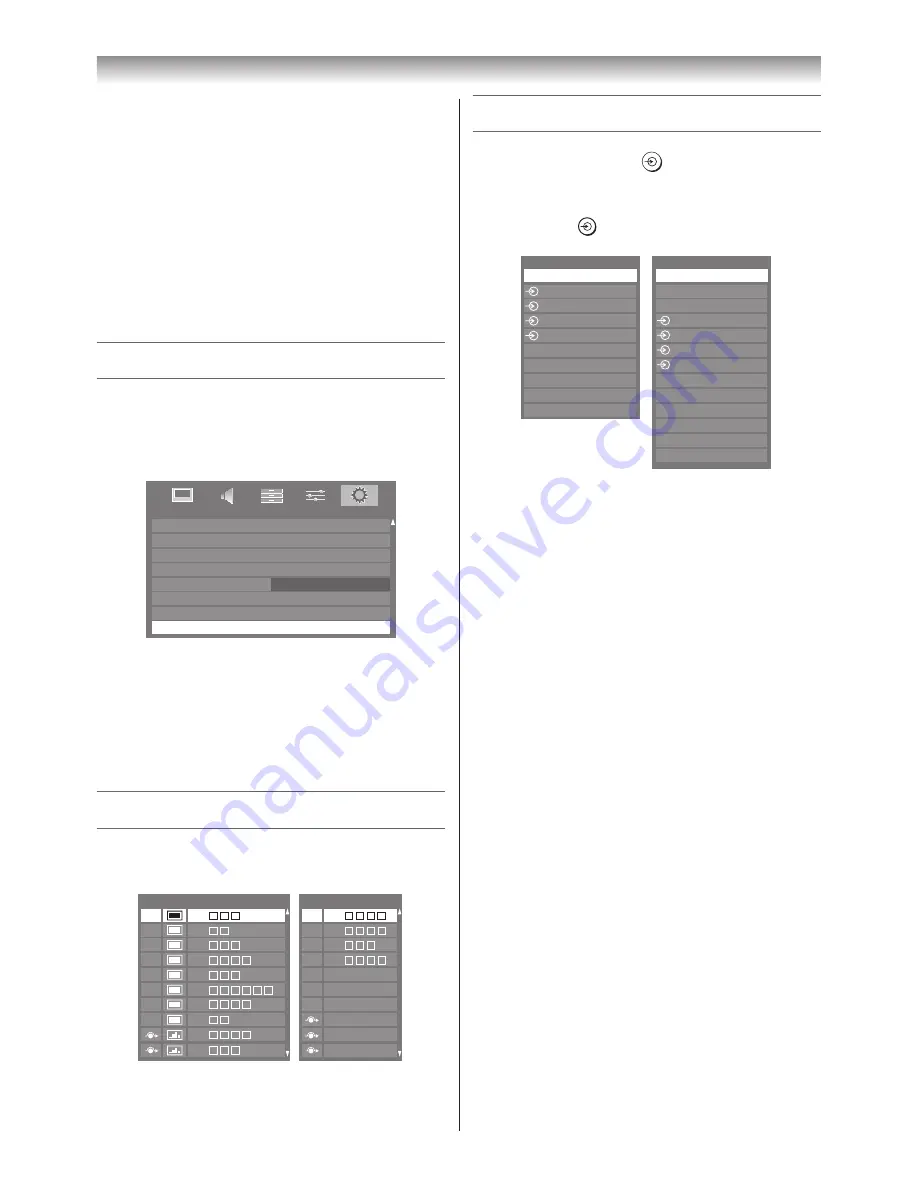
Channel List
1
Press the
LIST
button. The
Channel List
will appear.
Channel List
6
9
11
31
34
36
48
52
200
201
Channel List
1
2
3
4
5
6
7
8
9
10
Digital TV
Analogue TV
2
Press
s
or
r
to highlight a channel or input, and
then press
Q
to watch.
Selecting the video input source
1
At any time by pressing
on the remote control or
TV, a list will appear on screen showing all inputs and
external equipment.
Inputs
TV
1
2
3
4
HDMI 2
HDMI 1
PC
HDMI 3
HDMI 4
Inputs
DTV TV
DTV RADIO *
DTV TEXT *
1
2
3
4
HDMI 3
HDMI 2
ATV
HDMI 4
PC
HDMI 1
Pressing
on the
remote control
Pressing
o
on the
TV right side panel
*
I
f radio or text channels
are currently available
for DTV.
HDMI™ displays equipment connected to HDMI
inputs on the back or side of the TV.
PC displays a computer connected to the RGB/PC
input on the back of the TV.
2
Press
Q
.
TV (Digital TV or Analogue TV),
o
1 (
o
(1), video 1 input),
o
2 (
o
(2), video 2 input) or
o
2S (S-video input),
o
3 (
o
(3), component video input),
o
4 (
o
(4), component video input),
HDMI 1, HDMI 2, HDMI 3, HDMI 4 (HDMI input),
PC (
o
RGB/PC, PC input)
Notes:
•
When component video, PC, or HDMI input modes
are selected, the
MONITOR
terminals (
-
page 35)
output audio signal only.
•
If a REGZA-LINK device is connected to an HDMI
input, the
REGZA-LINK
icon will appear.
•
When the TV is switched on, it will take a few
minutes for the
REGZA-LINK
icon to appear in the
list; when an HDMI cable is removed, it will take a
few minutes for the icon to disappear.
•
If the HDMI cable from a connected device or an
HDMI setting for a connected device is changed,
Enable REGZA-LINK
in the
REGZA-LINK
menu
may need to be reset to
On
.
Содержание 42RV600A
Страница 52: ......


