6-12
Digital Edition - TIMECUTTER® HD Service Manual
April 2017
ENGINE
Kawasaki Engine (Cont.)
Installation
1. Prepare the frame and secure any fuel lines or wire harness components.
2. Lower the engine onto the frame.
3. Align the four holes of the engine base to the frame and attach the two rear mounting bolts and two flat washers
loosely.
NOTE: Apply Loctite to engine mounting bolts.
4. Attach the front bolt through the clutch anchor and into the engine base.
5. Install the remaining three engine bolts.
6. Torque the four engine mounting bolts to 300-400 in-lbs. (34-46 Nm).
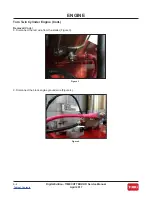
7. Apply anti-seize to the clutch end of the crankshaft.
8. Install the engine pulley onto the crankshaft.
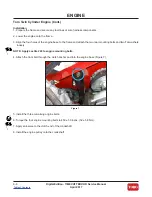
9. Install the clutch on to the crankshaft ensuring that the slot in the clutch aligns with the tab on the clutch anchor.
10. Install the washer and clutch bolt as shown.
NOTE: Apply Loctite to clutch bolt.
11. Torque the clutch bolt to 50-60 ft-lbs.(69-83 Nm).
see “Choke Control Assembly Installation,” chapter 5, page 5-27.
13. Connect the throttle cable,
see “Throttle Control Assembly Installation,” chapter 5, page 5-24.
14. Connect the black engine ground wire.
NOTE: Apply Loctite to ground bolt.
Содержание TIMECUTTER HD 74864
Страница 153: ...R e s i d e n t i a l P r o d u c t s ...

