7-17
Digital Edition - TIMECUTTER® HD Service Manual
April 2017
HYDROSTATIC DRIVE SYSTEM
Drive
Hydrostatic Drive Transmission (Cont.)
Installation (Right side shown)
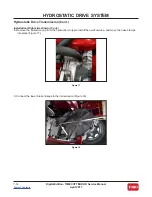
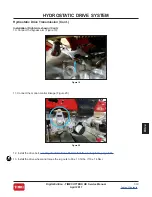
NOTE: These steps are shown replacing the right side hydrostatic drive transmission. All of the same
steps apply to the left side hydrostatic drive transmission (Figure 16).
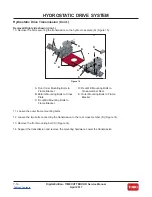
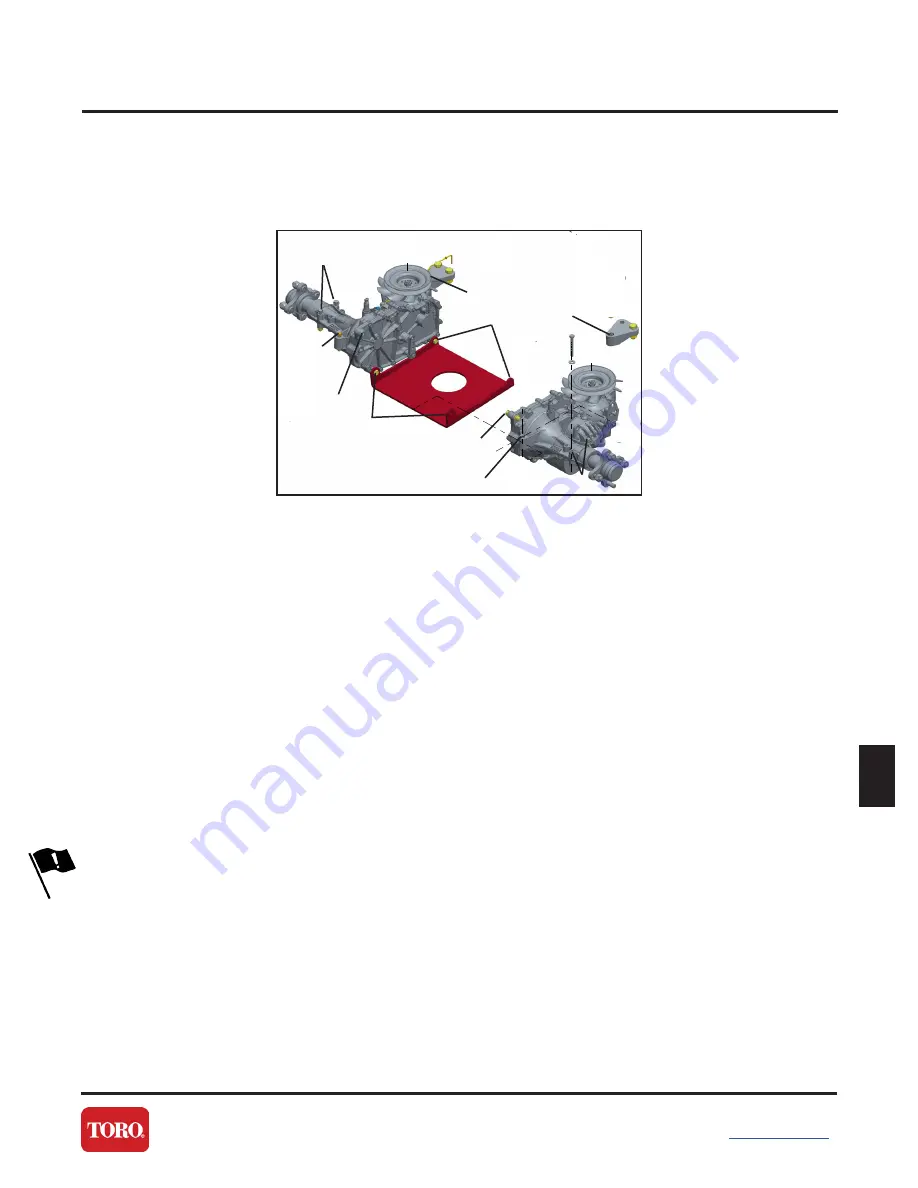
1. Lift and support the transmission, and install the two outer frame mounting bolts and nuts as shown (E) (Figure
15). Do not fully tighten at this time.
2. Align the hydro cross plate and install the bolts through the cross plate and the transmission (A) (Figure 15). Do
not tighten at this time.
3. Install the rear hydro mounting bolts and nuts (D) (Figure 15) and the front mounting bolt and nut. Do not
tighten at this time.
NOTE: The proper torque sequence, as outlined below, is critical in avoiding damage to the hydrostatic
transmissions and the frame.
4. Tighten the front mounting bolt through the frame bracket (C) (Figure 15).
5. Tighten the hydro cross plate bolts (A) (Figure 15).
6. Tighten the rear hydro mounting bolts (D) (Figure 15).
7. Tighten the two outer mounting bolts (E) (Figure 15).
Figure 16
E
B
B
A
D
D
C
A
C
E
A. Front Inner Mounting Bolts to
Frame Bracket
B. Bottom Mounting Bolts to Cross
Plate
C. Front Mid Mounting Bolts to
Frame Bracket
D. Rear Mid Mounting Bolts to
Cross-member Rear
E. Outer Mounting Bolts to Frame
Bracket
Содержание TIMECUTTER HD 74864
Страница 153: ...R e s i d e n t i a l P r o d u c t s ...


