34
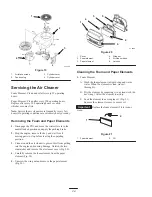
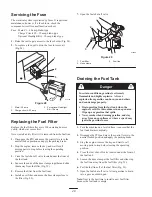
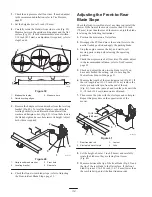
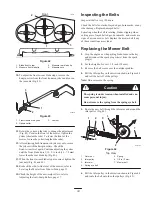
Note: Check to ensure that the length of exposed thread on
the spring eye bolt is 1/8 in. (3 mm) (Fig. 44).
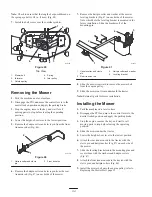
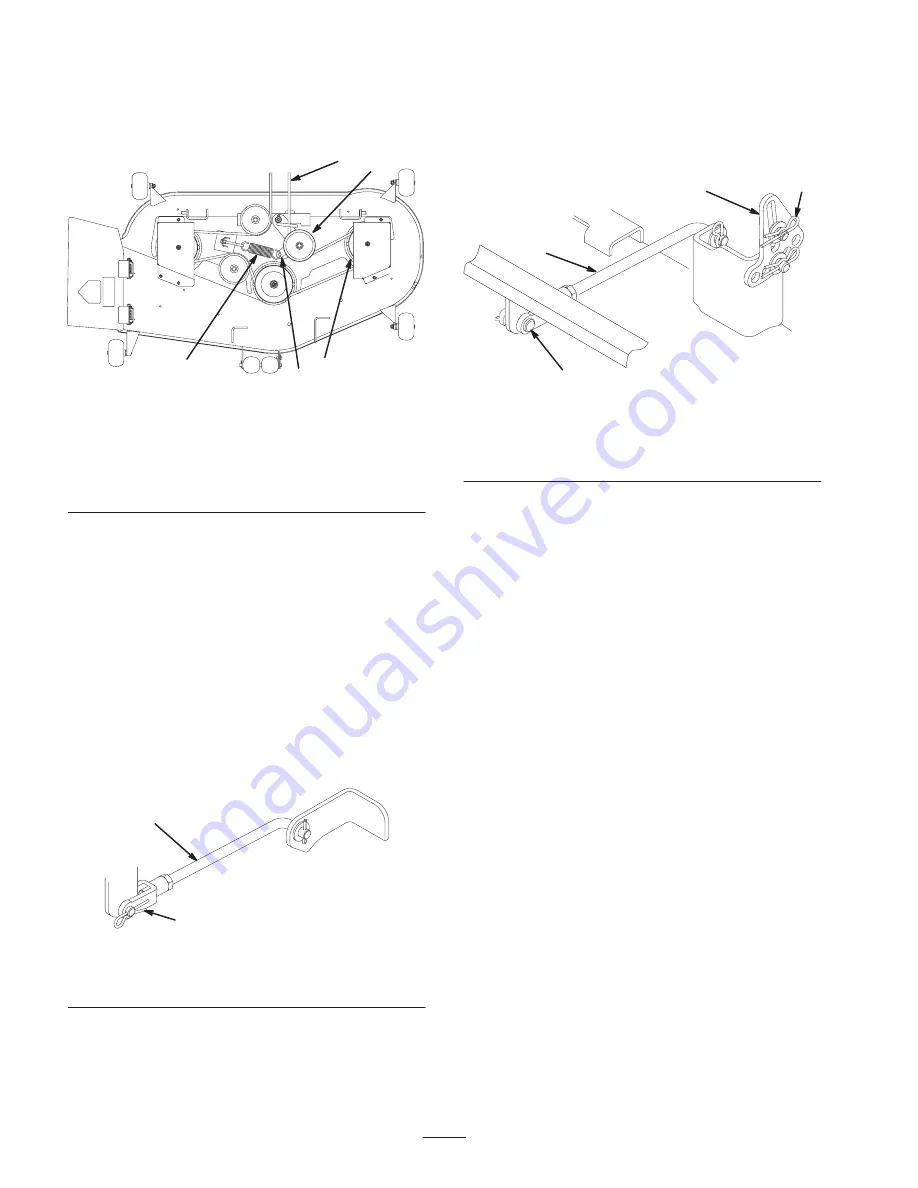
7. Install the belt covers over the outside spindles.
1
m–5157
2 3
4
5
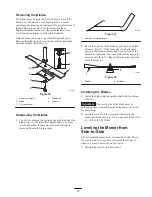
Figure 45
Top View
1.
Mower belt
2.
Idler arm
3.
Outside pulley
4.
Spring
5.
Idler pulley
Removing the Mower
1. Park the machine on a level surface.
2. Disengage the PTO and move the control levers to the
neutral locked position and apply the parking brake.
3. Stop the engine, remove the key, and wait for all
moving parts to stop before leaving the operating
position.
4. Lower the height-of-cut lever to the lowest position.
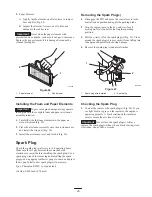
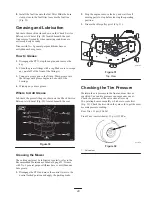
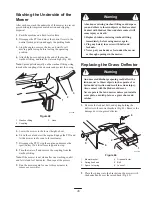
5. Remove the hairpin cotter and clevis pin from the front
trunnion yokes (Fig. 46).
m–5178
1
2
Figure 46
1.
Hairpin cotter and clevis
pin
2.
Front trunnion
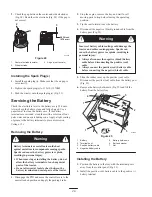
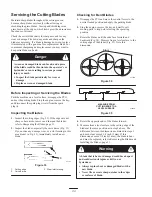
6. Remove the hairpin cotter and clevis pin from the rear
trunnion rod (Fig. 47) on each side of the mower.
7. Remove the hairpin cotter and washer at the mower
leveling brackets (Fig. 47) on each side of the mower.
Note which hole the leveling bracket is mounted in for
future installation. Slide the brackets off of the
mounting pin.
m–5177
1
3
4
2
Figure 47
1.
Hairpin cotter and clevis
pin
2.
Rear trunnion rod
3.
Hairpin cotter and washer
4.
Leveling bracket
8. Slide the mower rearward to remove the mower belt
from the engine pulley.
9. Slide the mower out from underneath the tractor.
Note: Retain all parts for future installation.
Installing the Mower
1. Park the machine on a level surface.
2. Disengage the PTO and move the control levers to the
neutral locked position and apply the parking brake.
3. Stop the engine, remove the key, and wait for all
moving parts to stop before leaving the operating
position.
4. Slide the mower under the tractor.
5. Lower the height-of-cut lever to the lowest position.
6. Attach the rear trunnion rod to the tractor with the
clevis pin and hairpin cotter (Fig. 47) on each side of
the mower.
7. Slide the leveling brackets onto the mounting pins and
secure them with the washers and hairpin cotters
(Fig. 47).
8. Attach the front trunnion rods to the tractor with the
clevis pins and hairpin cotters (Fig. 46).
9. Install the mower belt onto the engine pulley; refer to
Replacing the Mower Belt, page 33.
Содержание 18-52ZX TimeCutter
Страница 7: ...7 Slope Chart ...
Страница 8: ...8 ...

