GB
- 16 -
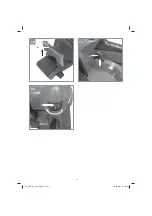
5.1.2 Installing the dust bag (Figure 4/
Item 14)
Slide the dust bag (14) on to the connection for
the dust extractor (6). Follow the instructions abo-
ve in reverse order to remove the dust bag.
The dust is extracted straight from the sanding/
grinding belt into the dust bag.
The use of the dust bag or dust extractor via the
dust extractor adapter is absolutely essential for
health reasons.
5.2 Adjusting the additional handle
(Fig. 5/Item 2)
Slacken the screw (1) by 2 or 3 turns and move
the additional handle (2) to its optimal position.
Lock the additional handle (2) in place by tighte-
ning the screw (1).
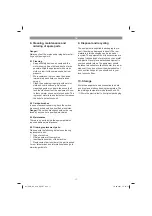
5.3 Changing the sanding / grinding belt
(Fig. 6-7/Item 13)
•
Pull the clamping lever (12) to the outside to
relieve the tension in the sanding/grinding
belt.
•
Pull the used sanding/grinding belt off the
drive rollers.
•
Slide the new sanding/grinding belt on to the
drive rollers.
•
Ensure that the direction of the sanding/grin-
ding belt (arrows on the inside of the sanding/
grinding belt) is identical to the direction of
the belt sander/grinder (arrow over the rear
drive roller).
•
Press the clamping lever (12) to the rear to
tension the sanding/grinding belt.
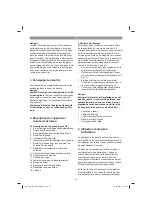
5.4 Adjusting the position of the belt
(Fig. 8/Item 8)
•
Hold the belt sander/grinder with the sanding/
grinding plate at the top.
•
Switch on the belt sander/grinder.
•
By turning the setting screw (8) the belt positi-
on should be set so that the sanding/grinding
belt is at the center of the two drive rollers.
5.5 Moving sanding/grinding belt cover
(Fig. 9 – 10/Item 9)
The moving sanding/grinding belt cover may only
be swung upwards if the pushbutton (7) has been
pressed.
•
Press the pushbutton (7) and at the same
time swing the cover (9) upwards.
•
Release the pushbutton.
•
The cover will lock in its end position.
•
To swing the cover back down again, press
the pushbutton (7) again. The cover can then
be swung downwards.
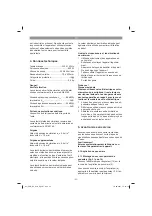
6. Starting up
6.1 Switching ON/OFF (Fig. 11)
To switch on:
Press the ON/OFF switch (5).
Continuous operation:
Secure the switch (5) with the locking button (4).
To switch o
ff
:
Press the ON/OFF switch (5) brie
fl
y.
The machine can be operated on a temporary or
permanent setting.
6.2 Setting the belt speed (Fig. 12/Item 3)
You can select the belt speed by turning the set-
ting knob (3).
PLUS direction:
Increase belt speed
MINUS direction:
Reduce belt speed
6.3 Instructions for use
Warning!
Never hold the workpiece you wish to
sand/grind in your hands. Secure the workpiece
on a sturdy surface or using a vise.
•
Allow the belt sander/grinder to start before
you place it on the workpiece.
•
Do not switch off the belt sander/grinder as
long as the sanding/grinding belt is in contact
with the workpiece.
•
Always hold the belt sander/grinder with both
hands whilst it is in use.
•
Always sand wood in the direction of the
grain.
7. Replacing the power cable
Danger!
If the power cable for this equipment is damaged,
it must be replaced by the manufacturer or its
after-sales service or similarly trained personnel
to avoid danger.
Anl_PRO_BS_850_E_SPK7.indb 16
Anl_PRO_BS_850_E_SPK7.indb 16
10.08.2017 15:22:15
10.08.2017 15:22:15


