background image


Main Functions 


1.


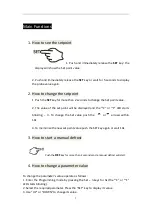
How to see the setpoint 

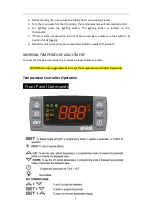
1.  Push  and  immediately release  the 

SET 

key: the 

display will show the Set point value;   


2. Push and immediately release the 

SET 

key or wait for 5 seconds to display 

the probe value again. 


2.


How to change the setpoint 

1. Push the 

SET

 key for more than 2 seconds to change the Set point value;   

 
2. The value of the set point will be displayed and the “°C” or “°F” LED starts 

blinking; 

3.  To  change  the  Set  value  push  the 

or

  arrows  within 

10s.   
 
4. To memorise the new set point value push the SET key again or wait 10s. 
 

3.


How to start a manual defrost 


Push the

 DEF

 key for more than 2 seconds and a manual defrost will start.


4.


How to change a parameter value 

 
To change the parameter’s value operate as follows:   
1. Enter the Programming mode by pressing the Set + n keys for 3s (the “°C” or “°F” 
LED starts blinking).   
2. Select the required parameter. Press the “SET” key to display its value   
3. Use “UP” or “DOWN” to change its value.   

Содержание DZW-1200

Страница 1: ...1 Direct Cooling Type Deli Bakery Cases Installation and Operation Manual Please read this manual completely before attempting to install or operate this equipment DZW 1200 DZW 1500 DZW 1800 DZW 2000...

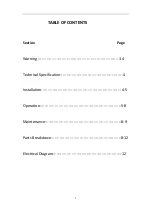
Страница 2: ...2 TABLE OF CONTENTS Section Page Warning 3 4 Technical Specification 4 Installation 4 5 Operation 5 8 Maintenance 8 9 Parts Breakdown 8 12 Electrical Diagram 12...

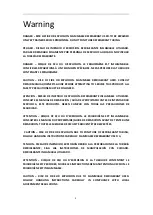
Страница 3: ...N GU A DEL PROPIETARIO ANTES DE INTENTAR DAR SERVICIO A ESTE PRODUCTO DEBEN CUMPLIR CON TODAS LAS PRECAUCIONES DE SEGURIDAD ATTENTION RISQUE DE FEU OU D EXPLOSION LE FRIGORIG NE EST INFLAMMABLE CONSU...

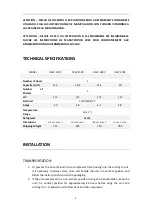
Страница 4: ...HP 1 3 1 3 1 2 1 2 Electrical 110V 60HZ 1P Amps 5 0 5 8 6 2 6 8 Temperature Range 33 41 F Refrigerant R290a Dimensions 47 2 x32 5 x45 2 59 x32 5 x45 2 70 8 x32 5 x45 2 79 x32 5 x45 2 Shipping Weight 5...

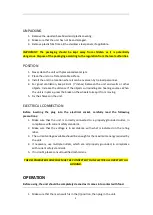
Страница 5: ...ress the brake on the wheels to keep it from moving 5 Fix the shelves on the unit ELECTRICAL CONNECTION Before inserting the plug into the electrical socket carefully read the following precautions 1...

Страница 6: ...on the thermostat 5 If there is some condensation in front of the curved glass please turn the switch to I position for defogging 6 Allow the unit to reach proper temperature before loading with produ...

Страница 7: ...displayed and the C or F LED starts blinking 3 To change the Set value push the or arrows within 10s 4 To memorise the new set point value push the SET key again or wait 10s 3 How to start a manual de...

Страница 8: ...a high standard of working performance leave the unit turned on during the night and day to avoid deposits CAUTION Do not use any damaging solvents petrol alcohol etc for cleaning the unit The unit ma...

Страница 9: ...Troubleshooting System Possible Reasons Solution Remark No power input power direction Broken fuse Replace As for authorized service department Poor connection of plug and Repair or replace the socke...

Страница 10: ...Repair or replace Compressor runs but the temperature in the showcase is high Circulating temperature is too high Adjust the thermostat properly Ask for authorized service department to check and too...

Страница 11: ...11...

Страница 12: ...X 0 11 AIR GUIDE BOARD 12 Front glass 138 0012 DZX 0 12 FRONT GLASS 13 Front panel 138 0013 DZX 0 13 FRONT PANEL 14 Condenser 138 0014 DZX 0 14 CONDENSER 15 Compressor board 138 0015 DZX 0 15 COMPRESS...

Страница 13: ...13 CIRCUIT DIAGRAM...

Отзывы: