background image

The machine is to be used only for its prescribed
purpose. Any other use is deemed to be a case of
misuse. The user / operator and not the
manufacturer will be liable for any damage or injuries
of any kind caused as a result of this.

4. Technical data

Power supply:

230 ~ 50 Hz

Motor rating in kW/HP:

1.1/1,5

Operating mode 

S3 25% 10 min

Compressor speed in rpm:

3550

Operating pressure in bar:

8

Pressure vessel volume in litre:

6

Theoretical intake rate in l/min.:

180

Sound power level L

WA

in dB:

94.5

Sound pressure level L

pA

in dB:

74.5

Protection type:

IP 20

Machine weight in kg:

9,1

Operating mode S3 - 25% - 10min: S3 = Intermittent
mode without influencing the starting process. This
means that during a period of 10 min the max.
operating time is 25% (2.5 min).

5.  Points to note when setting up the

compressor

Examine the machine for signs of transit
damage. Report any damage immediately to the
company which delivered the compressor.

The compressor should be set up near the
working consumer.

Avoid long air lines and long supply lines
(extensions).

Make sure the intake air is dry and dust-free.

Do not set up the compressor in damp or wet
rooms.

The compressor may only be used in suitable
rooms (with good ventilation and an ambient
temperature from +5°C to +40°C). There must be
no dust, acids, vapors, explosive gases or
inflammable gases in the room.

The compressor is designed to be used in dry
rooms. It is prohibited to use the compressor in
areas where work is conducted with sprayed
water.

6. Assembly and starting

Important!

You must fully assemble the appliance before
using it for the first time.

6.1. Fitting the supporting feet (3)

Fit the supplied supporting feet (4) as shown in Fig.
3.

6.2. Assembly of the quick-lock coupling (4)

Screw the quick-lock coupling (5) to the appliance as
shown in Fig 4-5. 

6.3 Voltage

The compressor is equipped with a mains cable with
shock-proof plug. This can be connected to any
230V ~ 50Hz shock-proof socket which is protected
by a 16 A fuse. Before you use the machine, make
sure that the mains voltage complies with the
specifications on the rating plate. Long supply
cables, extensions, cable reels etc. cause a drop in
voltage and can impede motor start-up. In the case
of low temperatures below +5°C, motor start-up is
jeopardized as a result of stiffness. 

6.4 On/Off switch (8)

To switch on the equipment set the On/Off switch (8)
to position 1.
Move the On/Off switch (8) to position 0 to switch off
the equipment.

6.5  Adjusting the pressure: (Fig. 1)

You can adjust the pressure on the pressure
gauge (6) using the pressure regulator (7). 

The set pressure can be taken from the quick-
lock coupling (5). 

6.6  Setting the pressure switch

The pressure switch is set at the factory.

Switch-on pressure 6 bar
Switch-off pressure 8 bar

7. Cleaning and maintenance

Important!

Pull the power plug before doing any cleaning
and maintenance work on the appliance.

Important! 

Wait until the compressor has completely cooled
down. Risk of burns!

Important! 

Always depressurize the tank before carrying out
any cleaning and maintenance work.

UK

22

Original operating instructions 

Anleitung_TMAC_160_OF_SPK7:_  08.04.2011  8:58 Uhr  Seite 22

Содержание 40.101.52

Страница 1: ...Anleitung_TMAC_160_OF_SPK7 _ 08 04 2011 8 57 Uhr Seite 1...

Страница 2: ...rn S Anv nd h rselskydd SF K yt kuulosuojuksia UK Wear ear muffs DK N Advarsel mod elektrisk sp nding S Varning f r elektrisk sp nning SF Varo s hk virtaa UK Beware of electrical voltage DK N Advarsel...

Страница 3: ...3 1 2 2 4 10 3 4 1 9 11 7 6 5 8 3 Anleitung_TMAC_160_OF_SPK7 _ 08 04 2011 8 58 Uhr Seite 3...

Страница 4: ...4 4 5 5 Anleitung_TMAC_160_OF_SPK7 _ 08 04 2011 8 58 Uhr Seite 4...

Страница 5: ...de 7 B r egnet arbejdst j B r ikke l st t j eller smykker De kan blive fanget af bev gelige dele Ved arbejde i det fri anbefales brug af gummihandsker og solidt fodt j Brug h rnet hvis De har langt h...

Страница 6: ...lsesforanstaltninger kan v re p kr vede navnlig i form af bekl dning og masker Arbejdsrummet skal v re p mere end 30 m3 og der skal ske et tilstr kkeligt luftskifte Spr jt ikke op mod vinden Ved p spr...

Страница 7: ...omr der hvor der arbejdes med st nkvand 6 Montage og idrifts ttelse Vigtigt Maskinen skal monteres fuldst ndig komplet inden den tages i brug 6 1 Montering af standf dder 3 De medf lgende standf dder...

Страница 8: ...dsventilen skal af og til aktiveres dette for at sikre en konstant funktionsevne Tr k kraftigt i ringen s du tydeligt h rer trykluften sive ud Bagefter slipper du ringen igen 7 4 Oplagring Vigtigt Tr...

Страница 9: ...er men ingen tryk 1 Tilbageslagsventil ut t 1 Skift tilbageslagsventilen ud 2 Pakninger g et 2 Kontroller pakninger delagte pakninger skiftes ud hos fagmand 3 Aftapningsskrue til kondensvand 11 ut t 3...

Страница 10: ...r smycken Du kan fastna i r rliga delar Vid arbeten utomhus rekommenderar vi gummihandskar och halkfria skor B r h rn t om du har l ngt h r 8 Anv nd inte kabeln til annat n den r avsedd f r Dra inte k...

Страница 11: ...lltag l mpliga skydds tg rder vid behov s rskilt med tanke p l mpliga kl der och ansiktsmasker Bearbeta inte medier som lacknafta butylalkohol och metylenklorid tillsammans med PVC trykslangen f rkort...

Страница 12: ...omr den d r sprutvatten anv nds 6 Montering och driftstart Obs Se till att maskinen har monterats komplett innan du tar den i drift 6 1 Montera st den 3 Bifogade st d 4 m ste monteras enligt beskrivn...

Страница 13: ...r inte till tet att ndra p s kerhetsventilens inst llning eller att ta bort plomberingen F r att garantera att s kerhetsventilen fungerar r tt n r den beh vs ska den aktiveras med j mna mellanrum Dra...

Страница 14: ...get tryck 1 Backventil ot t 1 Byt ut backventilen 2 T tningar defekta 2 Kontrollera t tningarna l t en auktoriserad verkstad byta ut defekta t tningar 3 Avtappningsplugg f r kondensvatten 11 ot t 3 Dr...

Страница 15: ...tulla tehoalueella 7 K yt sopivaa ty vaatetusta l k yt v lji vaatteita tai koruja ne voivat takertua liikkuviin osiin Ty skennelless ulkona suositellaan kumik si neit ja pit vi jalkineita K yt hiusver...

Страница 16: ...ek kuivauksen aikana on huolehdittava riitt v st ilmanvaihdosta Ei saa ruiskuttaa vastatuuleen Helposti syttyvi tai muuten vaarallisia ruiskutusaineita k sitelless on noudatettava paikallisen poliisil...

Страница 17: ...joissa esiintyy my s vesiroiskeita 6 Asennus ja k ytt notto Huomio Ennen k ytt nottoa tulee laite ehdottomasti asentaa kokonaan 6 1 Jalkojen 3 asennus Mukana toimitetut jalat 4 tulee asentaa kuvan 3...

Страница 18: ...vaksi Turvaventtiilin s t ei saa muuttaa ja siihen pantua sinetti ei saa ottaa pois Jotta turvaventtiili toimii h t tilanteessa oikein tulee se toimentaa kokeeksi aika ajoin Ved renkaasta niin voimakk...

Страница 19: ...takaiskuventtiili uuteen 2 Tiivisteet ovat rikki 2 Tarkasta tiivisteet anna alan korjaamon vaihtaa vialliset tiivisteet uusiin 3 Lauhdeveden laskuruuvi 11 ei ole tiivis 3 Kirist ruuvi k sin Tarkasta r...

Страница 20: ...hes Do not wear loose garments or jewellery There is a risk of them catching on moving parts Rubber gloves and non slip shoes are recommended when working outdoors Put on a hair net if you have long h...

Страница 21: ...ter packaging of the processed material must be observed Additional protective measures are to be undertaken if necessary particularly the wearing of suitable clothing and masks The work room has to b...

Страница 22: ...th sprayed water 6 Assembly and starting Important You must fully assemble the appliance before using it for the first time 6 1 Fitting the supporting feet 3 Fit the supplied supporting feet 4 as show...

Страница 23: ...from time to time to ensure that it works when required Pull the ring with sufficient force until you can hear the compressed air being released Then release the ring again 7 4 Storage I mportant Pull...

Страница 24: ...Leak in the non return valve 1 Replace the non return valve 2 The seals are damaged 2 Check the seals and have any damaged seals replaced by a service center 3 The drainage screw for condensation wate...

Страница 25: ...25 Anleitung_TMAC_160_OF_SPK7 _ 08 04 2011 8 58 Uhr Seite 25...

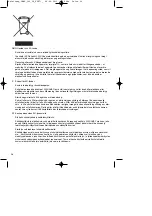
Страница 26: ...rnativ till ters ndning r garen av elutrustningen skyldig att bidraga till ndam lsenlig avfallshantering f r det fall att utrustningen ska skrotas Efter att den f rbrukade utrustningen har l m nats in...

Страница 27: ...o the demand to return electrical devices As an alternative to returning the electrical device the owner is obliged to cooperate in ensuring that the device is properly recycled if ownership is relinq...

Страница 28: ...ISC GmbH SF Tuotteiden dokumentaatioiden ja muiden mukaanliitettyjen asiakirjojen vain osittainenkin kopiointi tai muunlainen monistaminen on sallittu ainoastaan ISC GmbH n nimenomaisella luvalla UK T...

Страница 29: ...ages forbehold f r tekniske ndringer S F rbeh ll f r tekniska f r ndringar SF Oikeus teknisiin muutoksiin pid tet n UK Technical changes subject to change Anleitung_TMAC_160_OF_SPK7 _ 08 04 2011 8 58...

Страница 30: ...30 Anleitung_TMAC_160_OF_SPK7 _ 08 04 2011 8 58 Uhr Seite 30...

Страница 31: ...31 Anleitung_TMAC_160_OF_SPK7 _ 08 04 2011 8 58 Uhr Seite 31...

Страница 32: ...ler brug af v rkt j eller tilbeh r som ikke er godkendt tilsides ttelse af vedligeholdelses og sikkerhedsforskrifter indtr ngen af fremmedlegemer i apparatet f eks sand sten eller st v brug af vold el...

Страница 33: ...anv ndning av ej godk nda insatsverktyg eller tillbeh r sidosatta underh lls och s kerhetsbest mmelser fr mmande partiklar som har tr ngt in i produkten t ex sand sten eller damm yttre v ld eller ytt...

Страница 34: ...mittaminen tai hyv ksym tt mien ty kalujen tai lis varusteiden k ytt minen huolto ja turvallisuusm r ysten noudattamatta j tt misest vieraiden esineiden esim hiekan kivien tai p lyjen p syst laitteen...

Страница 35: ...external influences e g damage caused by the device being dropped and normal wear resulting from proper operation of the device This applies in particular to rechargeable batteries for which we never...

Страница 36: ...EH 04 2011 01 Anleitung_TMAC_160_OF_SPK7 _ 08 04 2011 8 58 Uhr Seite 36...

Отзывы: