background image

TM 76025 


English 


www.toolland.eu 


ANGLE GRINDER 
TM 76025 
 

WARNING 

Read this manual carefully before using the 

machine, for your own safety. 


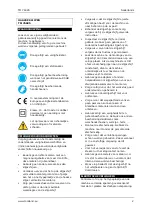
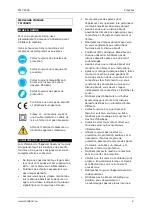
The following symbols are used throughout 

this manual: 


Always wear safety glasses. 


Always wear a safety masque 
against dust. 


Always wear ear protection when 
the sound level noise exceed 
85dB(A). 


Always wear protection gloves. 


In accordance with the European 
standards and directives. 


Class II – The machine is double 
insulated, an earthed wire is not 
necessary. 


Warning! Risk of personal injury 
or damage of the tool or other 
objects. 


SAFETY INSTRUCTIONS 


Do not use any other accessories than 

grinding wheels. 


Make sure that the speed stated on the 

grinding wheel is larger or the same as 

the speed of the angle grinder given on 

the nameplate. 


Do not cut workpieces requiring a 

maximum depth of cut exceeding that of 

the grinding wheel. 


Make sure that the grinding wheel has 

the correct dimensions and fits properly 

on the spindle. 


Treat grinding wheels with great care in 

accordance with the instructions supplied 

with the grinding wheel. Inspect the 

grinding wheel before every use. Do not 

use cracked or otherwise damaged 

grinding discs. 


Make sure that the grinding wheel is 

mounted in accordance with the 

instructions. 


After mounting the grinding wheel let the 

machine run at no load speed in a safe 

area. If the machine vibrates strongly or 

if you see damages in the grinding wheel, 

switch off the machine immediately and 

try to establish the cause. 


Do not use adapters or other aids to 

mount grinding wheels with a different 

spindle diameter. 


Make sure that the workpiece is properly 

supported or fixed. 


Never use a cut-off wheel for deburring. 


Make sure that sparks cannot hit any 

persons or set flammable materials 

alight. 


Always wear safety goggles, hearing 

protection and if necessary other 

protectibe means, such as working 

gloves, coat, hard hat, etc. 


Mount the screening guard. Never use 

the machine without screening guard 

fitted. 


Make sure that the ventilation openings 

are kept clean. Especially when working 

in a dusty environment. 


Before removing dust always unplug the 

tool. 


Do not use brushes of metal or the like to 

remove dust and avoid damaging the 

internal parts. 


Beware that after switching off the tool 

the wheel continuous to rotate for a short 

period. 


ELECTRICAL SAFETY 

Always check that the power supply 

corresponds to the voltage on the rating 

plate. 


DESCRIPTION 

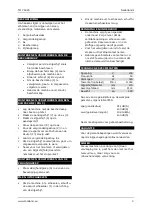
Your angle grinder has been designed for 

grinding and cutting masonry and steel. 

1.


On/off switch 

2.


Lock knob 

3.


Spindle 

4.


Guard 

5.


Side handle 


MOUNTING AND REMOVING THE GUARD 


First remove the grinding wheel as 

described below. 


Place the guard on the machine as 

Содержание TM76025

Страница 1: ...GEBRUIKSAANWIJZING MODE D EMPLOI INSTRUCTION MANUAL GEBRAUCHSANWEISUNG MADE IN P R C TM 76025 ...

Страница 2: ...ens de bij de slijpschijf geleverde instructies Inspecteer de slijpschijf voor ieder gebruik Gebruik geen gebroken of anderszins beschadigde slijpschijven Vergewis u ervan dat de slijpschijf volgens de instructies is gemonteerd Laat de machine na de montage van de slijpschijf ca 30 seconden draaien op een veilige plaats Als de machine sterk trilt of als u beschadigingen aan de slijpschijf constate...

Страница 3: ...contact MONTEREN EN VERWIJDEREN VAN DE ZIJHANDGREEP Draai de zijhandgreep 5 in een van de bevestigingsgaten vast IN EN UITSCHAKELEN Om de machine in te schakelen schuift u de aan uit schakelaar 1 in de richting van de slijpschijf Om de machine uit te schakelen schuift u de aan uit schakelaar terug REINIGING EN ONDERHOUD De machine vergt geen speciaal onderhoud Zorg ervoor dat de ventilatieopeninge...

Страница 4: ...ur la machine et s ajuste correctement sur l arbre Manipulez les disques abrasifs avec soin en vous conformant aux instructions fournies avec le disque abrasif Contrôlez l état du disque abrasif avant chaque utilisation N utilisez pas de disques abrasifs cassés ou autrement endommagés Assurez vous que le disque abrasif soit monté conformément aux instructions Après le montage du disque abrasif fai...

Страница 5: ...retirer le disque abrasif procédez dans l ordre inverse Avant de monter ou de retirer un disque abrasif débranchez toujours d abord la fiche de la prise de courant MONTAGE ET RETRAIT DE LA POIGNEE LATERALE FIG B Vissez la poignée latérale 5 dans un des trous de fixation MISE EN MARCHE ET ARRET FIG A Pour mettre la machine en marche déplacez le sélecteur marche arrêt 1 en direction du disque abrasi...

Страница 6: ...TM 76025 Français www toolland eu 6 GARANTIE Reportez vous aux conditions de garantie ci jointes ...

Страница 7: ... the instructions After mounting the grinding wheel let the machine run at no load speed in a safe area If the machine vibrates strongly or if you see damages in the grinding wheel switch off the machine immediately and try to establish the cause Do not use adapters or other aids to mount grinding wheels with a different spindle diameter Make sure that the workpiece is properly supported or fixed ...

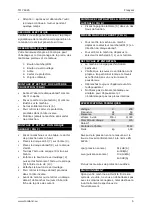
Страница 8: ...eel To switch off the machine you slide the on off switch back CLEANING AND MAINTENANCE The machine does not require any special maintenance Make sure that the ventilation openings are kept clean Especially when working in a dusty environment Before removing dust always unplug the tool Do not use brushes of metal or the like to remove dust and avoid damaging the internal parts TECHNICAL DATA Volta...

Страница 9: ...eiben Achten Sie darauf dass die Schleifscheibe gemäss den entsprechenden Montageanweisungen montiert wird Lassen sie das Elektrowerkzeug nach der Montage der Schleifscheibe in einer sicheren Umgebung im Leerlauf laufen Schalten Sie das Elektrowerkzeug sofort wieder aus wenn es stark vibriert oder wenn Sie Beschädigungen an der Schleifscheibe entdecken und versuchen Sie die Ursache hierfür herausz...

Страница 10: ...eihenfolgen vor Ziehen Sie vor den montieren oder entfernen der schleifscheibe immer den Netzstecker MONTIEREN UND ENTFERNEN DES ZUSATZHANDGRIFFS Abb B Montieren Sie den Zusatzhandgriff 5 in eines des Montagegelöcher EIN UND AUSSCHALTEN Abb A Schieben Sie zum einschalten den Ein Aus Schalter 1 in die Richtung der Schleifscheibe Schieben Sie zum Ausschalten den Ein Aus Schalter 1 zurück REINIGUNG U...

Страница 11: ...f vervangbaar lampen rubberen onderdelen aandrijfriemen onbeperkte lijst defecten ten gevolge van brand waterschade bliksem ongevallen natuurrampen enz defecten veroorzaakt door opzet nalatigheid of door een onoordeelkundige behandeling slecht onderhoud of abnormaal gebruik of gebruik van het toestel strijdig met de voorschriften van de fabrikant schade ten gevolge van een commercieel professionee...

Страница 12: ...winnausfall Verbrauchsgüter Teile oder Zubehörteile die durch normalen Gebrauch dem Verschleiß ausgesetzt sind wie z B Batterien nicht nur aufladbare sondern auch nicht aufladbare eingebaute oder ersetzbare Lampen Gummiteile Treibriemen usw unbeschränkte Liste Schäden verursacht durch Brandschaden Wasserschaden Blitz Unfälle Naturkatastrophen usw Schäden verursacht durch absichtliche nachlässige o...

Отзывы: