


4.3.2
Running an Eye-Tracking Test
Doing an eye tracking test with the Tobii Pro Mobile Device Stand and the Tobii X2-30/X2-60/X3-120 Eye Tracker, is similar to
other setups. Therefore, here we only go through in brief the steps of making a recording. The Tobii Studio Manual provides a
detailed walk-through of how you make recordings in Tobii Studio. The sections below touch upon specific tips and recommen-
dations pertaining to the Mobile Device Stand.
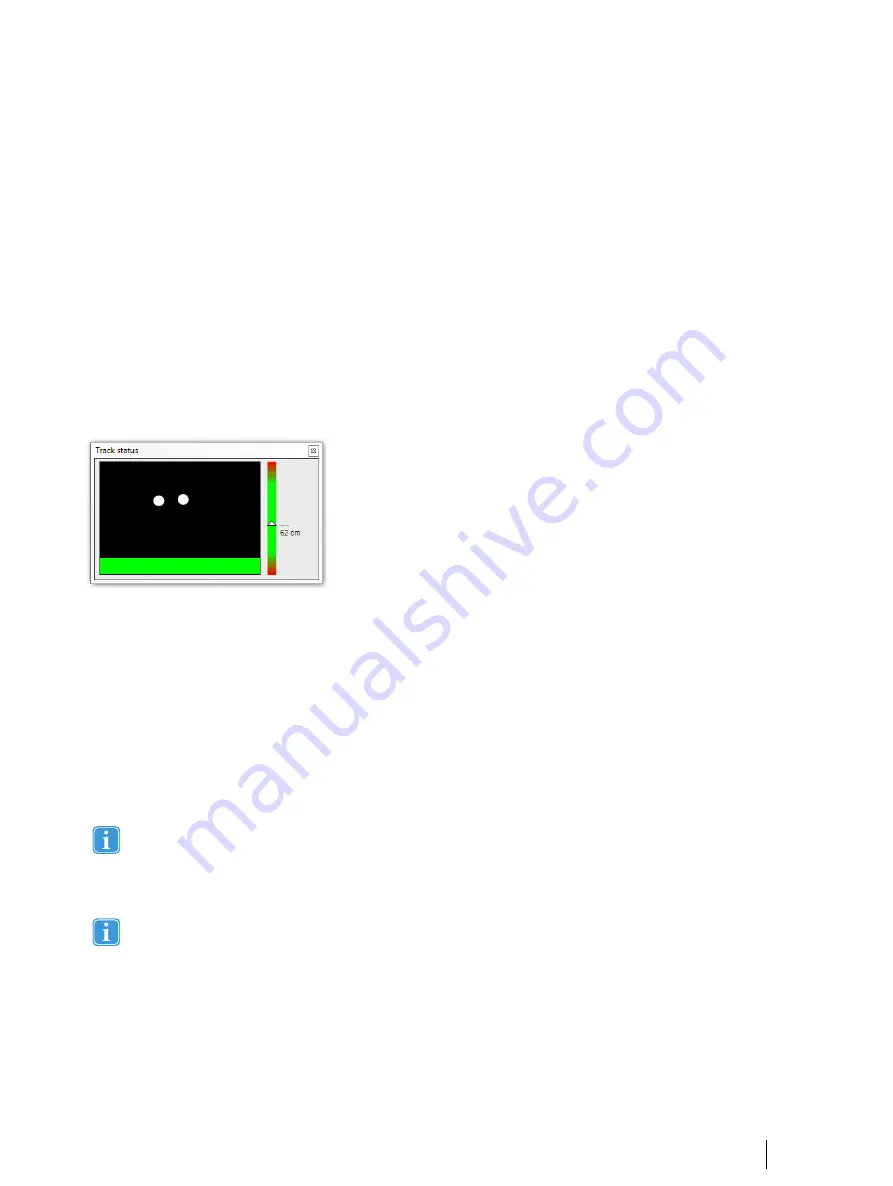
To get the participants into a good eye-tracking position, activate the Track status before starting the recording. You then moni-
tor the participants’ position both when they position themselves in front of the eye tacker, and during the test. Recommenda-
tion: Handle the participants’ differing heights and postures by putting them in a height-adjustable office chair.
Procedure for starting the Track Status you can:
•
Press Ctrl+T on the computer keyboard.
•
Click Track Status in the View menu of Tobii Studio.
Adjust the chair and the Mobile Device Stand’s tilt angle so that the participant is positioned optimally for the eye tracker (e.g.
the white dots showing the position of the eyes in the track status should be in the center or upper half of the black box, and the
distance indicator should indicate a distance of around 60- 65 cm). Data quality gets influenced by the participant’s position.
The picture displays a perfectly positioned participant (the eyes are in the center of the track status box).
Use the manual calibration routine in Tobii Studio for participant calibration with the Mobile Device Stand. You must therefore
instruct the participants which calibration dot to look at during the calibration procedure.
Procedure for calibrating a participant:
1.
Mount the calibration plate as described in Section
3.3 Mounting the Calibration Plate, page 10
. Set Tobii Studio to use
the manual calibration routine.
2.
Click “Start Recording” and parse through the dialogs till you reach to the calibration procedure.
3.
Before starting calibration, instruct the participant to focus on the center of the calibration plate.
4.
For each calibration point, tell the participant to look at the matching dot on the calibration plate (e.g. “Please look at
number …”). Progress to the next calibration point by instructing the participant to look at it and then pressing the space
bar or the left mouse button.
5.
Once the calibration result is satisfactory, proceed with the recording dialog procedure.
6.
Press escape or F10 to stop recording.
If you make any changes to the Mobile Device Stand configuration you need to change the values to correspond to
the new configuration in Eye Tracker Manager and save the changes to the eye tracker before you calibrate or record
a new participant. If the scene camera is moved or if you make adjustments to either the camera resolution or focus,
make sure to create a new calibration image in Tobii Studio using “New” in the Scene Camera Element settings and
readjust the calibration points before you calibrate and record a new participant.
Please refer to Tobii Studio User Manual for more information on how to analyze data from a scene camera recording.
Tobii Pro Mobile Device Stand User’s manual v.1.0.8 - en-US
4 Configuring Eye Trackers from Tobii Pro with the Mobile Device
21
Содержание Mobile Device Stand
Страница 1: ...Tobii Pro Mobile Device Stand User s Manual...
Страница 4: ......


