Toa AX-1000A Скачать руководство пользователя страница 15

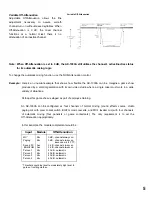
6. Final Adjustments

(1)  Reset master volume to off.

(2)  Reset all input channel volume to settings previously logged or marked.

(3)  Set master volume for desired acoustic level.  (Do not exceed setting arrived at in 3.(4) above.)

(4)  Mixer is ready for use.

General  Operating Considerations

The  AX-1000A  is  only  one  component  in  a  complex  acoustic  environment  which  includes  the  room  itself,  the

speakers  throughout  the  space,  the  microphones  and  cables,  the  number  of  mics  being  used,  the  power

amplifier(s)  and  equalizers.  In  the  long  run,  the  sound  system's  performance  depends  more  on  day-to-day

consistency than on any other single factor.

For best results,  plan  a system  so that the  inputs to the AX-1000A are consistent.  By the same token,  make sure

that the system components coming after the AX-1000A are operated in a consistent fashion:

Use the same mics in the same inputs all the time.

Set portable mics in the same spots whenever possible.

Use the same Master Volume setting and system EQ curve all the time.

If the speakers are portable, set them up in the same spots all the time.

Use the same power amplifier setting all the time.

If there will  be several  people connecting  up the  mics at different events,  make sure they have the  base line

settings on hand to begin a session from the same setup every time.

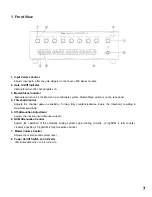
9. Setting Up Input Modules

Choosing  Microphones

Any  microphone  will  work  with  the  AX-1000A,  but  better-quality  microphones  yield  higher  gain  before  feedback.

Omnidirectional  microphones are  not recommended  if feedback is  a  major concern.  The  exception:  when  lavalier

mics are  required.

For best results, follow these guidelines:

Use  only  one  model  of cardioid  (hypercardioid)  mic  throughout the  system,  such  as TOA  Dynamic  Mics  or

Condenser Mics.

If using only one model of mic is impossible,  use the

 same model of mic in the same channel consistently.

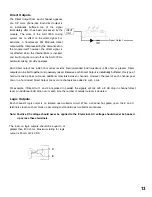
In other words,  if different brands of mics are constantly plugged  into different inputs, the automatic  mixing will not

work as well as it will when each mic is assigned to its own input.

After  all,  you  set  each  channel's  gain  to  the  maximum  before  feedback  with  a  certain  microphone.  Because

different mics differ in  output level  and frequency  response,  the  module Gain  and  Input Channel Volume settings

will differ.  If mics get swapped from input to input without channel volume readjustment, some mics could wind  up

with too much gain and feedback can  occur. Other channels will not have enough gain  (at the module input itself),

and will fail to gate-on consistently.

In  addition,  matching  specific  mics  to  specific  inputs  means  that  phantom  power  can  be  disabled  on  channels

using  dynamic  or  battery-powered  condenser  mics.  This  increases  system  reliability  by  preventing  noises  which

can  occur due to faulty cables or connectors.

15

Содержание AX-1000A

Страница 1: ...TIONS AUTOMATIC MICROPHONE MIXER AX 1000A Please follow the instructions in this manual to obtain the optimum results from this unit We also recommend you to keep this manual handy for future referenc...

Страница 2: ...etup Checklist General Operating Considerations 3 3 4 4 4 4 4 5 6 6 7 8 9 9 10 10 11 11 11 12 12 12 13 13 14 15 15 9 Setting Up Input Modules Choosing Microphones 10 Setup Procedure Mic Input Modules...

Страница 3: ...ng is user configured Internal Mute on any selected combination of inputs Input External Mute on any mutable modules Direct Outputs Logic Outputs Master Remote Volume Control terminal transformer isol...

Страница 4: ...Slave switches In addition to the Main Output the AX 1000A provides Direct and Logic Outputs for each channel Channel Direct Outputs Channel Direct Output uses are limited only by the application For...

Страница 5: ...here a single mixer must work in a wide variety of situations Perhaps this game show is staged as part of employee training An AX 1000A can be configured as four channels of normal mixing sound effect...

Страница 6: ...on than normal is needed with more mics on A setting between 10 logNOM and 20 logNOM provides more gain reduction than normal as additional microphones become active preventing feedback Note NOM Atten...

Страница 7: ...ts the channel gate on sensitivity Turning fully counter clockwise lowers the threshold resulting in maximum sensitivity 5 Off Attenuation Adjustment Adjusts the inactive input attenuation depth 6 NOM...

Страница 8: ...nnel Mute DIP Switches Chooses which channels mute in response to a short across the System Mute Terminals As shipped the default is on channels respond to a short across the mute terminals 9 Mute Fun...

Страница 9: ...serviceable parts inside Never remove the cover or you run the risk of a fatal electric shock 4 Input Signal Flow Since the AX 1000A has eight input ports for 900 Series plug in modules it is complete...

Страница 10: ...is set too low too sensitive ambient noise may cause a channel s gate to flutter open and closed randomly If it is too high the input will not gate open reliably when presented with a low level signa...

Страница 11: ...ure the AC power is off before inserting or removing modules Plug each module into its input port by sliding it between the guide rails Secure each module with two screws Cover unused ports with blank...

Страница 12: ...7 Output Configuration Main Output Connections Connect the power amplifier s to the output terminals To choose 150 ohm output To choose 600 ohm output Remote Master Volume If remote control of the mas...

Страница 13: ...mixed Because each Direct Output is individually buffered this type of hard wire mixing does not cause additional crosstalk between channels However the level of each channel goes down in a hard wire...

Страница 14: ...f 2 Confirm that NOM Attenuation is in the center detent 3 Confirm that all Off Attenuation Adjustments are fully counter clockwise 40 dB 4 Adjust the Master Volume to the desired nominal operating le...

Страница 15: ...p every time 9 Setting Up Input Modules Choosing Microphones Any microphone will work with the AX 1000A but better quality microphones yield higher gain before feedback Omnidirectional microphones are...

Страница 16: ...all channels 11 Setup Procedure Mic Channels Now you will set the channel volume controls to the maximum gain before feedback on all microphone inputs Begin with all channel volume controls off First...

Страница 17: ...me Automatic Module Mute Refers to a second independent muting scheme which can be designed into an AX 1000A by choosing the proper modules Internal Internal Mute INT muting occurs at the output of ea...

Страница 18: ...Mute contact closure is received MODULES DIP SWITCH POSITION Output TO MIX BUS DIRECT OUT LOGIC OUT 1 2 3 4 5 6 7 8 Mic Mic Mic mute to on Mic mute to off Aux with Mute Aux with Variable Mute Aux Line...

Страница 19: ...ormally this confers no advantage over the Internal Mute INT However the Mute or Mute Mic Module can be configured to turn on in the presence of the mute command There are some installations where cer...

Страница 20: ...ltiple Mixing AX 1000A s can be linked for up to 80 input channels 10 units The linking cable is available separately If you are installing N number of mixers order N 1 linking cables 1 for 2 mixers 2...

Страница 21: ...n to the one microphone in operation until more than one mic is on it shuts the others off even though their channel volume controls are set at operating level and it refuses to let the mic in operati...

Страница 22: ...y complex equipment overall system set up can affect the unit s performance in the field In any application it s a good idea to fasten a log of the Input Volume and Master Volume settings near the mix...

Страница 23: ...18 Block Diagram 23...

Страница 24: ...t output 1 x Link out 100mV 8 x Logic out isolated open collector 30 mA 24V DC max 8x Input Volume 1 x Master Volume 8 x Threshold Control 1 x NOM Attenuation Control 8 x Off Attenuation Control 1 x M...

Страница 25: ...ed Block Diagram Automatic Mixing Circuits omitted for clarity Simplified Block Diagram Automatic Mixing Circuits omitted for clarity Input Ch 1 Ch 1 Logic Output Ch 1 Direct Output Link Out Main Outp...

Страница 26: ...hoose Mic to use b Defeat phantom power if appropriate c Insert module d Connect input source Repeat on each input 2 Adjust Mic Module a Power up Mixer raise Master Volume and one channel s Input Volu...

Страница 27: ...old use Gate LEDs as a guide g Lower Input Volume to zero Repeat on each input 4 Insert and Set Up Line Input Modules a Connect input adjust module gain b Adjust Input Channel Volume Repeat for each l...

Страница 28: ...TOA Corporation Printed in Japan 133 12 157 10...

Отзывы: