7
3. Mounting preparations
Before attaching the actuator to the valve bonnet, actuators with close fail-safe
action "Air to open" must be pressurized to slightly retract the actuator stem.
Should no electric control signal be available during the mounting procedure, the
hexagon nut (5) must be tightened (use a hexagonal wrench SW 36) to hold the pre-
tensioned springs.
Actuators with open fail-safe action "Air to close" require to be pressurized only
for attaching the stem connector. The top diaphragm chamber must be pressurized
to approach the plug and actuator stem until they contact one another.
For electropneumatic actuators, a signal pressure can be applied to the pressure
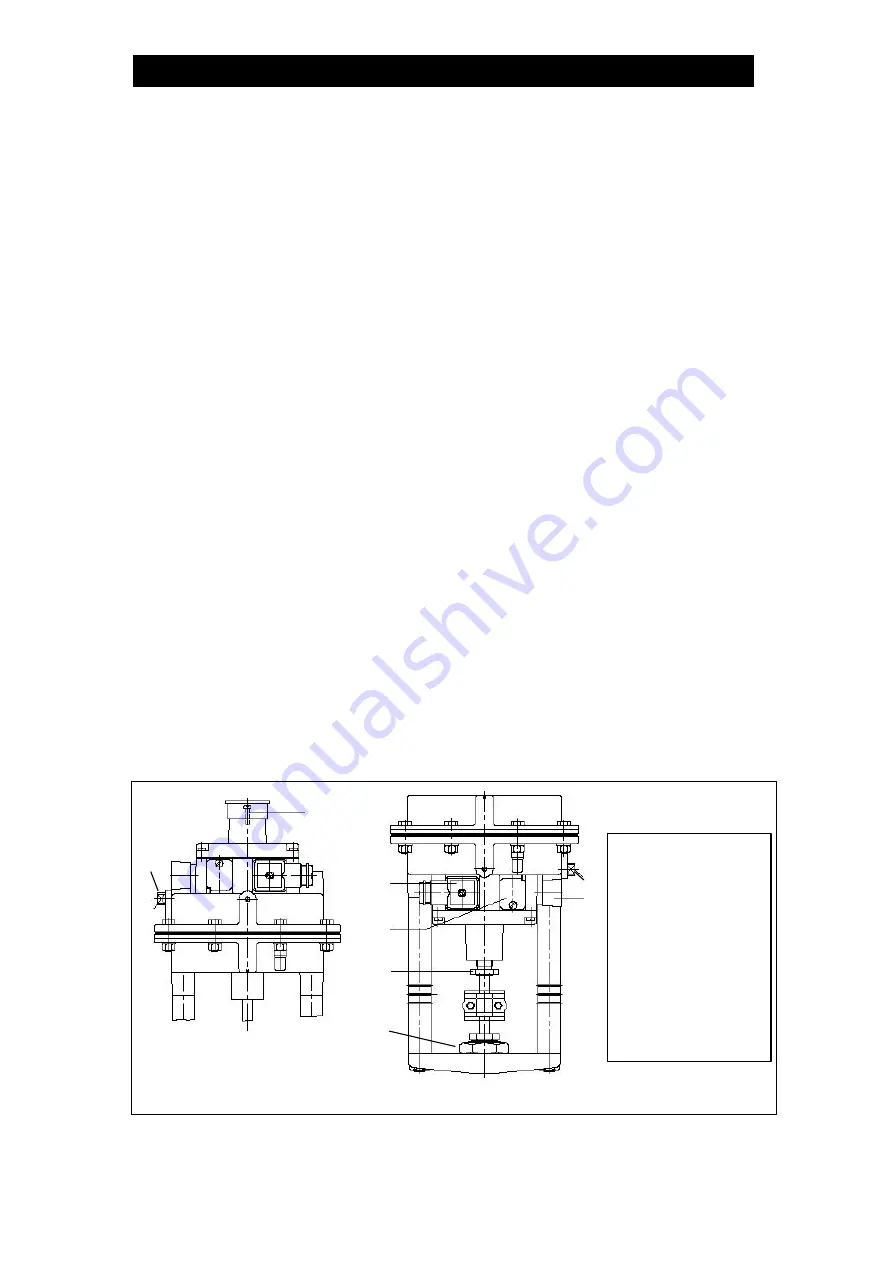
gauge connection, however, the plug (2, Fig. 2) must be removed first.
3.1 Mounting the actuator on the valve
1) For the electropneumatic actuator, apply a pressure of approx. 3 bar to the
connection "Supply" and additionally connect a control signal of 10 mA to retract
the actuator stem.
2) Remove the hexagon nut (5) from the valve bonnet and place the actuator with
its stem retracted on the valve bonnet.
3) Make sure that the actuator is in the proper position and secure with the
hexagon nut (SW 36), applying a tightening torque of min.150 Nm.
4) Pull up the plug stem until it contacts the actuator stem.
5) Attach the stem connector pieces to each stem and screw tight with the
fastening screws.
Fig. 2
1
2
2
3
4
1
5
6
1. Zero adjuster
2. Plug (Press. gauge)
3. Electrical connector
4. Cover plate
(span and tight-closing
function)
5. Nut
6. Vent plug
Air to close type
Air to open type


