background image

Instruction manual

33

General safety information

Failure to comply with these provisions shall render any claim for replacement null and void!

The provisions and safety information below must be observed for installation and maintenance:


Danger! 

Work on electrical components or component assemblies may only be carried  


out by a trained electrician in accordance with the electrical regulations (e.g. EN 60204, DIN VDE  


0100/0113/0160).


Danger! 

Plug connections and cables can be damaged. Do not use force when connecting plugs  


and sockets. Lay the cables without any kinks, with a sufficiently large radius (R > 5 x cable 


diameter). Take care to ensure, when using the product, that the cables connected are not  


damaged.


Attention! 

Use is only permitted in enclosed spaces, so not outdoors. Contact with moisture  


should be avoided without fail.

Intended use

The 

TLS

®

 Devices

 are used to provide mobile sound systems in rooms and halls of varying sizes. Use in wet 

buildings such as swimming pools or similar should be avoided. The 

TLS

®

 M100/M200

 devices provide sound for 

large spaces with up to approx. 400 people. You have the option of playing back a wide variety of media such as 
audio CDs, MP3s and audio cassettes. In addition, the products have connection options for headphones, micro-
phones and external audio sources. Use of the devices is only permitted indoors. The products are approved for 

connec-tion to 230 V~/50 Hz alternating current only. The products may not be modified or reconstructed. Safety 

infor-mation must always be observed. Use of the products in manners other than those set out above may result 

in damage to the products and is also associated with risks (e.g. electric shock, fire, short circuit, etc.).

Содержание 754600

Страница 1: ...M100 M200 Blue Nr Art 754600 754601 754602 756271 756272 756273 M100 M200 Funk M100 M200 Combi Bedienungsanleitung Instruction manual Mode d emploi...

Страница 2: ...lgemeine Informationen 4 Inbetriebnahme 6 Bedienung Kassettenlaufwerk 9 Media Player 12 Fernbedienung 16 Mischpult 18 Externe Anschl sse 19 Funkmikrofon 21 Reinigung Entsorgung Support Garantie Gew hr...

Страница 3: ...nn Sie das Ger t an Dritte weitergeben Bewahren Sie diese Bedienungsanleitung zum Nachlesen auf Impressum Diese Bedienungsanleitung ist eine Publikation der Arnulf Betzold GmbH Alle Rechte einschlie l...

Страница 4: ...nk ndigung zu ndern Umgebungsbedienungen Betriebstemperatur 5 C bis 60 C Rel Luftfeuchtigkeit Max 85 Einsatzbereich H he bis max 2000 m Nr Art Bezeichnung Netz kabel LS Kabel Fernbed Batterien Mikrofo...

Страница 5: ...ist auf eine sichere Aufstel lung zu achten Beachten Sie die Bedienungsanleitung des verwendeten Stativs Angeschlossene Leitungen sind dabei sicher zu verlegen Vorsicht Stolperfallen Drehen Sie den TO...

Страница 6: ...zerst rt werden Verbinden Sie Stecker und Buchsen ohne Gewalt Stellen Sie sicher dass bei der Benutzung des Produktes die angeschlossenen Leitungen nicht besch digt werden Achtung Eine Verwendung ist...

Страница 7: ...challen gro e R ume mit bis zu ca 400 Personen Sie haben die M glichkeit unterschiedliche Medien wie Audio CDs MP3 und Audiokassetten wiederzugeben Weiter verf gen die Produkte ber Anschlussm glichkei...

Страница 8: ...d gew nschte Tonbandseite Seite 1 oder A bzw 2 oder B nach vorn gerichtet in das Kassettenfach ein Schlie en Sie das Kassettenfach Dr cken Sie die Taste PLAY Bild 1 Hinweis Wenn Sie den Kassettenbetri...

Страница 9: ...sen Sie die Taste PAUSE die Aufnahme beginnt Auffinden einer bestimmten Bandstelle Stellen Sie vor Beginn von Aufnahme oder Wiedergabe mit der Taste RESET das Z hlwerk COUNTER auf 000 siehe Bild 2 Me...

Страница 10: ...auf die Aufnahme sondern regelt nur die Mith rlautst rke Monitorfunktion Um die Aufnahme kurz zu unterbrechen dr cken Sie die Taste PAUSE Um die Aufnahme zu beenden dr cken Sie die Taste ST EJ Wenn Si...

Страница 11: ...CD Einzugs bzw des Herausfahrens der CD darf die CD nicht mit mechanischer Gewalt behandelt werden Ein Zuwiderhandeln kann die Mechanik irreparabel zerst ren Power Best tigen Sie die Power Taste um d...

Страница 12: ...ben Dr cken Sie die Taste A B um den Anfang des Bereichs zu markieren den Sie wiederholt wiedergeben m chten Dr cken Sie die Taste A B erneut um das Ende des Bereichs zu markieren Der so selektierte B...

Страница 13: ...die Taste PLAY um die Wiedergabe in der Reihenfolge Ihrer Programmierung zu starten Um Ihre Auswahl wieder zu l schen dr cken Sie die Taste PROG zweimal Im Display wird der erfolgreiche L schvorgang m...

Страница 14: ...sgabe zu unterdr cken Dr cken Sie die MUTE Taste ein zweites Mal um wieder in den normalen Wiedergabebetrieb zu gelangen ENTER Dr cken Sie die ENTER Taste um eine Aktion auszuf hren FOLDER Durch Dr ck...

Страница 15: ...taturfeld 0 bis 9 Mit dem Tastenfeld k nnen Sie durch Eingabe der Titelnummer den jeweiligen Titel direkt anw hlen ID3 Dr cken Sie die ID3 Taste f r 2 Sekunden um ID3 Informationen des Titels im Displ...

Страница 16: ...ienung wird mit einer Knopfzelle des Typs CR2025 3V betrieben Dr cken Sie den Batterierie gel zur Geh usemitte und ziehen Sie anschlie end das Batteriefach aus der Fernbedienung heraus Nehmen Sie die...

Страница 17: ...hts um die maximale Lautst rke einzustellen und entsprechend links herum um die Lautst rke zu reduzieren Warnung Musik sollte nicht ber einen l ngeren Zeitraum mit gro er Laust rke geh rt werden Dadur...

Страница 18: ...Ladevorgang wird mit der Leuchtdiode CHARGE angezeigt Der aktuelle Zustand der Batteriekapazit t wird ber die Prozentanzeigen angegeben Die LOW Anzeige signalisiert eine fast leere Batterie Hinweis Se...

Страница 19: ...h digen k nnen Hinweis Bei verzerrter Wiedergabe k nnen die Lautsprecher gesch digt werden Betreiben Sie das Ger t nie dauerhaft mit Verzerrungen Verringern Sie die Gesamtlautst rke damit die Verzerru...

Страница 20: ...n USB Anschluss am Media Player geben Sie Ihre Musikdaten wieder Integrierter Trolly Die TLS Combibox verf gt ber einen integrierten Trolly Dr cken Sie den Arretierknopf in der Mitte des Trolley griff...

Страница 21: ...indem Sie den Knopf dr cken und f r ca 2 Sekunden gedr ckt halten Die Inbetriebanzeige leuchtet gr n auf womit eine ausreichende Batteriekapazit t signalisiert wird Blinkt diese Anzeige jedoch dann is...

Страница 22: ...die nationalen Bestimmungen der rtlichen Regulierungsbeh rden Weitere Informationen zum Mikrofon entnehmen Sie bitte der beigef gten separaten Bedienungsanleitung Reinigung Entsorgung Support Garanti...

Страница 23: ...recycelt werden Werfen Sie verbrauchte Batterien nicht in den Hausm ll ins Feuer oder ins Wasser Folien stellen eine Erstickungsgefahr f r Babys und Kleinkinder dar Support Mit Fragen die im Rahmen de...

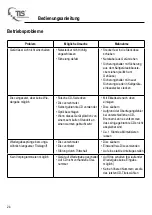
Страница 24: ...chlagen Wenn dieses Ger t pl tzlich von einem sehr kalten Standort an einen warmen gebracht wird Mit Etikettseite nach oben einlegen Disc s ubern Aufgrund der bertragungsfehler bei unterschiedlichen C...

Страница 25: ...enwie dergabe dumpf oder es treten Gleichlauffehler auf Kassettenband locker Kassettenlaufwerk ist ver schmutzt Kassettenband mit einem Blei stift oder hnlichen Gegenstand straffen Im Kassettenlaufwer...

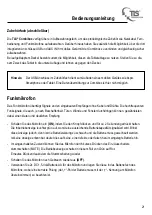
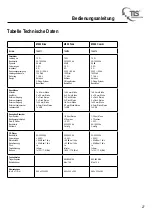
Страница 26: ...h Stereo 6 3 mm Klinke Stereo 2x 6 3 mm Klinke 6 3 mm Klinke 2x Cinch Stereo 2x Cinch Stereo 6 3 mm Klinke Stereo 2x 6 3 mm Klinke 6 3 mm Klinke 2x Cinch Stereo 2x Cinch Stereo 6 3 mm Klinke Stereo 2x...

Страница 27: ...Klinke Stereo 1x USB 1x 6 3 mm Klinke 6 x 3 5 mm Klinke 2 x Cinch Stereo 2 x Cinch Stereo 1x3 5 mm Klinke 6 3 mm Klinke Stereo 1x USB 1x 6 3 mm Klinke 6 x 3 5 mm Klinke 2 x Cinch Stereo 2 x Cinch Ster...

Страница 28: ...General information 28 Start up 30 Cassette player operation 33 Media player 36 Remote control 40 Mixer 42 External connections 43 Radio microphone 45 Cleaning disposal support guarantee warranty 46...

Страница 29: ...es Please also taken this into account when passing the device on to third parties Keep this instruction manual after reading it Legal disclaimer This instruction manual is a publication from Arnulf B...

Страница 30: ...a tions without notice Environmental conditions Operating temperature 5 C to 60 C Rel humidity Max 85 Air pressure 600 to 1000 hPA Nr Art Name Power cable LS cable Remote control batteries Microphone...

Страница 31: ...ation when using speaker stands Observe the instruction manual for the speaker stand used Connected cables should be laid safely here Caution Trip hazards Turn the TONE control or Bass Treble dependin...

Страница 32: ...ions other than those set out here may lead to hazardous radiation Do not expose yourself to the beam under any circumstances Danger Plug connections and cables can be damaged Do not use force when co...

Страница 33: ...spaces so not outdoors Contact with moisture should be avoided without fail Intended use The TLS Devices are used to provide mobile sound systems in rooms and halls of varying sizes Use in wet buildi...

Страница 34: ...audio tape face down and desired audio tape side side 1 or A or 2 or B to the front into the cassette tray Close the cassette tray Press the PLAY button Figure 1 Note If you want to stop cassette oper...

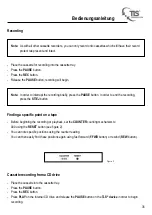
Страница 35: ...lease the PAUSE button recording will begin Finding a specific point on a tape Before beginning the recording or playback set the COUNTER counting mechanism to 000 using the RESET button see figure 2...

Страница 36: ...e recording it only controls the monitor volume level monitor function In order to interrupt the recording briefly press the PAUSE button In order to end the recording press the ST EJ button If you wa...

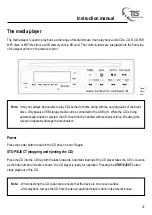
Страница 37: ...rt While the CD is being automatically loaded or ejected the CD should not be handled with mechanical force Breaking this rule can irreparably damage the mechanism Power Press the power button to swit...

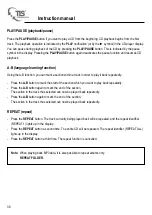
Страница 38: ...peatedly Press the A B button to mark the start of the section which you want to play back repeatedly Press the A B button again to mark the end of the section The section in the track thus selected c...

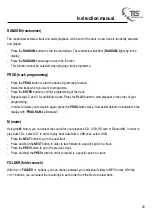
Страница 39: ...t playback in the order of your programming In order to delete your selection again press the PROG button twice Successful deletion is indicated in the display with PROGRAM is eliminated M mode Using...

Страница 40: ...the MUTE button a second time in order to return to normal playback operation ENTER Press the ENTER button in order to carry out an action FOLDER By pressing the FOLDER button you can navigate through...

Страница 41: ...directly select a particular track by entering the track number using the keypad ID3 Press the ID3 button for 2 seconds in order to show the ID3 information for the track on the display This can be tr...

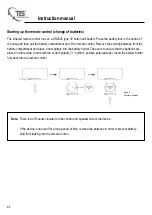
Страница 42: ...frared remote control runs on a CR2025 type 3V button cell battery Press the battery lock in the centre of the case and then pull the battery compartment out of the remote control Remove the existing...

Страница 43: ...ht in order to set the volume to maximum and conversely turn it to the left in order to reduce the volume Warning Music should not be listened to at high volumes for long periods of time This can caus...

Страница 44: ...ce while charging it The charging process is indicated by the light emitting diode CHARGE The current status of the battery capacity will be indicated via the percentage display The LOW display indica...

Страница 45: ...distortions in playback which can damage the speaker system Note The speakers can be damaged by distorted playback Never operate the device with distortions for long periods Reduce the overall volume...

Страница 46: ...ur music files back in the media player via the USB connection Integrated trolley The TLS Combibox has an integrated trolley Press the locking button in the centre of the trolley handle down in order...

Страница 47: ...on ON by pressing the button and holding it down for approx 2 seconds The operating indicator lights up green indicating sufficient battery capacity However if this indicator is fla shing then the bat...

Страница 48: ...ve the national regulations from the local regulatory authorities More information about the microphone can be found in the separately enclosed instruction manual Cleaning disposal support guarantee w...

Страница 49: ...recycled in accordance with the EU Battery Directive 2006 66 EC Do not dispose of used batteries in household waste by burning or in water Films constitute a suffocation risk for babies and small chi...

Страница 50: ...home CD used Lens fogged up If this device was suddenly moved from a very cold location to a warm location Place with the label side up Clean the disc Owing to transcription errors with various CD bu...

Страница 51: ...ontroller The box sounds muffled or there are synchronisation errors during cassette playback Cassette tape is loose Cassette tape is dirty Tighten the cassette tape using a pencil or similar Clean th...

Страница 52: ...ack 2x Cinch Stereo 2x Cinch Stereo 6 3 mm jack Stereo 2x 6 3 mm jack 6 3 mm jack 2x Cinch Stereo 2x Cinch Stereo 6 3 mm jack Stereo 2x 6 3 mm jack 6 3 mm jack 2x Cinch Stereo 2x Cinch Stereo 6 3 mm j...

Страница 53: ...3 mm jack stereo 1x USB 1x 6 3 mm jack 6 x 3 5 mm jack 2 x cinch stereo 2 x cinch stereo 1x3 5 mm jack 6 3 mm jack stereo 1x USB 1x 6 3 mm jack 6 x 3 5 mm jack 2 x cinch stereo 2 x cinch stereo 1x3 5...

Страница 54: ...n rales 52 Mise en service 54 Commande du lecteur de bandes 57 Lecteur multim dia 60 T l commande 64 Console de mixage 66 Raccordements ext rieurs 67 Microphone radio 69 Nettoyage limination service g...

Страница 55: ...ansfert de l appareil des tiers Conservez le pr sent mode d emploi pour des consultations ult rieures Mentions l gales Le pr sent mode d emploi est une publication de l Arnulf Betzold GmbH Tous droits...

Страница 56: ...es produits Conditions ambiantes Temp rature de fonctionnement 5 C 60 C Humidit relative de l air Max 85 Pression atmosph rique 600 1 000 hPA Nr Art D nomination C ble d alimen tation LS C ble T l com...

Страница 57: ...d enceinte exige une installation s re Reportez vous au mode d emploi du pied utilis Les c bles doi vent y tre raccord s de mani re s re attention aux tr buchements Tournez le bouton TONE ou Bass Treb...

Страница 58: ...alisation d autres op rations que celles indiqu es ici peut causer un rayonnement dangereux Ne vous exposez en aucun cas au rayon Danger Les connecteurs et les c bles peuvent tre d truits Raccordez le...

Страница 59: ...e viter imp rativement le contact avec l humidit Utilisation conforme Les appareils TLS sont destin s la sonorisation des locaux et des halles de dimensions diff rentes L utilisation dans des b timent...

Страница 60: ...bas et le c t d sir de la bande sonore cot 1 ou A resp 2 ou B orient vers l avant dans le compartiment cassette Fermez le compartiment cassette Appuyez sur la touche PLAY Image 1 Remarque Si vous voul...

Страница 61: ...ez la touche PAUSE l enregistrement commence Recherche d un endroit pr cis de la bande Avant de commencer l enregistrement ou la lecture mettez le compteur COUNTER sur 000 au moyen de la touche RESET...

Страница 62: ...le ne fait que r gler le volume de moniteur fonction de moniteur Pour interrompre bri vement l enregistrement appuyez sur la touche PAUSE Pour terminer l enregistrement appuyez sur la touche ST EJ Si...

Страница 63: ...au port USB Lors de l introduction et de l jection automatiques du CD le CD ne doit pas tre manipul avec la violence m canique Une violation peut d truire la m canique de mani re irr parable POWER App...

Страница 64: ...ez sur la touche A B pour marquer le d but de la partie que vous voulez r couter de fa on r p t e Appuyez de nouveau sur la touche A B pour marquer la fin de la partie La partie ainsi s lectionn e du...

Страница 65: ...a touche PLAY pour d marrer la lecture dans l ordre de votre programmation Pour effacer votre s lection appuyez sur la touche PROG deux fois L effacement r ussi s affichera sur l cran par PROGRAM is e...

Страница 66: ...is pour revenir au mode de lecture normal ENTER Appuyez sur la touche ENTER pour ex cuter une action FOLDER En appuyant sur la touche FOLDER vous pouvez naviguer travers vos dossiers MP3 Bluetooth Vou...

Страница 67: ...ectionner directement le titre concern en entrant le num ro du titre ID3 Appuyez sur la touche ID3 pendant 2 secondes pour afficher les informations du titre sur l cran Ce peut tre des indications sur...

Страница 68: ...t l commande infrarouge est exploit e par une pile bouton de type CR2025 3V Appuyez sur le loquet des piles vers le centre du bo tier et retirez ensuite le compartiment piles de la t l commande Enlev...

Страница 69: ...e vers la droite pour r gler le volume maximal et respectivement vers la gauche pour r duire le volume Avertissement Il est d conseill d couter la musique trop forte pendant une dur e prolong e Cela p...

Страница 70: ...le m me temps Le processus de chargement est affich par la diode lectroluminescente CHARGE L tat actuel de la capacit de la batterie est indiqu par l affichage d un pourcentage L affichage LOW signal...

Страница 71: ...n cas de distorsions de lecture les hautparleurs peuvent tre endommag s Ne faites jamais fonctionner l appareil avec des distorsions de mani re prolong e R duisez le volume total pour faire cesser les...

Страница 72: ...one Le port USB sur le lecteur multim dia permet de lire vos donn es musicales Mallette int gr e L enceinte TLS est pourvue d une mallette int gr e Appuyez sur le bouton d arr t au milieu de la poign...

Страница 73: ...on claire et pr cise Allumez le microphone ON en appuyant sur le bouton pendant environ 2 secondes L indicateur de service s allume en vert en signalant une capacit suffisante des piles Si en revanche...

Страница 74: ...de r gulation locales Veuillez trouver des informations suppl mentaires concernant le microphone dans le mode d emploi s par fourni Nettoyage limination service garantie Remarque Lors de l utilisatio...

Страница 75: ...r les piles UE RL 2006 66 EG Ne jetez pas les piles us es avec les d chets m nagers dans le feu ou dans l eau Les films plastiques repr sentent un risque de suffocation pour les nourrissons et les enf...

Страница 76: ...n haut Disque sale Utilisation de CD grav par vousm me El ment optique embu D placement soudain de cet appareil d un lieu froid dans un lieu chaud Ins rer avec le c t tiquette en haut Nettoyer le disq...

Страница 77: ...mmande Le son de l enceinte est sourd ou il y a des d fauts de synchronisme pendant la lecture Bande magn tique l che Le lecteur de bandes est sale Tendre la bande de la cassette avec un crayon ou un...

Страница 78: ...o Connecteur de 6 3 mm st r o 2 connecteurs de 6 3mm Connecteur de 6 3 mm 2 Cinch st r o 2 Cinch st r o Connecteur de 6 3 mm st r o 2 connecteurs de 6 3mm Connecteur de 6 3 mm 2 Cinch st r o 2 Cinch s...

Страница 79: ...mm 2 x Cinch st r o 2 x Cinch st r o Connecteur de 1x3 5 mm Connecteur st r o de 6 3 mm 1x USB Connecteur de 1x6 3mm Connecteur de 6 x 3 5 mm 2 x Cinch st r o 2 x Cinch st r o Connecteur de 1x3 5 mm C...

Страница 80: ......
Отзывы: